
This article is the continuation of our previous article where we built a simple machine learning app to predict the species of a sample Iris flower. In the previous article, we learned how to create this application from scratch (with Django and React) and we also learned how to put our application into production using docker and docker-compose. Docker-compose provides an elegant, platform-independent method of containerizing the individual components of our application and starting them together as one single application. This ensures that we face minimal issues in deployment. The problem we want to solve with Kubernetes is the problem of load-balancing and auto-scaling in the event of a large number of users visiting our application. Note that we could solve this problem with docker-compose by choosing a good architecture on our cloud service provider or by using managed services such as AWS Elastic Beanstalk, which provides an easy way of load-balancing and auto-scaling applications. For many applications, such managed services should be enough. However, Kubernetes provides far greater flexibility in managing the container instances of our app components and offers a far more efficient method of utilizing the available resources. The main difference between a service like AWS Elastic Beanstalk and Kubernetes is that the former would scale the entire application stack as one entity whereas the latter allows scaling only the required components of the application stack as required. Therefore Kubernetes allows greater flexibility and is more resource-efficient.
We would first test our application locally, then, later on, deploy our application to the cloud using one of the major cloud service providers. Note that unlike the previous article with docker-compose, where we only tested the production architecture, here we would test two architectures – a local (development) architecture and a production architecture. This is intentional so that we can compare, contrast and demonstrate why we prefer a particular architecture in production over the other. In reality, you would have just the production architecture, which after making any changes, you would first test locally and then deploy on the cloud.
1 Testing our app locally with Minikube
1.1 Install Minikube
We would first create a local Kubernetes cluster. To do so we would need to install 'minikube' and 'kubectl' (which stands for Kube control – a command-line interface to interact with Kubernetes). Before installing these ensure that you have either Docker Desktop or Oracle VirtualBox pre-installed. This is because, as you might have guessed, our cluster would need virtual machines. You can run minikube either on Docker or on VirtualBox. For specific Windows versions, you may require some pre-configuring to make Docker Desktop or Virtual Box work. Please refer to the official guides from Microsoft/Oracle VirtualBox/Docker if that is the case. Note that you only need to have one of either Docker or VirtualBox to create the Kubernetes cluster. You can definitely try installing both, but on certain machines, you may not be able to run both Docker and VirtualBox together. To install minikube and kubectl follow the official guide here.
If minikube and kubectl installed correctly you should be able to run the following help commands in your terminal and you would see a list of help options available.
minikube --help
kubectl --help
1.2 Create a local Kubernetes Cluster
We first need to create a local Kubernetes cluster using minikube.
In a normal production environment, our cluster would consist of at least two nodes. By nodes, we mean two different virtual machines. One of the nodes would be the master node i.e. the master machine and the other one would be a worker machine. You may add as many worker machines as you need. The master node is managed by the cloud service provider. By managed, it means that you do not have to worry about configuring the OS and middleware of this master machine. The master machine controls what is running inside each of our worker nodes – i.e. the master node orchestrates the worker nodes.
However, while using minikube, since the creators of minikube were well aware that minikube would most likely be only used for testing, we only have a single node. Both the master and worker nodes would run from the same virtual machine.
1.2.1 Minikube with Docker
To start the minikube Kubernetes cluster using Docker use the below command. Note that for this to work, you would need to keep Docker running in the background.
minikube start --driver=docker
You can check that the minikube single node is running by executing the below command.
docker ps
You should see that a single minikube node is running in a container as below.
CONTAINER ID   IMAGE                                           COMMAND                  CREATED         STATUS         PORTS                                                                                                      NAMES
47779d9a0d60   gcr.io/k8s-minikube/kicbase:v0.0.15-snapshot4   "/usr/local/bin/entr…"   9 minutes ago   Up 9 minutes   127.0.0.1:55003->22/tcp, 127.0.0.1:55002->2376/tcp, 127.0.0.1:55001->5000/tcp, 127.0.0.1:55000->8443/tcp   minikube
1.2.2 Minikube with VirtualBox
To start the minikube Kubernetes cluster using VirtualBox use the below command. Note: If you are using windows ensure that you have opened VirtualBox before starting minikube.
minikube start --driver=virtualbox
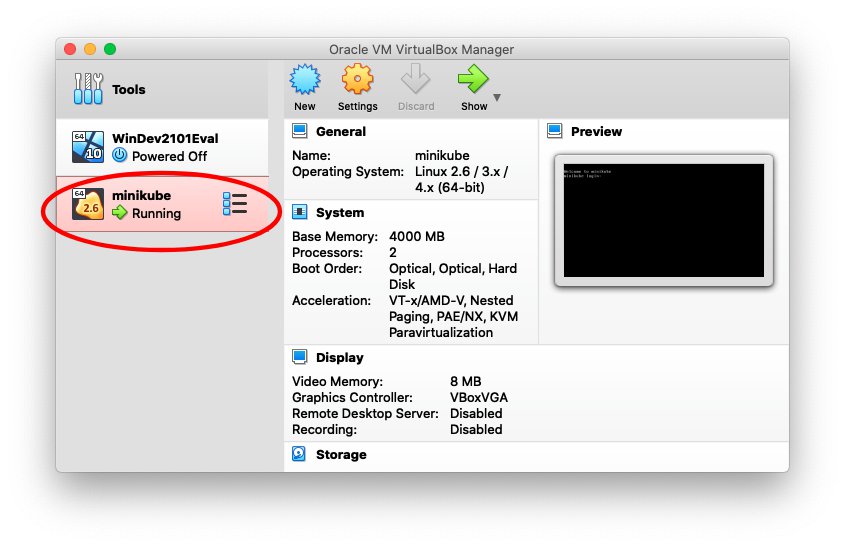
If you open VirtualBox, after executing the above command, you would see that your minikube cluster is running as a single node. A node is nothing but a virtual machine running within a Kubernetes cluster.
1.3 Development Architecture for the local Kubernetes cluster
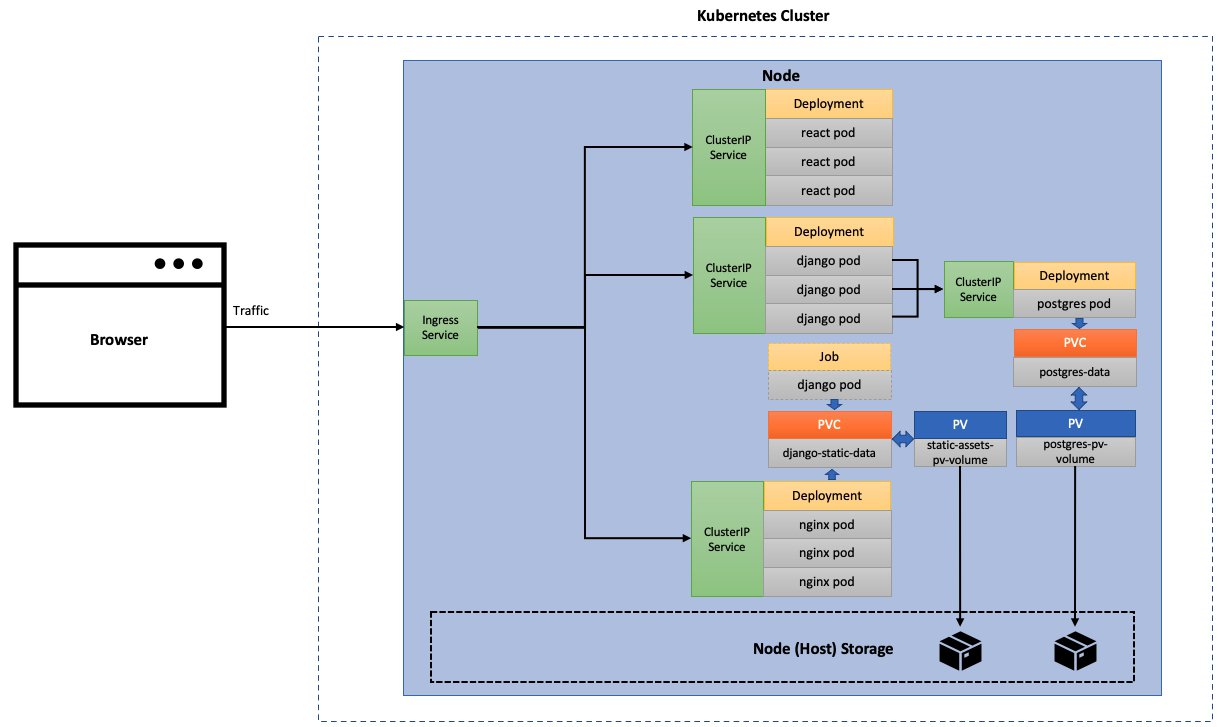
The architecture of our application would look like below. The below architecture is for the local version of Kubernetes. The production version would have certain modifications to this architecture, which we would discuss when we get to that stage.
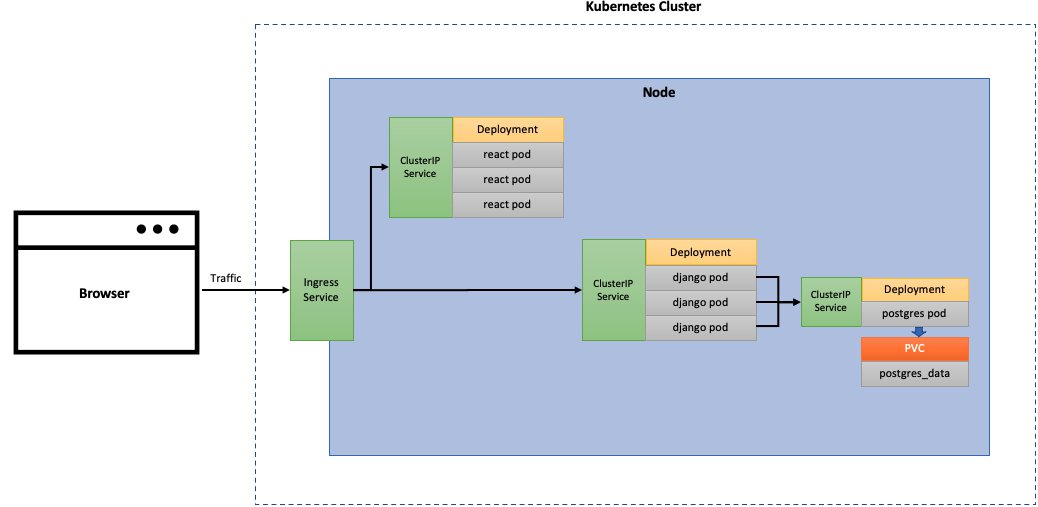
On our worker node, we want to create three different applications - one each for PostgreSQL, Django and React. In the above diagram, we have shown 3 pods for the React and Django applications and 1 pod for the PostgreSQL application. A pod is a Kubernetes object which can run one or more containers. In our case, every pod would only run one container within it. So for example, a Django pod would only run a Django container within it. For the Django and React applications, the 3 pods for each are nothing but replicas of each other. Please note that a Kubernetes pod can run any type of container technology - Docker, containerd, CRI-O etc. However, we use Docker as we have used that in our previous article. Further Docker is the most widely used container technology.
The way this architecture would work is that while making predictions the frontend React app would be loaded into the browser. When the user tries to log in, a request would be sent to the Django app running within our Kubernetes cluster. The Django app would connect to the PostgreSQL engine to verify if the user is registered and if the user credentials match with the username and encrypted password stored in the PostgreSQL database, Django would authenticate the user and send an authentication token back to the browser. This token would remain active for a certain time (default was 5 hours) or until the user logs out. When the use hits predict from the prediction page, a request would be sent to the Django app again. The Django app would then process the incoming data to make a prediction and send it to the browser. Note that, because of this approach, the frontend app would not interact directly with the backend Django pods, but rather this interaction would be intermediated by the browser.
1.3.1 Understanding storage options on the cloud
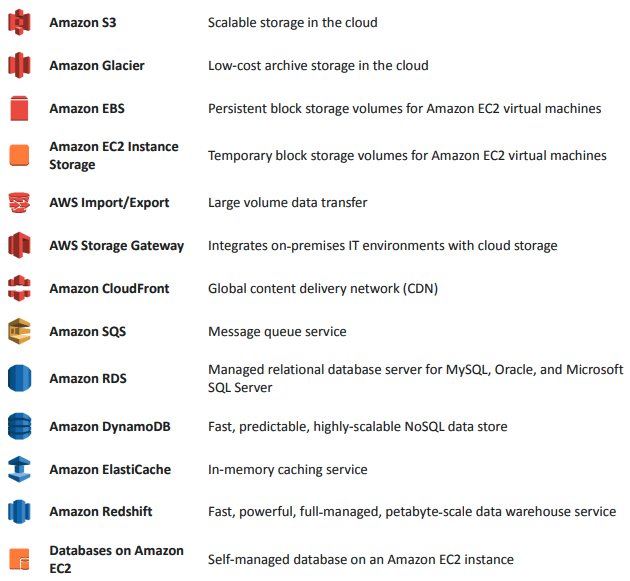
Before discussing anything else, I want to discuss storage with cloud services in general. This, in my opinion, is really important, because it is very easy to get confused with the wide variety of storage solutions from the popular cloud service providers. For example, AWS alone offers a number of storage options. The below snapshot is from this AWS whitepaper.
If you go to the storage classes available in Kubernetes, you would see that Kubernetes offers storage based on a number of storage classes.
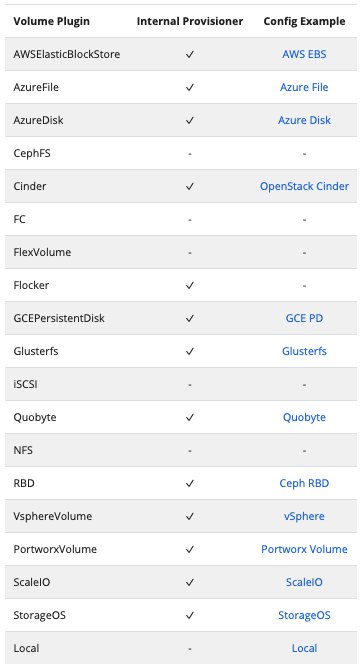
You may have questions like, why don't we see AWS S3 as a storage class on Kubernetes although it is so popular? What is the best way to store the files, documents, static assets of my web application? How do we ensure auto load balancing for storage, etc.?
In order to understand cloud storage, you have to understand this fundamental concept - there are two ways to handle storage on the cloud. Either, you do it yourselves, or, you use a managed storage solution (Storage as a service – SaaS). Say for example, in one of your applications, you wanted to have a relational database such as PostgreSQL to store your application's information. You may either use a managed solution like Amazon RDS with PostgreSQL or, you can create your own PostgreSQL engine running from a cloud compute instance. If you create your own database engine, then you need to store all of the data of this database somewhere. You may store it in the same instance where your database engine is running or you could attach a volume to your instance, which acts like a harddrive attached to a compute instance, for things like auto-scaling or backup. This is where Kubernetes storage comes in and that's why you don't see AWS S3 in the options – S3 cannot attach to an instance like a drive. Even with object storage, you have the same concept - whether you want to store your files in a managed object storage service like AWS S3 or you want to store your files yourself within a storage defined by Kubernetes. In this case, a managed storage service like AWS S3 is the equivalent of a managed relational database storage like Amazon RDS.
Now we would discuss the various bits and pieces of our local architecture in more detail.
1.3.2 PostgreSQL
The PostgreSQL deployment is a database engine that would allow storing the information of our Machine Learning application such as the registered users. We want to store the actual data coming from the PostgreSQL application separately in a volume. We would call this volume 'postgres_data'. This volume would need to be persistent so that if one or all of the pods running the PostgreSQL containers stops for any reason the data is not lost. The 'PVC' stands for Persistent Volume Claim. The PostgreSQL engine would run within a container in the 'postgres' pod. To expose our 'postgres' pod to other objects within our node, such as the Django pods in our case, we would need to create an internal service called 'ClusterIP' Service. In the diagram above we have shown 1 pod running the PostgreSQL application. The reason we are running only one replica for our database engine is that the data which would be stored in the volume has a state. This means that if two or more pods are trying to write to this data at the same time then this might create problems. Kubernetes certainly allows having multiple pods for this kind of scenario. However, we would need some additional configuration to achieve this. For our simple example, we just need one pod.
The 'Deployment' is a special kind of Kubernetes control object which is an imperative method of asking Kubernetes to start a given number of PostgreSQL pods and attach a PVC volume to the pods.
1.3.3 Django
The Django deployment would create any defined number of Django pods (we would use 3), which together would constitute the backend application that provides the machine learning REST API to interact with our Machine Learning model from the frontend. Just like the PostgresSQL app, the Django app has a ClusterIP service. The ClusterIP service enables the Django backend API to interact with the React frontend via the browser. Note that in our simple use-case, we don't need a PVC volume or need to mount any extra volume with our Django application as we did with docker-compose. Remember that while using docker-compose we needed Nginx to serve the static assets, for which we used docker volumes, which essentially linked the production version static assets of our Django app stored in a volume to a location inside the Nginx container. This was because, while using docker-compose, although testing locally, we were using a production version of Django along with a Gunicorn server, where we could not serve static assets using either the Django default server or Gunicorn. In our Kubernetes example, however, while testing locally, we would use the default development server of Django, which by design for development purposes, can serve static assets directly from the containers. When we run the Django pod in a production version of Kubernetes, there are many options to serve static assets. We could serve them using the Kubernetes storage options discussed above such as volumes, or for better performance, we could choose to store the static assets externally using a service such as AWS3 or Google Cloud Storage, or optionally, use CDNs - Content Delivery Networks - such as Amazon CloudFront.
1.3.4 React
The React deployment would create the frontend from where the end-users can interact with our application. Like before, this would also have a ClusterIP Service. The ClusterIP would allow the Ingress to divert incoming traffic to the frontend. Again we do not need a volume to host the static assets. We would store the static assets with the app itself. With the React container, we would use the 'serve' server as we did with docker-compose. The 'serve' server can serve static assets. Just like with Django, we have the option to store the static assets externally or use a CDN for better performance.
1.3.5 Ingress
The Ingress Service would essentially be doing what our Nginx server was doing before. This would take web traffic from outside the node and route the traffic to the respective applications. If we store the static assets of our application externally then the Ingress service would need to route to these static assets as well.
1.4 Creating our local architecture Kubernetes components
Before writing any code, we first need to create a new project folder. Start by cloning the previous project from the git repo here. If you don't have git installed, install it first.
git clone https://github.com/MausamGaurav/DockerDjangoReactProject.git
Rename the project folder name from 'DockerDjangoReactProject' to 'KubernetesDjangoReactProject'. I am using VS Code as my code editor. Open up your terminal, navigate to within the project directory. You can open VS code from your terminal, with this directory set as the project directory with the below command.
code .
You may use a different code editor than VS Code as per your requirement. Create a new folder inside our project folder and call it k8s (k8s stands for Kubernetes in short).
KubernetesDjangoReactProject
├── backend
├── frontend
├── k8s
├── nginx
└── postgres
(Note that we would modify certain files in the Nginx folder and some other files from the previous project later on. The Postgres folder is not required as we would use the latest image from Docker Hub directly. Essentially not all files from the previous project are required. However, I have kept these so that it easier to follow along, if you are coming from the previous article). We would add different YAML files inside this k8s folder. These YAML files would be the blueprints of different app components for our local Kubernetes cluster. Note that from now onwards I would be using the integrated terminal of VS Code for the rest of the article. This is not a requirement, but standard practice for most users of VS Code, plus it makes life a lot easier!
1.4.1 Create Secrets
Some of our app components here would require authentication information - PostgreSQL would require a database user and password, and Django would require the admin login information. We can provide such authentication information directly as environment variables. However since this is considered a bad practice, we would instead use a Kubernetes configuration object called Secrets. The way secrets work is that we first encode a value and then use the encoded value rather than using the plain value directly. For this demonstration, we would only encode the passwords. If you look at the .env files in the 'postgres' and 'backend' folders, you would see that we need to encode the following variable values and then use them in the secrets file.
POSTGRES_PASSWORD=postgres_password
DJANGO_ADMIN_PASSWORD=admin_password
DB_PASSWORD=postgres_password
On Mac and Linux you can use the bash terminal directly to encode the values of the variables above. On windows, if you had git installed, this would have installed git-bash. If not, re-install git with the git-bash option enabled. You can use the git-bash terminal on windows. Note that we need to encode only two values - 'postgres_password' and 'admin_password' because the values of the first and third variables are the same. Open your terminal and execute the below commands one by one.
echo -n 'admin_password' | base64
echo -n 'postgres_password' | base64
You would see the encoded values of these passwords printed as outputs as shown below.
YWRtaW5fcGFzc3dvcmQ=
cG9zdGdyZXNfcGFzc3dvcmQ=
Inside the k8s folder create a file called 'app_secrets.yaml'. The file should look like below:
apiVersion: v1
kind: Secret
metadata:
    name: app-secrets
type: Opaque
data:
    POSTGRES_PASSWORD: cG9zdGdyZXNfcGFzc3dvcmQ=
    DJANGO_ADMIN_PASSWORD: YWRtaW5fcGFzc3dvcmQ=
    DB_PASSWORD: cG9zdGdyZXNfcGFzc3dvcmQ=
This is a very basic way of creating secrets. There are more advanced methods available which you can read from the official documentation. If you look at the YAML file this is pretty much self-explanatory. The metadata is used by Kubernetes to refer to the secrets object created with this file and the data section contains the encoded variables we want to use within other components of Kubernetes. With the secrets file created, now we need to execute the below command (from our project folder) so that the secrets are available within the Kubernetes cluster during run time.
kubectl apply -f k8s/app_secrets.yaml
You would see the below message.
secret/app-secrets created
This means that the secrets object was created successfully. You can also inspect this via kubectl. Execute the below command.
kubectl get secrets
You would see a message appear similar to below.
NAME                  TYPE                                  DATA   AGE
app-secrets           Opaque                                3      4m4s
default-token-rpjjz   kubernetes.io/service-account-token   3      6m44s
This means our secrets object was created successfully and this object could be referenced via the name 'app-secrets'. Note that the other secret object, below the secrets object we created, is the default token created by Kubernetes when the local cluster is created for the first time.
1.4.2 Create a ConfigMap
For all of the remaining environment objects, we can create a config map. Essentially these are the variables whose values don't need to be encoded. Again, we could use the environment variables directly instead of creating a config map to store them. However, the advantage of using a config map is that in the event of changing the values in the future we only need to make changes in one place. You can read more about config maps from the official documentation here.
The list of all environment variables, to be used in the config map is shown below. These variables have been taken from all the .env files we used in our previous project. Note that we have removed all password environment variables because they have already been used in the secrets.
#.env from the postgres folder
POSTGRES_USER=postgres_user
POSTGRES_DB=predictiondb

#.env from the backend folder
DJANGO_ENV=production
DEBUG=0
SECRET_KEY=secretsecretsecretsecretsecret
DJANGO_ALLOWED_HOSTS=www.example.com localhost 127.0.0.1 [::1]
DJANGO_ADMIN_USER=admin
DJANGO_ADMIN_EMAIL=admin@example.com

DATABASE=postgres
DB_ENGINE=django.db.backends.postgresql
DB_DATABASE=predictiondb
DB_USER=postgres_user
DB_HOST=db
DB_PORT=5432

#.env from the main project folder used for building the frontend
ENV_API_SERVER=http://127.0.0.1
Just like the secrets file, create a new file called 'app_variables.yaml' in the k8s folder.
Note that we won't require the last environment variable anymore — the one used by our frontend react app. This is because we won't be using docker-compose any more to spin up images as and when required. Over here we would create an image and then push that up to Docker Hub. Thereafter in the Kubernetes YAML files which would create our app components, we would pull such images from Docker Hub. As already explained in our earlier article, the production build of the react app would produce static files that cannot use dynamic environment variables. As per the official documentation:
The environment variables are embedded during the build time. Since Create React App produces a static HTML/CSS/JS bundle, it can’t possibly read them at runtime.
Therefore, we would don't need environment variables for the React app.
Note: We change the value of the variable DB_HOST from 'db' to 'postgres-cluster-ip-service'. This is because in our previous project with docker-compose, the Postgres engine was running from a service called 'db' (If you look inside the docker-compose.yml file you would see that it was called 'db'). However, here, later on, when we create our Postgres engine, we would attach a service called 'postgres-cluster-ip-service', which is more in line with the architecture we are using, to the engine. Also, for the local Kubernetes cluster, we would be running our Django app in the development mode. For this, we also need to set DEBUG=1, so that Django is running in development mode. As already explained, as we are running Kubernetes locally, this would allow us to serve the static assets directly from the development server. For the allowed hosts setting, DJANGO_ALLOWED_HOSTS, we have set its value to '*' which means our Django application can accept connections from any IP address. Instead of keeping its value to 127.0.0.1 or 'localhost' we are allowing all IP addresses because our local Minikube cluster would have a different IP address. Allowing all hosts is not good from a security perspective, however, since we would test our app locally, this should be fine. Further note that we have quoted the values of certain environment variables such as those with numbers and special characters.
apiVersion: v1
kind: ConfigMap
metadata:
  name: app-variables
data:
  #env variables for the postgres component
  POSTGRES_USER: postgres_user
  POSTGRES_DB: predictiondb

  #env variables for the backend component
  DJANGO_ENV: development
  DEBUG: "1"
  SECRET_KEY: secretsecretsecretsecretsecret
  DJANGO_ALLOWED_HOSTS: "*"
  DJANGO_ADMIN_USER: admin
  DJANGO_ADMIN_EMAIL: "admin@example.com"

  DATABASE: postgres
  DB_ENGINE: "django.db.backends.postgresql"
  DB_DATABASE: predictiondb
  DB_USER: postgres_user
  DB_HOST: postgres-cluster-ip-service
  DB_PORT: "5432"
With the config map file created, now we need to execute the below command (from our project folder) so that these variables are available within the Kubernetes cluster during run time.
kubectl apply -f k8s/app_variables.yaml
You would see the below message.
configmap/app-variables created
This means that the secrets object was created successfully. You can also inspect this via kubectl. Execute the below command.
kubectl get configmap
You would see a message appear similar to below.
NAME               DATA   AGE
app-variables      14     68s
kube-root-ca.crt   1      76m
This means our config map object was created successfully and this object could be referenced via the name 'app-variables'.
1.4.3 Create the PostgreSQL deployment
We are going to create the Postgres component first, and then create other components of our local architecture. Inside the k8s folder create a new file called 'component_postgres.yaml'. The file should look like below.
###########################
# Persistent Volume Claim
###########################
apiVersion: v1
kind: PersistentVolumeClaim
metadata:
  name: postgres-persistent-volume-claim
spec:
  accessModes:
    - ReadWriteOnce
  resources:
    requests:
      storage: 100M
---
###########################
# Deployment
###########################
apiVersion: apps/v1
kind: Deployment
metadata:
  name: postgres-deployment
spec:
  replicas: 1
  selector:
    matchLabels:
      component: postgres
  template:
    metadata:
      labels:
        component: postgres
    spec:
      volumes:
        - name: postgres-data
          persistentVolumeClaim:
            claimName: postgres-persistent-volume-claim
      containers:
        - name: postgres-container
          image: postgres
          ports:
            - containerPort: 5432
          volumeMounts:
            - name: postgres-data
              mountPath: /var/lib/postgresql/data
              subPath: postgres
          env:
            - name: POSTGRES_PASSWORD
              valueFrom:
                secretKeyRef:
                  name: app-secrets
                  key: POSTGRES_PASSWORD
            - name: POSTGRES_USER
              valueFrom:
                configMapKeyRef:
                  name: app-variables
                  key: POSTGRES_USER
            - name: POSTGRES_DB
              valueFrom:
                configMapKeyRef:
                  name: app-variables
                  key: POSTGRES_DB
---
###########################
# Cluster IP Service
###########################
apiVersion: v1
kind: Service
metadata:
  name: postgres-cluster-ip-service
spec:
  type: ClusterIP
  selector:
    component: postgres
  ports:
    - port: 5432
      targetPort: 5432
The file consists of three parts – a persistent volume claim, a deployment, and a service. We have clubbed these three parts together in one file as they all relate to one component – the Postgres component, a practice actually recommended by Kubernetes. Note that for these separate parts to work from a single file, we need to separate them by '---'.
Like before, execute the below command to run this YAML file.
kubectl apply -f k8s/component_postgres.yaml
You would see the below message appear if your file executed correctly.
persistentvolumeclaim/postgres-persistent-volume-claim created
deployment.apps/postgres-deployment created
service/postgres-cluster-ip-service created
Although the YAML file we used is almost self-explanatory, let's also discuss these parts briefly to cover some of the important concepts not made obvious by the YAML.
1.4.3.1 Persistent Volume Claim
apiVersion: v1
kind: PersistentVolumeClaim
metadata:
  name: postgres-persistent-volume-claim
spec:
  accessModes:
    - ReadWriteOnce
  resources:
    requests:
      storage: 100M
Before explaining what a Persistent Volume Claim is we need to understand what a Persistent Volume is.
A PersistentVolume (PV) is a piece of storage in the cluster that has been provisioned by an administrator or dynamically provisioned using Storage Classes. It is a resource in the cluster just like a node is a cluster resource.
A PersistentVolumeClaim (PVC) is a request for storage by a user. It is similar to a Pod. Pods consume node resources and PVCs consume PV resources. Pods can request specific levels of resources (CPU and Memory). Claims can request specific size and access modes.
Therefore, a PVC requires a PV first. Since we have not created any PV by now, this means our PV has the default standard storage, which is the same disk storage that is used by the local Kubernetes cluster. The access mode we have used is 'ReadWriteOnce', which means that the PVC can be mounted as read-write by a single node. You may read more about the access modes from the official documenation here. Further, we have requested 100 MBs of data.
You may execute the below command to see the status of our PVC.
kubectl get persistentvolumeclaim
You would see a message like below appear. You would see that it is indeed using a standard storage class.
NAME                               STATUS   VOLUME                                     CAPACITY   ACCESS MODES   STORAGECLASS   AGE
postgres-persistent-volume-claim   Bound    pvc-e2aa3c4d-1f1f-4337-8de1-38ff85b3bc49   100M       RWO            standard       33m
1.4.3.2 Deployment
apiVersion: apps/v1
kind: Deployment
metadata:
  name: postgres-deployment
spec:
  replicas: 1
  selector:
    matchLabels:
      component: postgres
  template:
    metadata:
      labels:
        component: postgres
    spec:
      volumes:
        - name: postgres-data
          persistentVolumeClaim:
            claimName: postgres-persistent-volume-claim
      containers:
        - name: postgres-container
          image: postgres
          ports:
            - containerPort: 5432
          volumeMounts:
            - name: postgres-data
              mountPath: /var/lib/postgresql/data
              subPath: postgres
          env:
            - name: POSTGRES_PASSWORD
              valueFrom:
                secretKeyRef:
                  name: app-secrets
                  key: POSTGRES_PASSWORD
            - name: POSTGRES_USER
              valueFrom:
                configMapKeyRef:
                  name: app-variables
                  key: POSTGRES_USER
            - name: POSTGRES_DB
              valueFrom:
                configMapKeyRef:
                  name: app-variables
                  key: POSTGRES_DB
This is the most important part as this creates our Postgres engine. A Deployment is a Kubernetes controller object which creates the pods and their replicas. We have given our deployment a name - 'postgres-deployment'. In our 'spec' section we define the actual specifications of this deployment. We say that we want to have 1 replica of our pod. The selector attribute would be used to map the pods and their replicas to other resources such as the ClusterIP service in our case. By matchLabels we mean that we need to match the key-value pair 'component: postgres' to achieve this mapping.
The template is the definition of our pod. The deployment would create 'n' replicas of this pod, where 'n' is any number that we specify. We provide the template a label, which is the same key-value pair discussed above, and used for mapping our pod(s) in the deployment. As per the template, our pod would have some volumes and some containers.
The volumes are defined in the volumes section and the containers are defined in the containers section. Both the volumes and containers have their own names to identify them. The volume in our case is the PVC volume as already explained.
We would use the latest 'postgres' image from Docker to create the container within the pod. We give the container a name, 'postgres-container'. We specify the port which would be open on the container. We then specify the volume which would be mounted inside our container. Essentially all information inside the mountPath within our container would be stored on the PVC. The subpath tells us that we would not be using the entire PVC but rather a folder inside it. We call our subpath 'postgres', so that in the event of another application using the same PVC, the storage used by them is easily distinguishable. However, this is an over-kill as our PVC is only going to be used by our Postgres application and we have named our PVC as 'postgres-persistent-volume-claim' already.
Next, we specify the environment variables to be used by our container running inside our pod. The Docker 'postgres' container requires an essential environment variable 'POSTGRES_PASSWORD' and the other two are optional. Since we also used the other two optional environmental variables in our previous article, we would do the same again. The 'POSTGRES_PASSWORD' takes values from the app-secrets we created earlier and the other two environment variables take their value from the app-variables configmap we created earlier.
Since we already performed 'kubectl apply -f k8s/component_postgres.yaml', and our deployment was part of this yaml file, the deployment must have been created. If you perform the below command, you would see that our deployment has been created.
kubectl get deployment
The command would produce an output like below, which means that our deployment is running.
NAME                  READY   UP-TO-DATE   AVAILABLE   AGE
postgres-deployment   1/1     1            1           41s
To see the pods which have been created, run the below command to visualize all pods in our Kubernetes cluster.
kubectl get pods
Since our deployment is running, it must have created pods - which we should be able to see in the output. The output for the above command should be similar to the below.
NAME                                   READY   STATUS    RESTARTS   AGE
postgres-deployment-54656d7fb9-sz8d2   1/1     Running   0          9m18s
In the above output, the pod name consists of the deployment name followed by two arbitrarily assigned ids which are unique. The first id is the replica set name and the second id is the pod name. This is because if we had created two or more pods using the replica option from the deployment, we are able to tell that these pods belong to the same replica set.
You can also view all containers running inside our pod with the below command with a custom output format. This command lists all containers by pods.
kubectl get pods -o=custom-columns=POD:.metadata.name,CONTAINERS:.spec.containers[*].name
You would see that a container called 'postgres-container' is running inside our pod.
POD                                    CONTAINERS
postgres-deployment-54656d7fb9-sz8d2   postgres-container
With a similar custom command, you can also view the volumes created inside our pod.
kubectl get pods -o=custom-columns=POD:.metadata.name,CONTAINERS:.spec.containers[*].name,VOLUMES:.spec.volumes[*].name
You would see output like below.
POD                                    CONTAINERS           VOLUMES
postgres-deployment-54656d7fb9-sz8d2   postgres-container   postgres-data,default-token-rpjjz
Note that the second volume, after the comma, is the same default service account token from Kubernetes which we saw before in the secrets.
You may check if the volume is working correctly with a simple test. We would first connect with our pod container. Next, we would create a file in the mounted volume location of the pod container. The file should be created on the PVC associated with that volume. Next, we would delete/stop the pod manually. Kubernetes would attempt to create another pod to fulfill the requirement – replicas = 1, in the event of a pod being shut down due to any reason. Once Kubernetes restarts the pod, we would get the id of the new pod, connect with this new pod and if everything is fine, we should still be able to see the file because it was stored on a persistent volume.
Let's first connect with our running pod with the bash terminal. The syntax for executing a command on a container within a pod is below.
kubectl exec -i -t my-pod --container main-app -- /bin/bash
We want to open the bash terminal on that container, so we are using the command '/bin/bash'. Depending on the container we are running the bash terminal might be unavailable. In that case you would need to check with the documentation of the image of that container, that which terminal is available. For example for certain Linux containers, you have the 'sh' terminal. In the above command, you may skip the container option, and just provide the pod name if the pod is running only one container.
Note that with the exec -i -t, you can run any command instead of just opening the bash terminal on the container. The -i and -t are short forms of --stdin and --tty, and using these options allows us to run any command in interactive mode – which means that we would be able to provide further inputs/outputs with that command – the command would not just execute and exit. For our case, I have further short-handed the command and it would look like below.
kubectl exec -it postgres-deployment-54656d7fb9-sz8d2 -c postgres-container -- bash
The bash terminal would open in the root folder of the container. Create a test file called 'test_file.txt' in the mounted folder '/var/lib/postgresql/data' with below.
touch /var/lib/postgresql/data/test_file.txt
You should be able to see that the file was created by performing the 'ls' command in that folder as below.
ls /var/lib/postgresql/data/
base          pg_dynshmem    pg_logical    pg_replslot   pg_stat      pg_tblspc    pg_wal                postgresql.conf  test_file.txt
global        pg_hba.conf    pg_multixact  pg_serial     pg_stat_tmp  pg_twophase  pg_xact               postmaster.opts
pg_commit_ts  pg_ident.conf  pg_notify     pg_snapshots  pg_subtrans  PG_VERSION   postgresql.auto.conf  postmaster.pid
Exit out of the bash terminal with Ctrl+D. Now we are going to stop our running pod with the below command. Please use the exact pod id running in your cluster.
kubectl delete pod postgres-deployment-54656d7fb9-sz8d2
Once the pod has been deleted, perform the 'kubectl get pods' and you would see that a new pod is running with the same deployment and replica id but with a different pod id.
kubectl get pods
NAME                                   READY   STATUS    RESTARTS   AGE
postgres-deployment-54656d7fb9-4tgx6   1/1     Running   0          29s
Like before, if you open the bash terminal within the container running on this new pod, you should be able to see the file we created.
kubectl exec -it postgres-deployment-54656d7fb9-4tgx6 -c postgres-container -- bash
ls /var/lib/postgresql/data/
You would see that the test file still exists.
base          pg_dynshmem    pg_logical    pg_replslot   pg_stat      pg_tblspc    pg_wal                postgresql.conf  test_file.txt
global        pg_hba.conf    pg_multixact  pg_serial     pg_stat_tmp  pg_twophase  pg_xact               postmaster.opts
pg_commit_ts  pg_ident.conf  pg_notify     pg_snapshots  pg_subtrans  PG_VERSION   postgresql.auto.conf  postmaster.pid
Remove the test file.
rm /var/lib/postgresql/data/test_file.txt
Exit out of the bash terminal with Ctrl+D.
1.4.3.3 ClusterIP Service
apiVersion: v1
kind: Service
metadata:
  name: postgres-cluster-ip-service
spec:
  type: ClusterIP
  selector:
    component: postgres
  ports:
    - port: 5432
      targetPort: 5432
There is not much to explain here, as the YAML is self-explanatory. You may further read about Kubernetes Service types here.
Okay so now we have tested our PostgreSQL component, let's build the Django Backend Deployment.
1.4.4 Create the Django BackendEnd deployment
Before doing anything else here, first, we need to create the Docker image of our Django app and push the image either to Docker Hub or the container registry of a chosen cloud service provider. For our case, we would use Docker Hub. We would use the same Dockerfile we used in our previous article but with a few changes for Kubernetes. In the Dockerfile within the backend folder, comment out the below line of code, which is at the very end.
ENTRYPOINT ["/usr/src/app/entrypoint.sh"]
This is because, if you could recall, the 'entrypoint.sh' file executes commands to wait for the PostgreSQL engine to be ready and then performs three commands from our Django application. Firstly, it creates our static assets. Secondly, it migrates the app schema to the PostgreSQL database. And thirdly, it creates our superuser – the 'admin' user. Because we would build the Django application from our local machines (our Mac/Window laptop/PC etc.), and not from within the local Kubernetes cluster which has the PostgreSQL engine, in its current state – inaccessible from the outside world, running, we are unable to perform this operation from our local machine. If however, we were using a managed database solution like Amazon RDS and defined the location of the static assets to be hosted on an external cloud service like AWS S3, we could use the Dockerfile straightway without any modifications – this is also the recommended solution for production. However, for testing it locally and given that we are using our own database engine, we need to make this change to our Dockerfile.
Our Dockerfile should look like the below.
###########
# BUILDER #
###########

# pull official base image
FROM python:3.7.9-slim-stretch as builder

# set work directory
WORKDIR /usr/src/app

# set environment variables
ENV PYTHONDONTWRITEBYTECODE 1
ENV PYTHONUNBUFFERED 1

# install dependencies
COPY ./requirements.txt .
RUN pip wheel --no-cache-dir --no-deps --wheel-dir /usr/src/app/wheels -r requirements.txt


#########
# FINAL #
#########

# pull official base image
FROM python:3.7.9-slim-stretch

# installing netcat (nc) since we are using that to listen to postgres server in entrypoint.sh
RUN apt-get update && apt-get install -y --no-install-recommends netcat && \
    apt-get autoremove -y && \
    apt-get clean && \
    rm -rf /var/lib/apt/lists/*

# install dependencies
COPY --from=builder /usr/src/app/wheels /wheels
COPY --from=builder /usr/src/app/requirements.txt .
RUN pip install --no-cache /wheels/*

# set work directory
WORKDIR /usr/src/app

# copy entrypoint.sh
COPY ./entrypoint.sh /usr/src/app/entrypoint.sh

# copy our django project
COPY ./django_app .

# run entrypoint.sh
RUN chmod +x /usr/src/app/entrypoint.sh
# ENTRYPOINT ["/usr/src/app/entrypoint.sh"]
Now we are ready to build our docker image. From within the project folder run the build command. The below command is what I ran from my system. The -t stands for tag. The tag I have used is 'mausamgaurav/django_dev_image:latest'. You would need to run the below command with your own tag.
docker build -t mausamgaurav/django_dev_image:latest ./backend
The tag I have used has the syntax.
<docker_hub_user_id>/<image_name>:<image_version>
The first part of the tag is the Docker Hub user-id. This determines that when you later push the docker image, it gets pushed to your own repository. To create your user-id you need to register a free account with Docker Hub. The remaining two parts are the image name of your image and its version.
Once you have run the build command, your image would be created and tagged. You would see a number of messages in your terminal output, specifying the various stages of your build process. In the end, you would see a message like below.
Successfully built d41aee9e1213
Successfully tagged mausamgaurav/django_dev_image:latest
After this step, you are ready to push your image to Docker Hub. Perform the below command (with your own Docker Hub ID) from your terminal.
docker push mausamgaurav/django_dev_image:latest
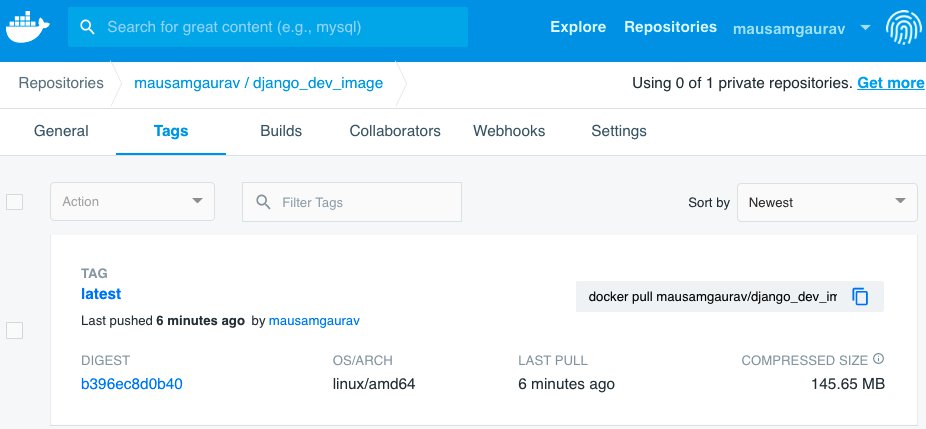
Depending on your system this would take a few minutes to complete. Once the process of pushing the image finishes, you can log in to your Docker Hub account, to see that your image is available.
This is great. Now we are ready to create the deployment of our Django application. Remember that we had put an 'entrypoint.sh' file inside our image. The file was originally created for docker-compose, so that before we start the Django server from any container, we collect the static files, migrate our app schema to the database and create an admin 'superuser'. The same principles hold true for Kubernetes as well. Thing is, there are many ways to achieve this with Kubernetes. In our case, we are going to utilize the Kubernetes 'Job' object. Inside the k8s folder create a file called 'job_django.yaml'. The file should look like below.
###########################
# Job
###########################
apiVersion: batch/v1
kind: Job
metadata:
  name: django-job
spec:
  template:
    spec:
      containers:
      - name: django-job-container
        image: mausamgaurav/django_dev_image:latest
        command: ["bash", "-c", "/usr/src/app/entrypoint.sh"]
        env:
          - name: DJANGO_ENV
            valueFrom:
              configMapKeyRef:
                name: app-variables
                key: DJANGO_ENV
          - name: SECRET_KEY
            valueFrom:
              configMapKeyRef:
                name: app-variables
                key: SECRET_KEY
          - name: DEBUG
            valueFrom:
              configMapKeyRef:
                name: app-variables
                key: DEBUG
          - name: DJANGO_ALLOWED_HOSTS
            valueFrom:
              configMapKeyRef:
                name: app-variables
                key: DJANGO_ALLOWED_HOSTS
          - name: DB_ENGINE
            valueFrom:
              configMapKeyRef:
                name: app-variables
                key: DB_ENGINE
          - name: DB_DATABASE
            valueFrom:
              configMapKeyRef:
                name: app-variables
                key: DB_DATABASE
          - name: DB_USER
            valueFrom:
              configMapKeyRef:
                name: app-variables
                key: DB_USER
          - name: DB_PASSWORD
            valueFrom:
              secretKeyRef:
                name: app-secrets
                key: DB_PASSWORD
          - name: DB_HOST
            valueFrom:
              configMapKeyRef:
                name: app-variables
                key: DB_HOST
          - name: DB_PORT
            valueFrom:
              configMapKeyRef:
                name: app-variables
                key: DB_PORT
          - name: DJANGO_ADMIN_USER
            valueFrom:
              configMapKeyRef:
                name: app-variables
                key: DJANGO_ADMIN_USER
          - name: DJANGO_ADMIN_PASSWORD
            valueFrom:
              secretKeyRef:
                name: app-secrets
                key: DJANGO_ADMIN_PASSWORD
      restartPolicy: Never
  backoffLimit: 4
The file is pretty simple to understand. We create a job, which would pull in the latest dev image of our Django app from Docker Hub and execute the 'entrypoint.sh' from the bash terminal of the container based on this image when the container starts. Next, we provide all the environment variables required by the Django app container.
Execute the below from your within the project folder in your terminal.
kubectl apply -f k8s/job_django.yaml
You would see a message "job.batch/django-job created" appear as output.
Wait for some seconds and then execute "kubectl get pods" from the terminal. You should see a message like below.
NAME                                   READY   STATUS      RESTARTS   AGE
django-job-n2wbq                       0/1     Completed   0          3m21s
postgres-deployment-54656d7fb9-bfhvv   1/1     Running     0          18m
This means our job ran successfully. Note that as part of this job, we did not need to perform the collect static operation for our development environment at this stage, as we have already said that we would be using the development version of Django. However for the production environment, since we may host the static assets externally, performing the collect static at this stage would be really useful.
The purpose of creating this job object was to perform a one-time operation - collect the static assets (in case of production) and also migrate the app database schema to our database. If the job executed successfully, then we would see the Django database tables created inside the PostgreSQL database. First, check which pod is running for your PostgreSQL deployment and open the bash terminal on this Postgres container with a command similar to below.
kubectl exec -it postgres-deployment-54656d7fb9-bfhvv -- bash
Inside the bash terminal, we want to connect to our PostgreSQL engine. Perform the below command on the bash terminal of your container.
psql predictiondb postgres_user
Essentially we connect to our database 'predictiondb' as user 'postgres_user'. Upon execution of the command, you would see an input prompt like below.
predictiondb=#
In the input prompt, enter the command '\dt' which is the Postgres command to list all tables in a database. In the output, you would see a list of tables that look familiar to the tables used by our Django app.
predictiondb=# \dt
                      List of relations
 Schema |            Name            | Type  |     Owner
--------+----------------------------+-------+---------------
 public | auth_group                 | table | postgres_user
 public | auth_group_permissions     | table | postgres_user
 public | auth_permission            | table | postgres_user
 public | auth_user                  | table | postgres_user
 public | auth_user_groups           | table | postgres_user
 public | auth_user_user_permissions | table | postgres_user
 public | authtoken_token            | table | postgres_user
 public | django_admin_log           | table | postgres_user
 public | django_content_type        | table | postgres_user
 public | django_migrations          | table | postgres_user
 public | django_session             | table | postgres_user
(11 rows)
This means our migration ran successfully. Now we can safely spin up containers for our Django deployment. Exit out of the 'psql' terminal and the bash terminal by pressing Ctrl+D twice. Create a file called 'component_django.yaml' within the k8s folder. The file should look like below.
###########################
# Deployment
###########################
apiVersion: apps/v1
kind: Deployment
metadata:
  name: django-deployment
spec:
  replicas: 3
  selector:
    matchLabels:
      component: django
  template:
    metadata:
      labels:
        component: django
    spec:
      containers:
        - name: django-container
          image: mausamgaurav/django_dev_image:latest
          ports:
            - containerPort: 8000
          command: ["bash", "-c", "python manage.py runserver 0.0.0.0:8000"]
          env:
            - name: DJANGO_ENV
              valueFrom:
                configMapKeyRef:
                  name: app-variables
                  key: DJANGO_ENV
            - name: SECRET_KEY
              valueFrom:
                configMapKeyRef:
                  name: app-variables
                  key: SECRET_KEY
            - name: DEBUG
              valueFrom:
                configMapKeyRef:
                  name: app-variables
                  key: DEBUG
            - name: DJANGO_ALLOWED_HOSTS
              valueFrom:
                configMapKeyRef:
                  name: app-variables
                  key: DJANGO_ALLOWED_HOSTS
            - name: DB_ENGINE
              valueFrom:
                configMapKeyRef:
                  name: app-variables
                  key: DB_ENGINE
            - name: DB_DATABASE
              valueFrom:
                configMapKeyRef:
                  name: app-variables
                  key: DB_DATABASE
            - name: DB_USER
              valueFrom:
                configMapKeyRef:
                  name: app-variables
                  key: DB_USER
            - name: DB_PASSWORD
              valueFrom:
                secretKeyRef:
                  name: app-secrets
                  key: DB_PASSWORD
            - name: DB_HOST
              valueFrom:
                configMapKeyRef:
                  name: app-variables
                  key: DB_HOST
            - name: DB_PORT
              valueFrom:
                configMapKeyRef:
                  name: app-variables
                  key: DB_PORT

---
###########################
# Cluster IP Service
###########################
apiVersion: v1
kind: Service
metadata:
  name: django-cluster-ip-service
spec:
  type: ClusterIP
  selector:
    component: django
  ports:
    - port: 8000
      targetPort: 8000
Like the Postgres component before, we have a Deployment section and a Cluster IP Service section in the YAML file. In our deployment, we create 3 replicas of the Django app pod. The pod definition in the template is similar to the one we used in the Job since both are using the same Django image, except for two fewer environment variables in the end. In the command section, we start the Django server. Note that, compared to our last article, we won't be using Gunicorn this time to serve our Django application. This is because Gunicorn cannot serve static assets. To serve static assets while using Gunicorn for the main Django app, we would have to serve them using Nginx or some other server. That is why we are using the default server, which comes prepackaged with Django, and can serve static assets in development mode. Later on, in the production environment, we would use Gunicorn.
Create the deployment by the below command.
kubectl apply -f k8s/component_django.yaml
You would see that our deployment and ClusterIP service have been created.
deployment.apps/django-deployment created
service/django-cluster-ip-service created
You can see that our Django pods are running as below.
kubectl get pods
NAME                                   READY   STATUS      RESTARTS   AGE
django-deployment-cdb9c7797-9fq7s      1/1     Running     0          9s
django-deployment-cdb9c7797-q6jl9      1/1     Running     0          9s
django-deployment-cdb9c7797-sqqtb      1/1     Running     0          9s
django-job-n2wbq                       0/1     Completed   0          86m
postgres-deployment-54656d7fb9-bfhvv   1/1     Running     0          101m
1.4.5 Create the React FrontEnd deployment
We first need to build our React dev image and push that to Docker Hub. In our Dockerfile located inside the frontend folder, we need to pass the value of the environment variable API_SERVER as an argument with the docker build command. For our development environment, this value would be a blank string – '', and not 'http://127.0.0.1' like before. This is because, as we have already explained – our Minikube virtual machine would have a different IP address than 127.0.0.1. The Dockerfile for the frontend would remain unchanged from last time and looks like below.
###########
# BUILDER #
###########

# pull official base image
FROM node:12.18.3-alpine3.9 as builder

# set work directory
WORKDIR /usr/src/app

# install dependencies and avoid `node-gyp rebuild` errors
COPY ./react_app/package.json .
RUN apk add --no-cache --virtual .gyp \
        python \
        make \
        g++ \
    && npm install \
    && apk del .gyp

# copy our react project
COPY ./react_app .

# perform npm build
ARG API_SERVER
ENV REACT_APP_API_SERVER=${API_SERVER}
RUN REACT_APP_API_SERVER=${API_SERVER} \
  npm run build

#########
# FINAL #
#########

# pull official base image
FROM node:12.18.3-alpine3.9

# set work directory
WORKDIR /usr/src/app

# install serve - deployment static server suggested by official create-react-app
RUN npm install -g serve

# copy our build files from our builder stage
COPY --from=builder /usr/src/app/build ./build
We need to build the image using the below command.
docker build -t mausamgaurav/react_dev_image:latest ./frontend --build-arg API_SERVER=''
Once the image has been created, we need to upload it to Docker Hub. Push the image to Docker Hub with a command similar to below where the repository points to your own Docker Hub id.
docker push mausamgaurav/react_dev_image:latest
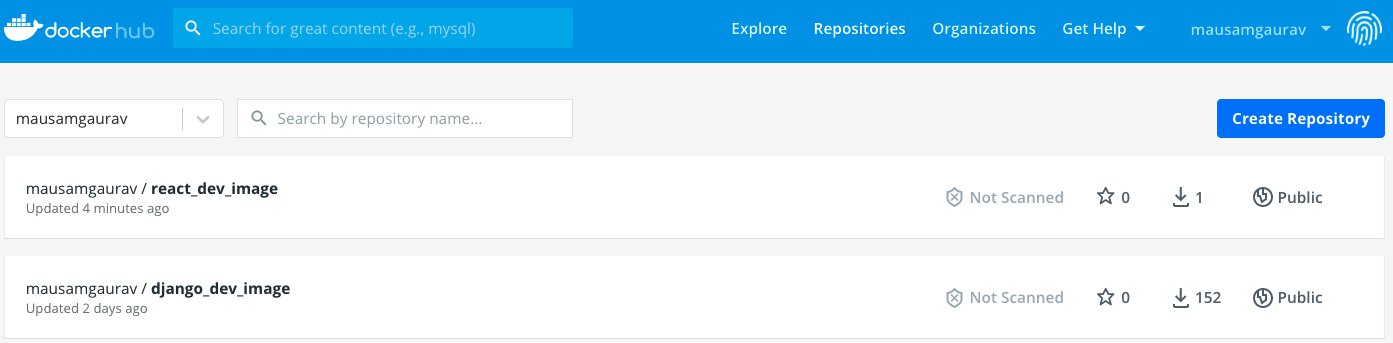
Once this finishes, you would be able to see the image in your repository on Docker Hub.
Now we need to create the deployment file for our React frontend, which would use this image to spin up Kubernetes pods. Inside the k8s folder create a file called 'component_react.yaml'. The content of the file is shown below.
###########################
# Deployment
###########################
apiVersion: apps/v1
kind: Deployment
metadata:
  name: react-deployment
spec:
  replicas: 3
  selector:
    matchLabels:
      component: react
  template:
    metadata:
      labels:
        component: react
    spec:
      containers:
        - name: react-container
          image: mausamgaurav/react_dev_image:latest
          ports:
            - containerPort: 3000
          command: ["sh", "-c", "serve -s build -l 3000 --no-clipboard"]

---
###########################
# Cluster IP Service
###########################
apiVersion: v1
kind: Service
metadata:
  name: react-cluster-ip-service
spec:
  type: ClusterIP
  selector:
    component: react
  ports:
    - port: 3000
      targetPort: 3000
Like before, we are creating a Deployment and a ClusterIP service. Our react containers cannot consume any environment variables, so we designed our app to not depend on any environment variables. Hence there are no environment variables for the react containers. The react server is served by a server called 'serve'. Therefore as soon as the container is up, we want to run the command to start this server. Note that we are using the 'sh' terminal instead of the 'bash' terminal for the react containers as 'sh' is the default terminal on these containers. Further, we added the --no-clipboard option with the 'serve' command to eliminate a clipboard error we were getting on the containers.
Note that we cannot test the React app's connection with our Django app at the moment. We would only be able to test this connection from the browser when we have set up the ingress. Nevertheless, we need to create the deployment. Create the deployment with the below command.
kubectl apply -f k8s/component_react.yaml
Like before you would see the below messages appear, which means that our Deployment and the associated ClusterIP service were created.
deployment.apps/react-deployment created
service/react-cluster-ip-service created
If you take a look at all the pods running, with 'kubectl get pods', you would see that all our react pods are running successfully.
NAME                                   READY   STATUS      RESTARTS   AGE
django-deployment-cdb9c7797-9fq7s      1/1     Running     0          22h
django-deployment-cdb9c7797-q6jl9      1/1     Running     0          22h
django-deployment-cdb9c7797-sqqtb      1/1     Running     0          22h
django-job-n2wbq                       0/1     Completed   0          24h
postgres-deployment-54656d7fb9-bfhvv   1/1     Running     0          24h
react-deployment-56c494dbb-f8hdh       1/1     Running     0          20s
react-deployment-56c494dbb-hf2d5       1/1     Running     0          20s
react-deployment-56c494dbb-v5tzg       1/1     Running     0          20s
We can inspect one of the react pods as below.
kubectl logs react-deployment-56c494dbb-f8hdh
You should see the below message as output.
INFO: Accepting connections at http://localhost:3000
Although this says localhost you would not be able to open the React frontend on the browser yet because this message simply means that the container is accepting connections at port 3000 locally. This locally is the local environment within the container. You can, however, test that the React frontend is serving up pages by the below test. Connect to one of the pod containers of the React deployment, with the below command.
kubectl exec -it react-deployment-56c494dbb-f8hdh -- sh
Now perform the below commands to install 'curl' on this container.
sudo root
apk add curl
Once curl is installed, you can test the React server (from the container itself). Execute the below command.
curl http://127.0.0.1:3000/login
You would see an output that is contained within HTML tags.
<!doctype html><html lang="en">.....
....</html>
This means that the React server is running properly within the pod containers.
Exit out of the 'sh' terminal and the pod by pressing Ctrl+D twice. Kill this particular pod because we tampered with its container a little bit by installing curl. Don't worry! – Kubernetes would spin up a fresh new pod in place of this deleted pod.
kubectl delete pod react-deployment-56c494dbb-f8hdh
kubectl get pods
NAME                                   READY   STATUS      RESTARTS   AGE
django-deployment-cdb9c7797-9fq7s      1/1     Running     0          23h
django-deployment-cdb9c7797-q6jl9      1/1     Running     0          23h
django-deployment-cdb9c7797-sqqtb      1/1     Running     0          23h
django-job-n2wbq                       0/1     Completed   0          24h
postgres-deployment-54656d7fb9-bfhvv   1/1     Running     0          25h
react-deployment-56c494dbb-hf2d5       1/1     Running     0          38m
react-deployment-56c494dbb-l6rmw       1/1     Running     0          28s
react-deployment-56c494dbb-v5tzg       1/1     Running     0          38m
With the react component successfully deployed within our local Kubernetes cluster we are now ready to create the last remaining part, which is setting up Ingress.
1.4.6 Create Ingress
We are going to use a component called 'ingress-nginx' for our application and not the default ingress which comes with Kubernetes. The official page of this component is https://kubernetes.github.io/ingress-nginx/. This component is actually a controller, which is an object similar to a Deployment - which manages resources to ensure that the user requirements are constantly met by Kubernetes. Please keep in mind that the 'ingress-nginx' component works differently on different cloud providers and is also different for Minikube. Further, there is another similar component available from the organisation 'Nginx', with a very similar name, which is a commercial application and not free like this 'ingress-nginx'. The reason we are using our 'ingress-nginx' is that this component has certain advantages compared to the default ingress, for example, it allows having sticky sessions with the frontend app containers if required.
The way our 'ingress-nginx' controller works is that it first looks for routing rules as defined in an Ingress object and then spins up a pod which fulfils these routing rules. On the Minikube setup, we need to provide the routing rules as an ingress object with an annotation class 'Nginx' – This is nothing complicated as you would see in the YAML file later. For this to work on Minikube you need to perform an additional command as well, as shown below.
minikube addons enable ingress
Wait for some time until this command finishes.
Now we need to write the routing rules. These are almost the same routing rules we created in our last project (in the 'nginx.conf' file within the 'nginx' folder), except that in this development version we would not be serving the static files via Nginx. Last time we served the static files via Nginx, by using volume mounts to link the Django container static assets to the Nginx container – refer to the docker-compose file. This time Django would be served from the default development server (rather than using Gunicorn), which is capable of serving static files.
Create a file called 'ingress_service.yaml' within the k8s folder. The file contents are shown below.
apiVersion: networking.k8s.io/v1beta1
kind: Ingress
metadata:
  name: ingress-service
  annotations:
    kubernetes.io/ingress.class: 'nginx'
spec:
  rules:
    - http:
        paths:
          ################
          # URL ROUTING #
          ################
          - path: /admin
            backend:
              serviceName: django-cluster-ip-service
              servicePort: 8000
          - path: /api
            backend:
              serviceName: django-cluster-ip-service
              servicePort: 8000
          ##########################
          # STATIC FOLDER ROUTING #
          ##########################
          - path: /static/admin/
            backend:
              serviceName: django-cluster-ip-service
              servicePort: 8000
          - path: /static/rest_framework/
            backend:
              serviceName: django-cluster-ip-service
              servicePort: 8000
          - path: /static/
            backend:
              serviceName: react-cluster-ip-service
              servicePort: 3000
          - path: https://datagraphi.s3.amazonaws.com/media/
            backend:
              serviceName: react-cluster-ip-service
              servicePort: 3000
          ################
          # URL ROUTING #
          ################
          - path: /
            backend:
              serviceName: react-cluster-ip-service
              servicePort: 3000
As you can see, the routing rules are the same as before except for the static folders of Django. Now we need to execute the above file with the command below.
kubectl apply -f k8s/ingress_service.yaml
You should see a message output like below.
Warning: networking.k8s.io/v1beta1 Ingress is deprecated in v1.19+, unavailable in v1.22+; use networking.k8s.io/v1 Ingress
ingress.networking.k8s.io/ingress-service created
To see that our ingress is successfully running, execute the below command.
kubectl get ingress
You would see an output, similar to below. This also shows the IP address of the cluster, since our ingress service would accept traffic for the cluster on this IP address.
NAME              CLASS    HOSTS   ADDRESS          PORTS   AGE
ingress-service   <none>   *       192.168.99.105   80      12m
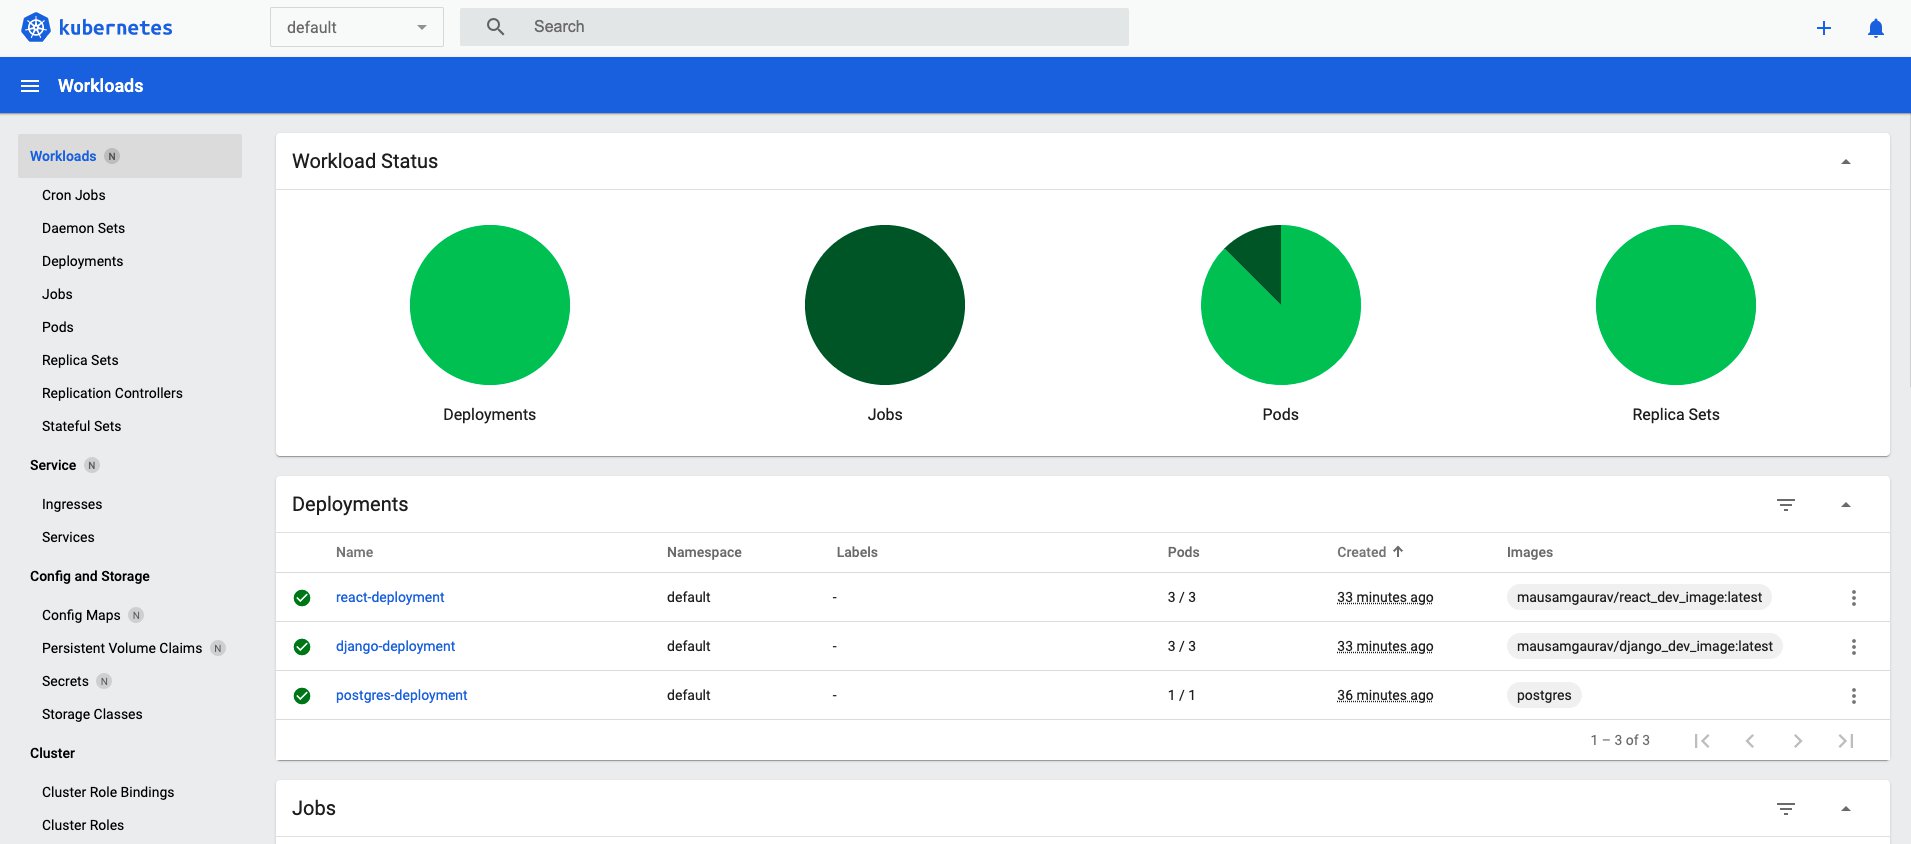
You can also see all resources we have created so far in this article, in the Minikube dashboard, which can be launched as below.
minikube dashboard
This would launch the dashboard in your default browser. You can visualise all resources in the Minikube cluster by their namespaces. At the moment we have the resources only in the default namespace.
Now we are ready to test our local application.
We first need to get the IP address of the local Minikube cluster, which can be obtained as below.
minikube ip
In my case, the IP was below, which is the same we got from the ingress command before.
192.168.99.105
If you put this IP address in your browser URL bar and press enter, you would see our Machine Learning app in action.
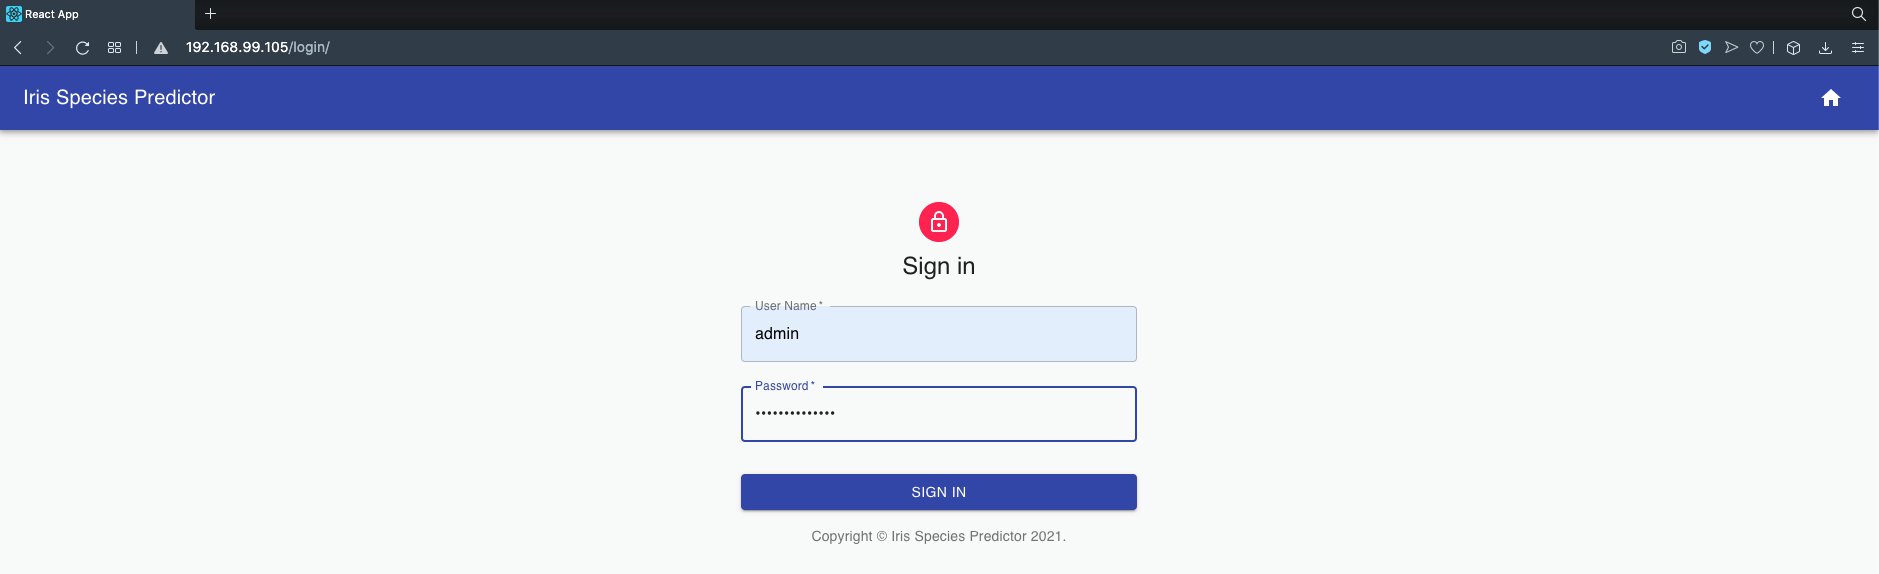
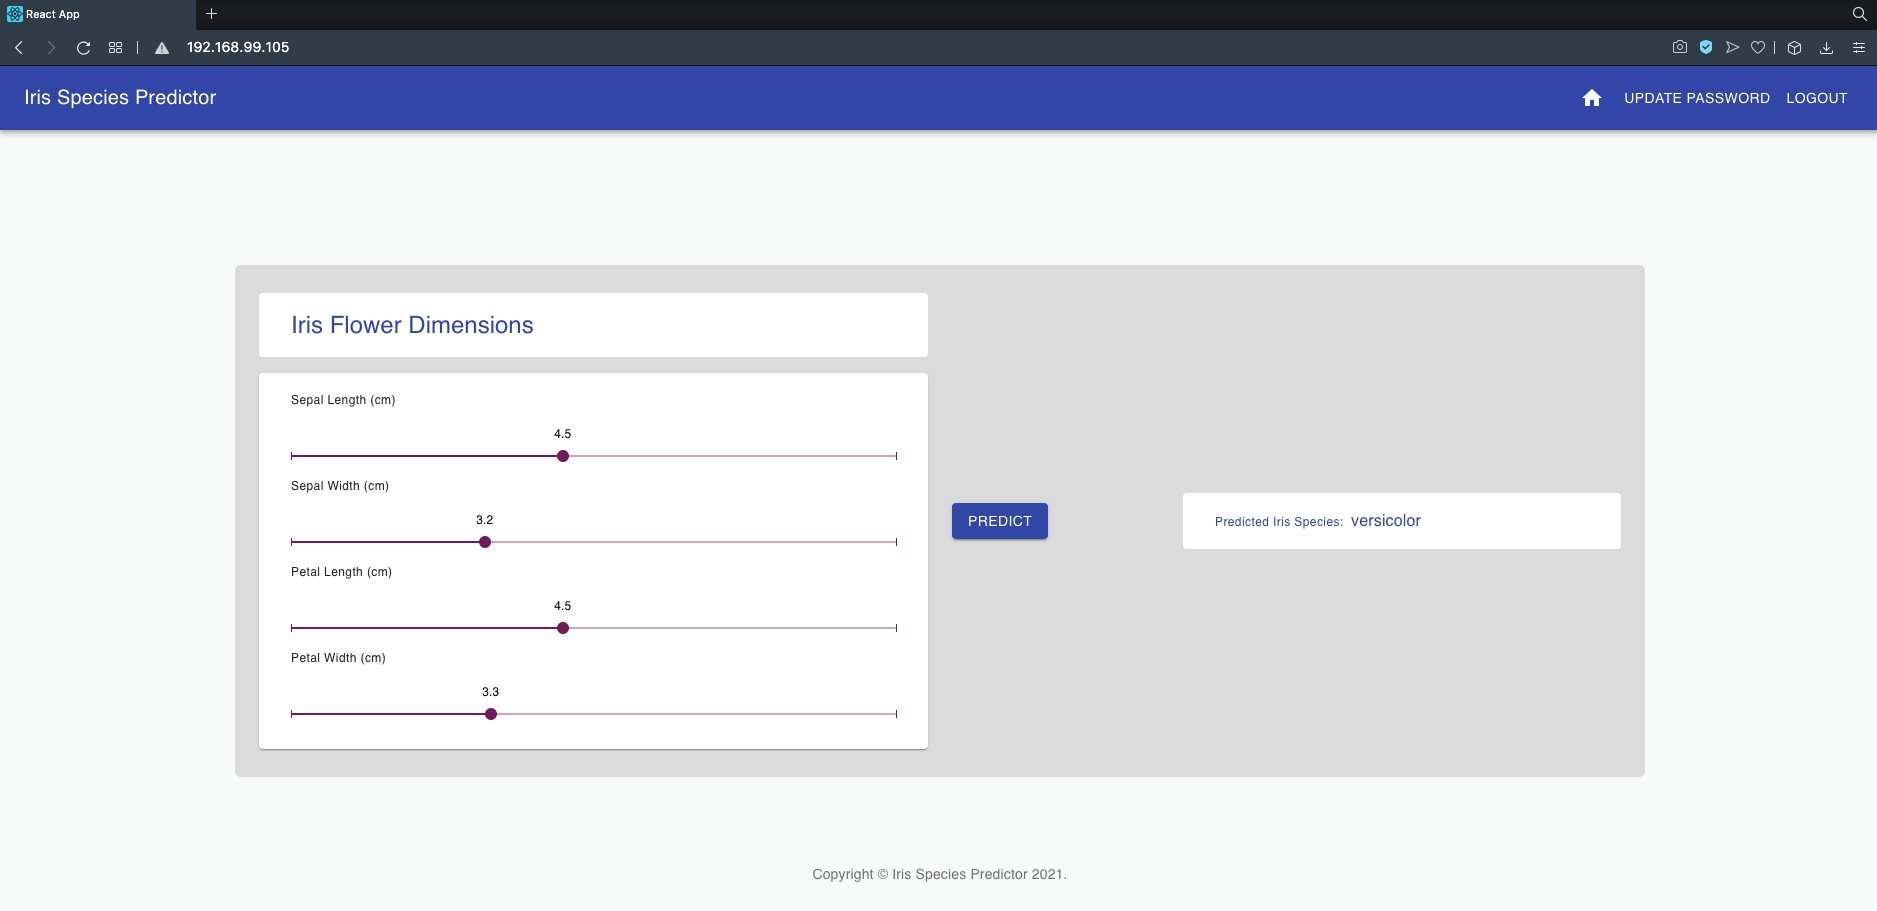
So here we go again! We have tested the local deployment of our Machine Learning App on Kubernetes!🍺
2 Deployment to Cloud
For this part, I have created a new git repository on Git Hub, which also contains the files we have worked with so far. For deploying to the cloud, as already mentioned, we would require an architecture, which works on recommended principles for production deployment. The files required to create the production-architecture are in a folder called 'prod' on the Git repo. The repo has the following project structure.
KubernetesDjangoReactProject
├── backend
├── frontend
├── k8s
├── nginx
├── postgres
└── prod
From now on this would be our main project folder. You may delete the previous project with the same name, clone the new repo and use it as your project from now onwards. Or you may just refer to the files individually on the Repo when we discuss them.
2.1 Production Architecture for Kubernetes cluster
Before deploying our app to the cloud, we need to make certain changes to the architecture to be production-ready. The production architecture would look like below.
The main modifications to the production architecture are:
- The Django app would be running in production mode for security concerns and other reasons. We would use Gunicorn to serve our Django app, instead of the default Django server. Since Gunicorn cannot serve static assets, we would need a different server, to serve the Django app static assets.
- We serve the Django app static assets via a production-ready static server – just like with docker-compose, we choose Nginx again, as this is a lightweight and robust server that can serve static files. Note that, for this article, we are only serving static files of the Django app and not those of the React app. This is because the 'serve' server running from the React pods are good enough to serve the static assets of the React frontend.
- We use Persistent Volumes (PVs) to bind our Persistent Volume Claims (PVCs). In the local architecture, we didn't need to explicitly define PVs. However, this time around we would explicitly define the PVs so that we know the exact location of the PVs, in case we needed to access them. We use two PVs – one for the Postgres PVC and one for the Django static assets (Nginx) PVC. The PVs themselves are linked to specific storage locations on the node. This would be especially useful for our Postgres application as we could easily access the Node storage location, to backup the Postgres database files if required.
- Earlier we were using the Django job just to migrate the app schema to the database and to create the admin superuser. This time around, the Django job would also create the PV + PVC required for the production-static assets, as well as perform the building of the static assets and storing them on the PVC/PV. The same PVC would be shared with the Nginx pods so that the Nginx containers within the pods can serve them.
2.2 Testing Production Architecture on Minikube
For proof-testing of the production architecture before the actual cloud deployment, create a fresh new Minikube cluster. First, delete the previous cluster.
minikube delete
Create a new Minikube cluster. Optionally provide the driver you wish to use.
minikube start --driver=virtualbox
2.2.1 Create the secrets
The secrets file is unchanged from earlier. However, our production files are in the 'prod' folder. Execute the below command.
kubectl apply -f prod/app_secrets.yaml
The secrets object would be created in our new Minikube cluster.
2.2.2 Create the config map
We have changed the following values in the app_variables file. Essentially we would be running the Django server in production mode.
....

  #env variables for the backend component
  DJANGO_ENV: production
  DEBUG: "0"
....
The content of the entire file looks like below.
apiVersion: v1
kind: ConfigMap
metadata:
  name: app-variables
data:
  #env variables for the postgres component
  POSTGRES_USER: postgres_user
  POSTGRES_DB: predictiondb

  #env variables for the backend component
  DJANGO_ENV: production
  DEBUG: "0"
  SECRET_KEY: secretsecretsecretsecretsecret
  DJANGO_ALLOWED_HOSTS: "*"
  DJANGO_ADMIN_USER: admin
  DJANGO_ADMIN_EMAIL: "admin@example.com"

  DATABASE: postgres
  DB_ENGINE: "django.db.backends.postgresql"
  DB_DATABASE: predictiondb
  DB_USER: postgres_user
  DB_HOST: postgres-cluster-ip-service
  DB_PORT: "5432"
The variable 'DJANGO_ALLOWED_HOSTS' is unchanged for now. However, on the actual cloud deployment, after you create your Kubernetes cluster, you would first need to get the external IP address of your Kubernetes Cluster VM and then change the value of the variable 'DJANGO_ALLOWED_HOSTS' to this IP address. Or if you plan to use your own domain such as "www.yourwebsite.com", you could also put that value for this variable. So the value of this variable should look like below on your actual cloud deployment file.
DJANGO_ALLOWED_HOSTS: "your_kubernetes_cluster_IP_address www.yourwebsite.com [::1]"
Create the config map with the below command.
kubectl apply -f prod/app_variables.yaml
2.2.3 PostgreSQL deployment
As per our production architecture, the PVC volume would be created on a PV which is actually a folder on the node machine. Essentially, the PostgreSQL database would be stored in a folder called '/var/lib/data/postgres_data' on the node machine. This is so that, as already explained, the database information is easily accessible for things like back up, so that you don't lose your database files etc. Before creating the PV, you would need to create this folder yourselves and grant all permissions to all users. This is because by default the Postgres engine would access this folder by some default username such as 'postgres' and if you don't grant these permissions, the Postgres containers would fail to start up.
On Minikube, ssh into the cluster and navigate to the folder 'mnt/data'. Next, create this folder and grant permissions like below. Note you would need root privileges, so you'd first need to 'sudo' as superuser with 'sudo su'.
minikube ssh
                         _             _
            _         _ ( )           ( )
  ___ ___  (_)  ___  (_)| |/')  _   _ | |_      __
/' _ ` _ `\| |/' _ `\| || , <  ( ) ( )| '_`\  /'__`\
| ( ) ( ) || || ( ) || || |\`\ | (_) || |_) )(  ___/
(_) (_) (_)(_)(_) (_)(_)(_) (_)`\___/'(_,__/'`\____)

$ sudo su
$ mkdir -p /var/lib/data/postgres_data
$ chmod -R 777 /var/lib/data/postgres_data
$ chown -R 999:999 /var/lib/data/postgres_data
Exit out of the Minikube ssh terminal by pressing Ctrl+D twice. Now we are ready to start our PostgreSQL deployment. The 'component_postgres.yaml' file in the 'prod' folder looks like below.
###########################
# Persistent Volume
###########################
apiVersion: v1
kind: PersistentVolume
metadata:
  name: postgres-pv-volume
  labels:
    type: local
spec:
  storageClassName: manual
  capacity:
    storage: 100M
  accessModes:
    - ReadWriteOnce
  hostPath:
    path: "/var/lib/data/postgres_data"
  persistentVolumeReclaimPolicy: Retain
---
###########################
# Persistent Volume Claim
###########################
apiVersion: v1
kind: PersistentVolumeClaim
metadata:
  name: postgres-persistent-volume-claim
spec:
  storageClassName: manual
  accessModes:
    - ReadWriteOnce
  resources:
    requests:
      storage: 100M
---
###########################
# Deployment
###########################
apiVersion: apps/v1
kind: Deployment
metadata:
  name: postgres-deployment
spec:
  replicas: 1
  selector:
    matchLabels:
      component: postgres
  template:
    metadata:
      labels:
        component: postgres
    spec:
      volumes:
        - name: postgres-data
          persistentVolumeClaim:
            claimName: postgres-persistent-volume-claim
      containers:
        - name: postgres-container
          image: postgres
          ports:
            - containerPort: 5432
          volumeMounts:
            - name: postgres-data
              mountPath: /var/lib/postgresql/data
              subPath: postgres
          env:
            - name: POSTGRES_PASSWORD
              valueFrom:
                secretKeyRef:
                  name: app-secrets
                  key: POSTGRES_PASSWORD
            - name: POSTGRES_USER
              valueFrom:
                configMapKeyRef:
                  name: app-variables
                  key: POSTGRES_USER
            - name: POSTGRES_DB
              valueFrom:
                configMapKeyRef:
                  name: app-variables
                  key: POSTGRES_DB
---
###########################
# Cluster IP Service
###########################
apiVersion: v1
kind: Service
metadata:
  name: postgres-cluster-ip-service
spec:
  type: ClusterIP
  selector:
    component: postgres
  ports:
    - port: 5432
      targetPort: 5432
As already mentioned before, this file would first create a PV and then create a PVC mapped to it. To map the PVC to the PV, we have used a custom storage class called 'manual' on both the PV and the PVC. Start the Postgres component with the below command from the project folder.
kubectl apply -f prod/component_postgres.yaml
You should see messages like below.
persistentvolume/postgres-pv-volume created
persistentvolumeclaim/postgres-persistent-volume-claim created
deployment.apps/postgres-deployment created
service/postgres-cluster-ip-service created
If you created the cluster folder correctly, you would see that your Postgres deployment pod is running. If the folder was not created with the right permissions, you would see an error in the container startup.
kubectl get pods
NAME                                   READY   STATUS    RESTARTS   AGE
postgres-deployment-54656d7fb9-tgcqt   1/1     Running   0          15s
If you ssh back into the Minikube cluster and look up the folder we created earlier, you would see that a sub-folder called 'postgres' has been created inside it. This is the location where all the Postgres database files are stored.
minikube ssh
                         _             _
            _         _ ( )           ( )
  ___ ___  (_)  ___  (_)| |/')  _   _ | |_      __
/' _ ` _ `\| |/' _ `\| || , <  ( ) ( )| '_`\  /'__`\
| ( ) ( ) || || ( ) || || |\`\ | (_) || |_) )(  ___/
(_) (_) (_)(_)(_) (_)(_)(_) (_)`\___/'(_,__/'`\____)

$ ls /var/lib/data/postgres_data
postgres
Exit out of the Minikube terminal by pressing Ctrl+D.
Please note that in your project directory, within the 'prod' folder, there is an optional file called 'component_postgres_stateful.yaml' – This is purely optional. If you use this file instead for creating our Postgres component, this would create our Postgres pod as a stateful replica set instead of as a pod from a deployment (stateless) – for this demo you should ideally use the 'component_postgres.yaml' file, to have the Postgres pod as a replica set of a stateless deployment.
2.2.4 Django job
We have modified the 'job_django.yaml' file so that we are able to perform the below.
- Create the PV and PVC to store the Django app static files to be served by the Nginx pods later on.
- Perform a 'collect static' command to create the production version of the static files, which are stored on a volume inside the Django pod container. Since this volume is mapped to the PVC which is linked to the PV – further linked to a node storage location, the static files are actually stored in the node location. The node location, like before, is '/var/lib/data/static_assets_data'.
- Perform the initial migration on the Postgres database – this functionality is unchanged from the local architecture.
The file 'job_django.yaml' inside the 'prod' folder looks like below.
###########################
# Persistent Volume
###########################
apiVersion: v1
kind: PersistentVolume
metadata:
  name: static-assets-pv-volume
  labels:
    type: local
spec:
  storageClassName: manual2
  capacity:
    storage: 100M
  accessModes:
    - ReadWriteOnce
  hostPath:
    path: "/var/lib/data/static_assets_data"
  persistentVolumeReclaimPolicy: Retain
---
###########################
# Persistent Volume Claim
###########################
apiVersion: v1
kind: PersistentVolumeClaim
metadata:
  name: static-assets-volume-claim
spec:
  storageClassName: manual2
  accessModes:
    - ReadWriteOnce
  resources:
    requests:
      storage: 100M
---
###########################
# Job
###########################
apiVersion: batch/v1
kind: Job
metadata:
  name: django-job
spec:
  template:
    spec:
      volumes:
      - name: django-static-data
        persistentVolumeClaim:
          claimName: static-assets-volume-claim
      containers:
      - name: django-job-container
        image: mausamgaurav/django_dev_image:latest
        volumeMounts:
          - name: django-static-data
            mountPath: /usr/src/app/static
            subPath: django_files
        command: ["bash", "-c", "/usr/src/app/entrypoint.sh"]
        env:
          - name: DJANGO_ENV
            valueFrom:
              configMapKeyRef:
                name: app-variables
                key: DJANGO_ENV
          - name: SECRET_KEY
            valueFrom:
              configMapKeyRef:
                name: app-variables
                key: SECRET_KEY
          - name: DEBUG
            valueFrom:
              configMapKeyRef:
                name: app-variables
                key: DEBUG
          - name: DJANGO_ALLOWED_HOSTS
            valueFrom:
              configMapKeyRef:
                name: app-variables
                key: DJANGO_ALLOWED_HOSTS
          - name: DB_ENGINE
            valueFrom:
              configMapKeyRef:
                name: app-variables
                key: DB_ENGINE
          - name: DB_DATABASE
            valueFrom:
              configMapKeyRef:
                name: app-variables
                key: DB_DATABASE
          - name: DB_USER
            valueFrom:
              configMapKeyRef:
                name: app-variables
                key: DB_USER
          - name: DB_PASSWORD
            valueFrom:
              secretKeyRef:
                name: app-secrets
                key: DB_PASSWORD
          - name: DB_HOST
            valueFrom:
              configMapKeyRef:
                name: app-variables
                key: DB_HOST
          - name: DB_PORT
            valueFrom:
              configMapKeyRef:
                name: app-variables
                key: DB_PORT
          - name: DJANGO_ADMIN_USER
            valueFrom:
              configMapKeyRef:
                name: app-variables
                key: DJANGO_ADMIN_USER
          - name: DJANGO_ADMIN_PASSWORD
            valueFrom:
              secretKeyRef:
                name: app-secrets
                key: DJANGO_ADMIN_PASSWORD
      restartPolicy: Never
  backoffLimit: 4
Note that we are mapping the PVC to the PV by using a custom storage class called 'manual2'. Also, we store the Django static assets in a sub-folder called 'django_files' inside our PVC->PV->node location.
Like before, please create the static_assets_data folder in your node and grant the required permissions and privileges.
minikube ssh
                         _             _
            _         _ ( )           ( )
  ___ ___  (_)  ___  (_)| |/')  _   _ | |_      __
/' _ ` _ `\| |/' _ `\| || , <  ( ) ( )| '_`\  /'__`\
| ( ) ( ) || || ( ) || || |\`\ | (_) || |_) )(  ___/
(_) (_) (_)(_)(_) (_)(_)(_) (_)`\___/'(_,__/'`\____)

$ sudo su
$ mkdir -p /var/lib/data/static_assets_data
$ chmod -R 777 /var/lib/data/static_assets_data
$ chown -R 999:999 /var/lib/data/static_assets_data
Note: For this to happen smoothly in that actual cloud deployment, I have created a file called 'create_node_storage_directories.sh' inside the Git repository 'prod' folder, which automates these steps.
Now we are ready to create our Kubernetes job. Exit out of the Minikube ssh terminal and perform the below command from the project folder.
kubectl apply -f prod/job_django.yaml
You should see the below messages appear.
persistentvolume/static-assets-pv-volume created
persistentvolumeclaim/static-assets-volume-claim created
job.batch/django-job created
You can check if the job was performed successfully as below.
kubectl get pods
NAME                                   READY   STATUS      RESTARTS   AGE
django-job-7qzbm                       0/1     Completed   0          21s
postgres-deployment-54656d7fb9-tgcqt   1/1     Running     0          6m42s
The Django job pod should show a status of completed. Further, if the static assets were created and stored on the PV, we should be able to see them on the node storage location. Ssh into Minkube again, to have a peek into the required folder. You would see that a subfolder called 'django_files' was created.
                         _             _
            _         _ ( )           ( )
  ___ ___  (_)  ___  (_)| |/')  _   _ | |_      __
/' _ ` _ `\| |/' _ `\| || , <  ( ) ( )| '_`\  /'__`\
| ( ) ( ) || || ( ) || || |\`\ | (_) || |_) )(  ___/
(_) (_) (_)(_)(_) (_)(_)(_) (_)`\___/'(_,__/'`\____)

$ ls /var/lib/data/static_assets_data
django_files
Brilliant! This means we are now ready to serve the static assets from the Nginx pods. Exit out of the Minikube terminal by pressing Ctrl+D.
2.2.5 Nginx deployment
We first need to create an Nginx container image, which is able to serve the static assets. Change the 'nginx.conf' file inside the 'nginx' folder in the project directory like below.
server {

    listen 8000;

    #################################
    # SERVING DJANGO STATIC ASSETS #
    #################################

    location /static/admin/ {
        alias /usr/src/app/django_files/static/admin/;
    }

    location /static/rest_framework/ {
        alias /usr/src/app/django_files/static/rest_framework/;
    }

}
Essentially what this 'nginx.conf file' does is that it instructs the Nginx containers to listen on port 8000 which is the same port as our Django application and it specifies two specific routing rules. The Nginx container has only one purpose – that is to serve the two folders locations – '/usr/src/app/django_files/static/admin/' and '/usr/src/app/django_files/static/rest_framework/' on the containers. Any requests to '/static/admin/' and '/static/rest_framework/' are routed to these folders respectively. In our Nginx deployment below, these container volumes are mapped to a PVC linked to a PV. Therefore, when the Nginx pods start on Kubernetes, traffic to the routes are actually directed to this PVC location. This PVC is the same PVC created by the Django job object. Thus we are able to serve the Django static assets from Nginx.
Now it is time to build the custom Nginx image and push that to Docker Hub. Build the image like below.
docker build -t mausamgaurav/nginx_dev_image:latest ./nginx
Don't forget to use your own Docker Hub ids for tagging the images. Note that the Dockerfile inside the 'nginx' folder remains unchanged from the previous article. Further, in the tag name, we are using the word 'dev' to be consistent with other images we built so far.
Once the image has been successfully built, push it to Docker Hub.
docker push mausamgaurav/nginx_dev_image:latest
The file 'component_static_assets.yaml' inside the 'prod' folder is the one that would create the Nginx deployment in our Kubernetes cluster. The file looks like below.
###########################
# Deployment
###########################
apiVersion: apps/v1
kind: Deployment
metadata:
  name: static-assets-nginx-deployment
spec:
  replicas: 3
  selector:
    matchLabels:
      component: static-assets
  template:
    metadata:
      labels:
        component: static-assets
    spec:
      volumes:
        - name: django-static-data
          persistentVolumeClaim:
            claimName: static-assets-volume-claim
      containers:
        - name: nginx-container
          image: mausamgaurav/nginx_dev_image:latest
          ports:
            - containerPort: 8000
          volumeMounts:
            - name: django-static-data
              mountPath: /usr/src/app/django_files/static
              subPath: django_files
---
###########################
# Cluster IP Service
###########################
apiVersion: v1
kind: Service
metadata:
  name: static-assets-cluster-ip-service
spec:
  type: ClusterIP
  selector:
    component: static-assets
  ports:
    - port: 8000
      targetPort: 8000
Essentially,
- This creates the Nginx deployment called 'static-assets-nginx-deployment' which creates pods that use the same PVC created by the Django job earlier. Since the Django job was able to create the static assets in the same PVC, these can now be served by the Nginx pods.
- A ClusterIP service called 'static-assets-cluster-ip-service' is attached to the pods created by the deployment. This is so that the Ingress is able to communicate with these pods.
Create the Kubernetes Nginx (Static Assets) component like below.
kubectl apply -f prod/component_static_assets.yaml
You should see the below messages.
deployment.apps/static-assets-nginx-deployment created
service/static-assets-cluster-ip-service create
If you inspect the pods in the default namespace, you would see that our Nginx pods are running.
kubectl get pods
NAME                                             READY   STATUS      RESTARTS   AGE
django-job-7qzbm                                 0/1     Completed   0          7m57s
postgres-deployment-54656d7fb9-tgcqt             1/1     Running     0          15m
static-assets-nginx-deployment-69b476fdd-phf4b   1/1     Running     0          110s
static-assets-nginx-deployment-69b476fdd-vndwc   1/1     Running     0          110s
static-assets-nginx-deployment-69b476fdd-xltlv   1/1     Running     0          110s
2.2.6 Django deployment
The Django deployment has the following change from last time. Essentially we are using the recommended production python server, Gunicorn to start our Django application within our Django containers.
  .....
    spec:
      containers:
        - name: django-container
          ....
          command: ["bash", "-c", "gunicorn mainapp.wsgi:application --bind 0.0.0.0:8000"]
          ....
The entire content of the file, 'prod/component_django.yaml', looks like below.
###########################
# Deployment
###########################
apiVersion: apps/v1
kind: Deployment
metadata:
  name: django-deployment
spec:
  replicas: 3
  selector:
    matchLabels:
      component: django
  template:
    metadata:
      labels:
        component: django
    spec:
      containers:
        - name: django-container
          image: mausamgaurav/django_dev_image:latest
          ports:
            - containerPort: 8000
          command: ["bash", "-c", "gunicorn mainapp.wsgi:application --bind 0.0.0.0:8000"]
          env:
            - name: DJANGO_ENV
              valueFrom:
                configMapKeyRef:
                  name: app-variables
                  key: DJANGO_ENV
            - name: SECRET_KEY
              valueFrom:
                configMapKeyRef:
                  name: app-variables
                  key: SECRET_KEY
            - name: DEBUG
              valueFrom:
                configMapKeyRef:
                  name: app-variables
                  key: DEBUG
            - name: DJANGO_ALLOWED_HOSTS
              valueFrom:
                configMapKeyRef:
                  name: app-variables
                  key: DJANGO_ALLOWED_HOSTS
            - name: DB_ENGINE
              valueFrom:
                configMapKeyRef:
                  name: app-variables
                  key: DB_ENGINE
            - name: DB_DATABASE
              valueFrom:
                configMapKeyRef:
                  name: app-variables
                  key: DB_DATABASE
            - name: DB_USER
              valueFrom:
                configMapKeyRef:
                  name: app-variables
                  key: DB_USER
            - name: DB_PASSWORD
              valueFrom:
                secretKeyRef:
                  name: app-secrets
                  key: DB_PASSWORD
            - name: DB_HOST
              valueFrom:
                configMapKeyRef:
                  name: app-variables
                  key: DB_HOST
            - name: DB_PORT
              valueFrom:
                configMapKeyRef:
                  name: app-variables
                  key: DB_PORT

---
###########################
# Cluster IP Service
###########################
apiVersion: v1
kind: Service
metadata:
  name: django-cluster-ip-service
spec:
  type: ClusterIP
  selector:
    component: django
  ports:
    - port: 8000
      targetPort: 8000
Note that, we are utilising the image which we built already – mausamgaurav/django_dev_image:latest. This image tag contains the word 'dev'. We are using still using this dev image as no further changes are required in the image for the production build.
Start the Kubernetes Django component with the below command.
kubectl apply -f prod/component_django.yaml
You should see the Django pods running without any issues.
kubectl get pods
NAME                                             READY   STATUS      RESTARTS   AGE
django-deployment-7487d6977b-2hzf5               1/1     Running     0          11s
django-deployment-7487d6977b-pd55p               1/1     Running     0          11s
django-deployment-7487d6977b-x8xl7               1/1     Running     0          11s
django-job-7qzbm                                 0/1     Completed   0          11m
postgres-deployment-54656d7fb9-tgcqt             1/1     Running     0          17m
static-assets-nginx-deployment-69b476fdd-phf4b   1/1     Running     0          2m26s
static-assets-nginx-deployment-69b476fdd-vndwc   1/1     Running     0          2m26s
static-assets-nginx-deployment-69b476fdd-xltlv   1/1     Running     0          2m26s
2.2.7 React deployment
The React deployment is unchanged from last time. Start the component, like before.
kubectl apply -f prod/component_react.yaml
You should see the React pods running without any issues.
kubectl get pods
NAME                                             READY   STATUS      RESTARTS   AGE
django-deployment-7487d6977b-2hzf5               1/1     Running     0          2m46s
django-deployment-7487d6977b-pd55p               1/1     Running     0          2m46s
django-deployment-7487d6977b-x8xl7               1/1     Running     0          2m46s
django-job-7qzbm                                 0/1     Completed   0          12m
postgres-deployment-54656d7fb9-tgcqt             1/1     Running     0          19m
react-deployment-56c494dbb-5fnd9                 1/1     Running     0          67s
react-deployment-56c494dbb-k9c97                 1/1     Running     0          67s
react-deployment-56c494dbb-xf7dg                 1/1     Running     0          67s
static-assets-nginx-deployment-69b476fdd-phf4b   1/1     Running     0          4m59s
static-assets-nginx-deployment-69b476fdd-vndwc   1/1     Running     0          4m59s
static-assets-nginx-deployment-69b476fdd-xltlv   1/1     Running     0          4m59s
2.2.8 Ingress
First, perform the below command to enable ingress on your new minikube cluster, if it is not enabled by default from last time.
minikube addons enable ingress
The routing configuration of our Ingress service would change slightly from last time. This is because we would be serving the static assets from the Nginx pods and not the Django development server. The routing changes in the file 'prod/ingress_service.yaml' are below. As you could see we are routing requests for the Django static assets to the Nginx pod Cluster IP service called 'static-assets-cluster-ip-service'.
...
          ##########################
          # STATIC FOLDER ROUTING #
          ##########################
          - path: /static/admin/
            backend:
              serviceName: static-assets-cluster-ip-service
              servicePort: 8000
          - path: /static/rest_framework/
            backend:
              serviceName: static-assets-cluster-ip-service
              servicePort: 8000
....
The content of the entire file looks like below.
apiVersion: networking.k8s.io/v1beta1
kind: Ingress
metadata:
  name: ingress-service
  annotations:
    kubernetes.io/ingress.class: 'nginx'
spec:
  rules:
    - http:
        paths:
          ################
          # URL ROUTING #
          ################
          - path: /admin
            backend:
              serviceName: django-cluster-ip-service
              servicePort: 8000
          - path: /api
            backend:
              serviceName: django-cluster-ip-service
              servicePort: 8000
          ##########################
          # STATIC FOLDER ROUTING #
          ##########################
          - path: /static/admin/
            backend:
              serviceName: static-assets-cluster-ip-service
              servicePort: 8000
          - path: /static/rest_framework/
            backend:
              serviceName: static-assets-cluster-ip-service
              servicePort: 8000
          - path: /static/
            backend:
              serviceName: react-cluster-ip-service
              servicePort: 3000
          - path: https://datagraphi.s3.amazonaws.com/media/
            backend:
              serviceName: react-cluster-ip-service
              servicePort: 3000
          ################
          # URL ROUTING #
          ################
          - path: /
            backend:
              serviceName: react-cluster-ip-service
              servicePort: 3000
Start the Kubernetes Ingress service with the command below.
kubectl apply -f prod/ingress_service.yaml
You should see a message similar to the below appear.
Warning: networking.k8s.io/v1beta1 Ingress is deprecated in v1.19+, unavailable in v1.22+; use networking.k8s.io/v1 Ingress
ingress.networking.k8s.io/ingress-service configured
Now it's time to test our new production-architecture!
Get the IP address of our Minkube cluster as below.
minikube ip
192.168.99.109
Open this IP address in your browser.
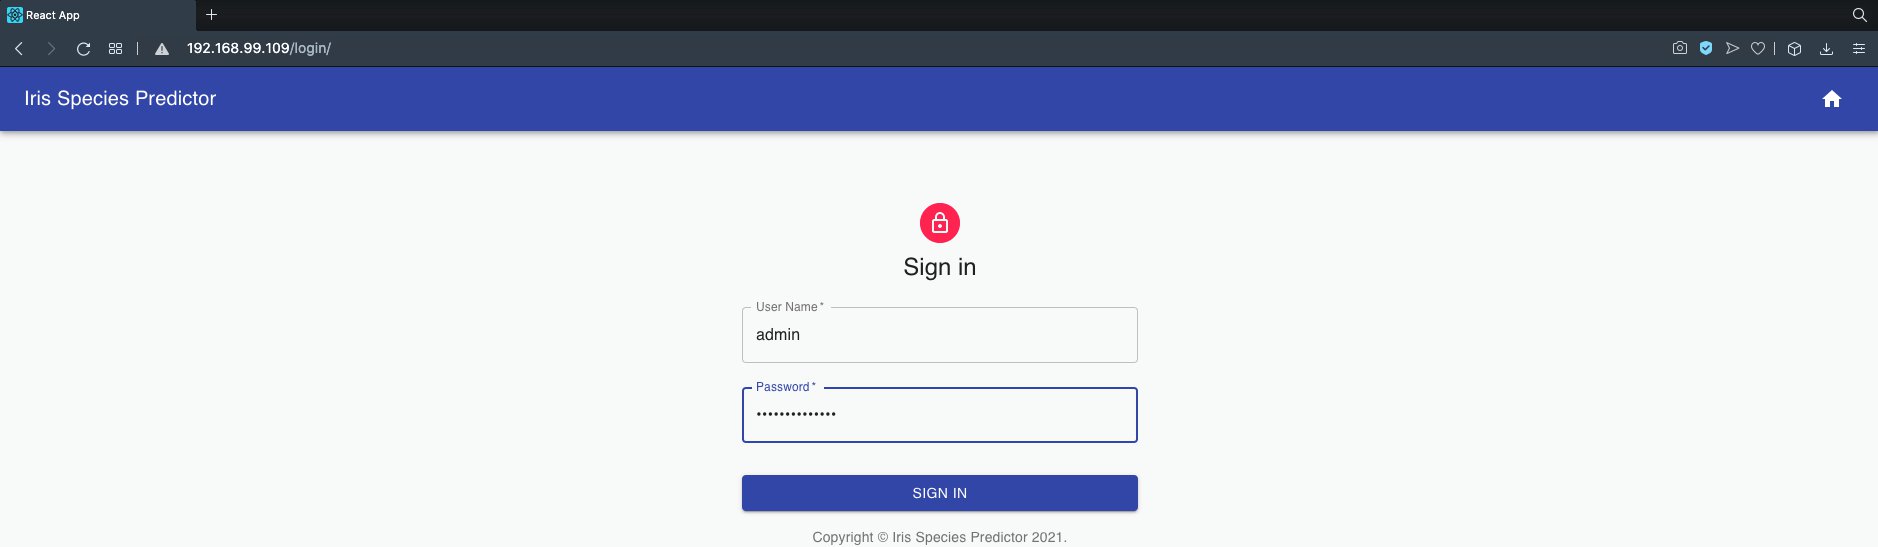
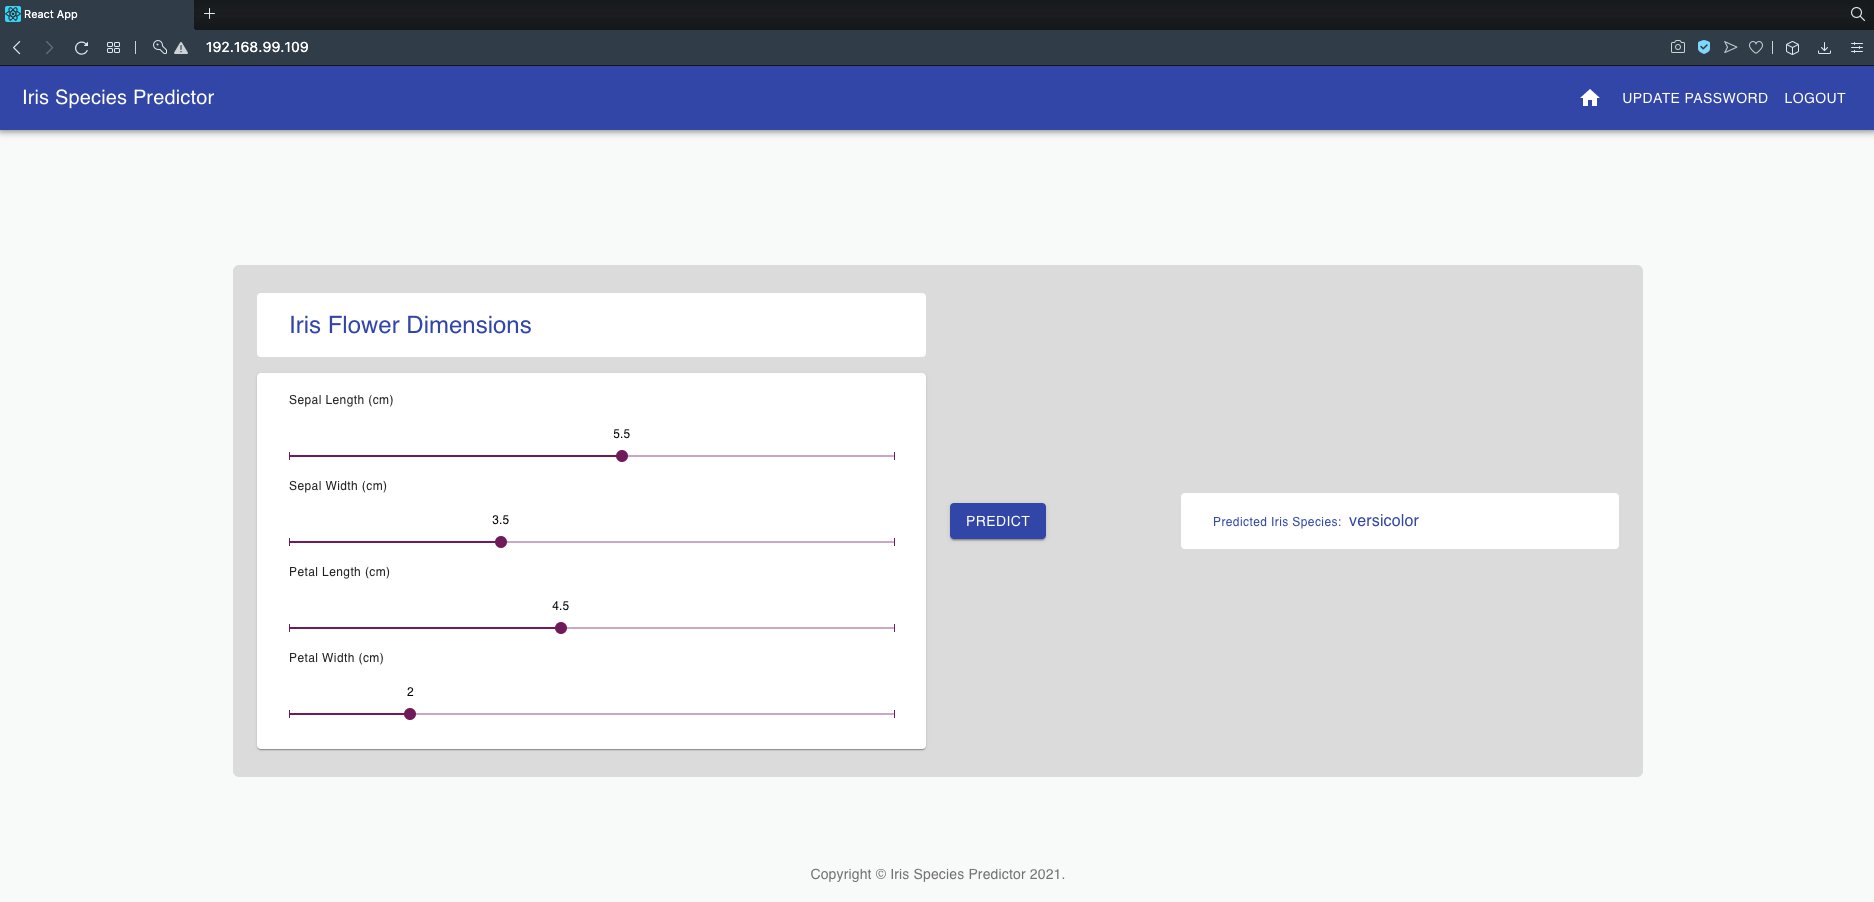
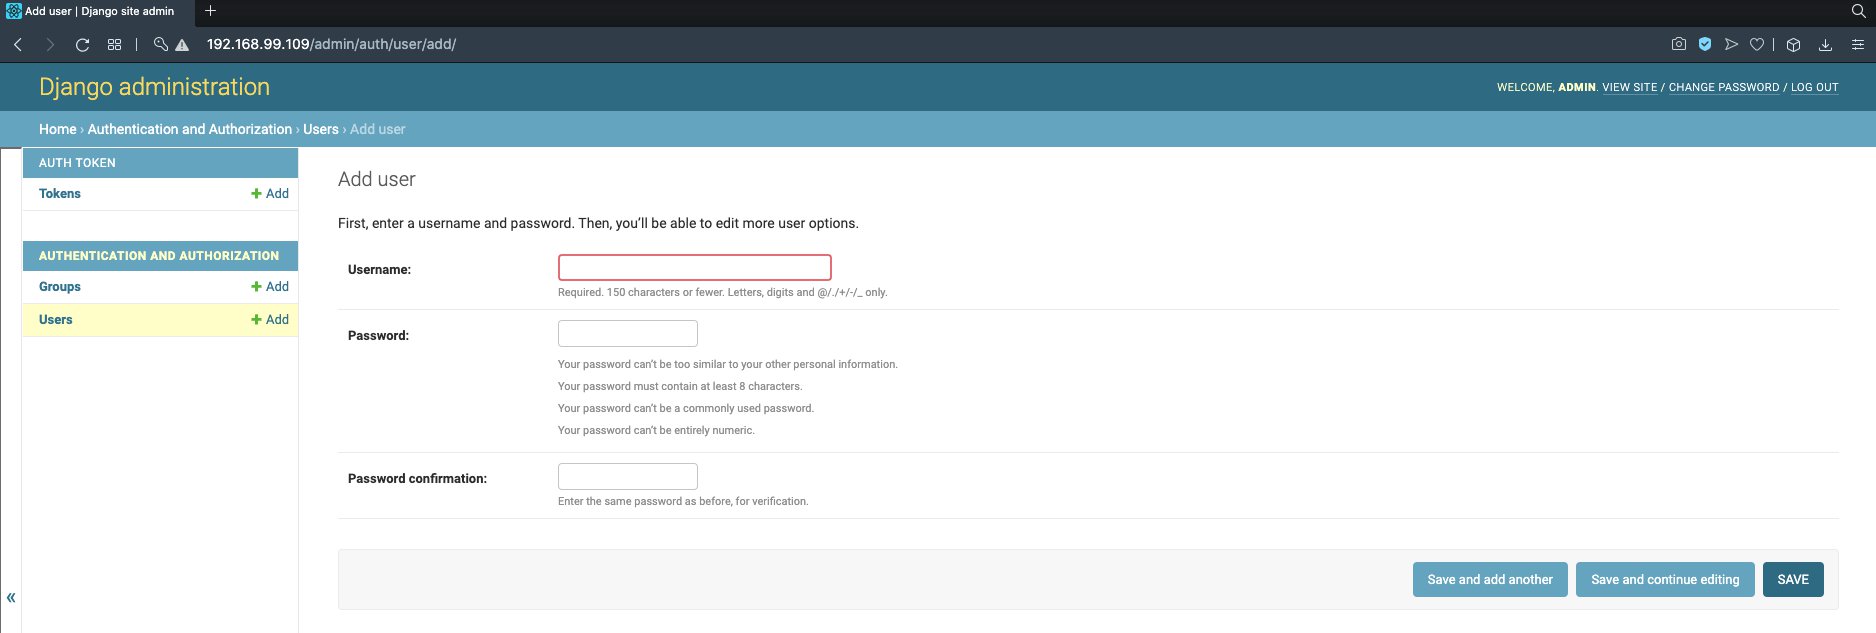

You would see that with our new production-architecture, where we have solved the issues of serving static files from a production server and allowed easy access to the Postgres database files, all our functionality is working flawlessly! 🍺🍺
With the production architecture tested, we are now just inches away from deploying our Machine Learning app on the cloud. For our demonstration, we would use Google Kubernetes Engine (GKE) from Google Cloud.
2.3 Google Cloud Deployment with Google Kubernetes Engine
Sign-up to google cloud, if you haven't already. At the time of writing this article, Google Cloud offers 90 days of free trial with $300 of free credit. Note that GKE is not on the free services list. However, you may still be able to use that for free with your free credit. You would also need a valid credit card to use the free service. Once done setting up your Google Cloud free service, login to Google Cloud and navigate to your cloud console.

2.3.3 Create Google Cloud Kubernetes Cluster
When you first go to your console, you would first need to create a project. By default, you would have a project created for you. Change the name of the project to something like 'IrisPredictionAppProject', so that you can easily identify it later on.
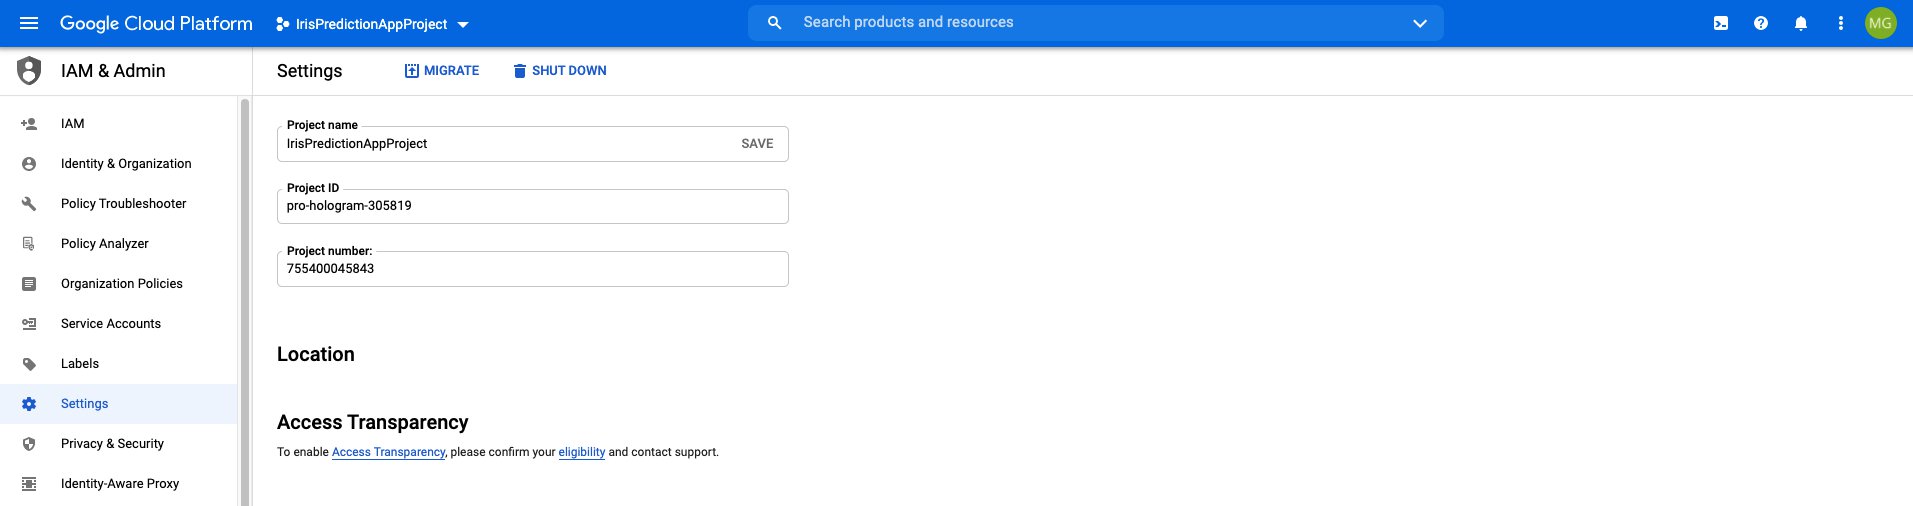
Now from the left sidebar, you need to go to the section Compute -> Kubernetes Engine and click on Clusters.
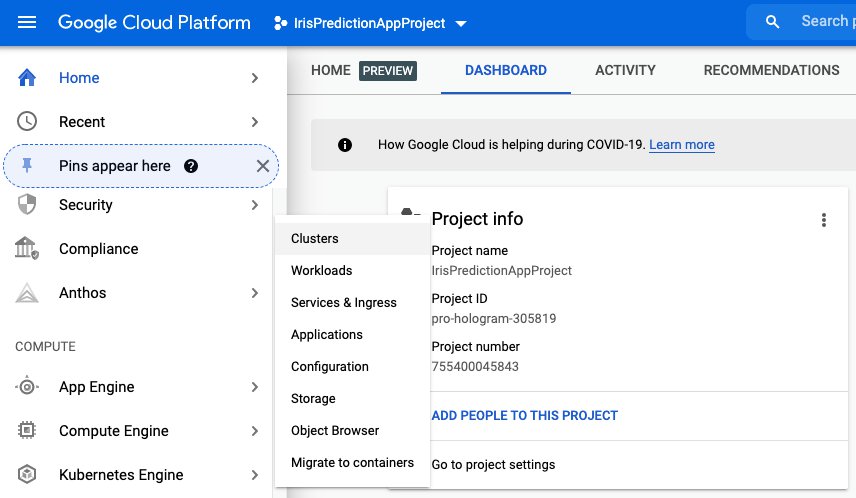
Then on the window that opens, you need to press the create button.
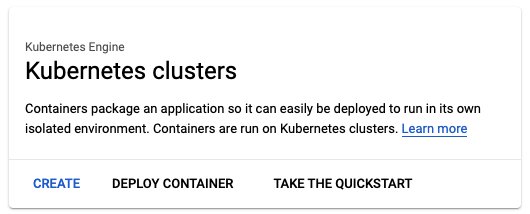
On the pop-up windows appearing after the previous step, you need to choose the standard option and click configure.
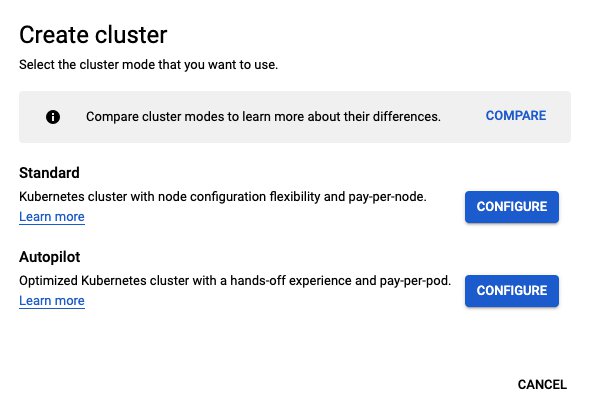
On the next windows, change the cluster name to something like 'iris-flower-cluster'. Select the Zonal option and choose a Zone. You should choose a zone location which is nearest to you and offers you the best price. However, I am going with the default option as this is usually the cheapest option.

Do-not press the create button yet as by default the Google cluster starts with 3 nodes. Since we have a database inside our nodes, we cannot have multiple nodes because this can cause discrepancies in the database from one node to the other. For our demonstration, we designed our production architecture to be as simple as possible, which would work without any issues from a single node. Note that our simple example would work even with 3 nodes, however, you would have discrepancies in data – For example, you may register one user, and their information would be stored on one of the nodes. If however, that user, when using our prediction app from their browser, ends up using another node, they would not be able to log in. You need to change the default config of your cluster to one node before pressing the create button. To do this, go to the default-pool option and change the number of clusters to 1.
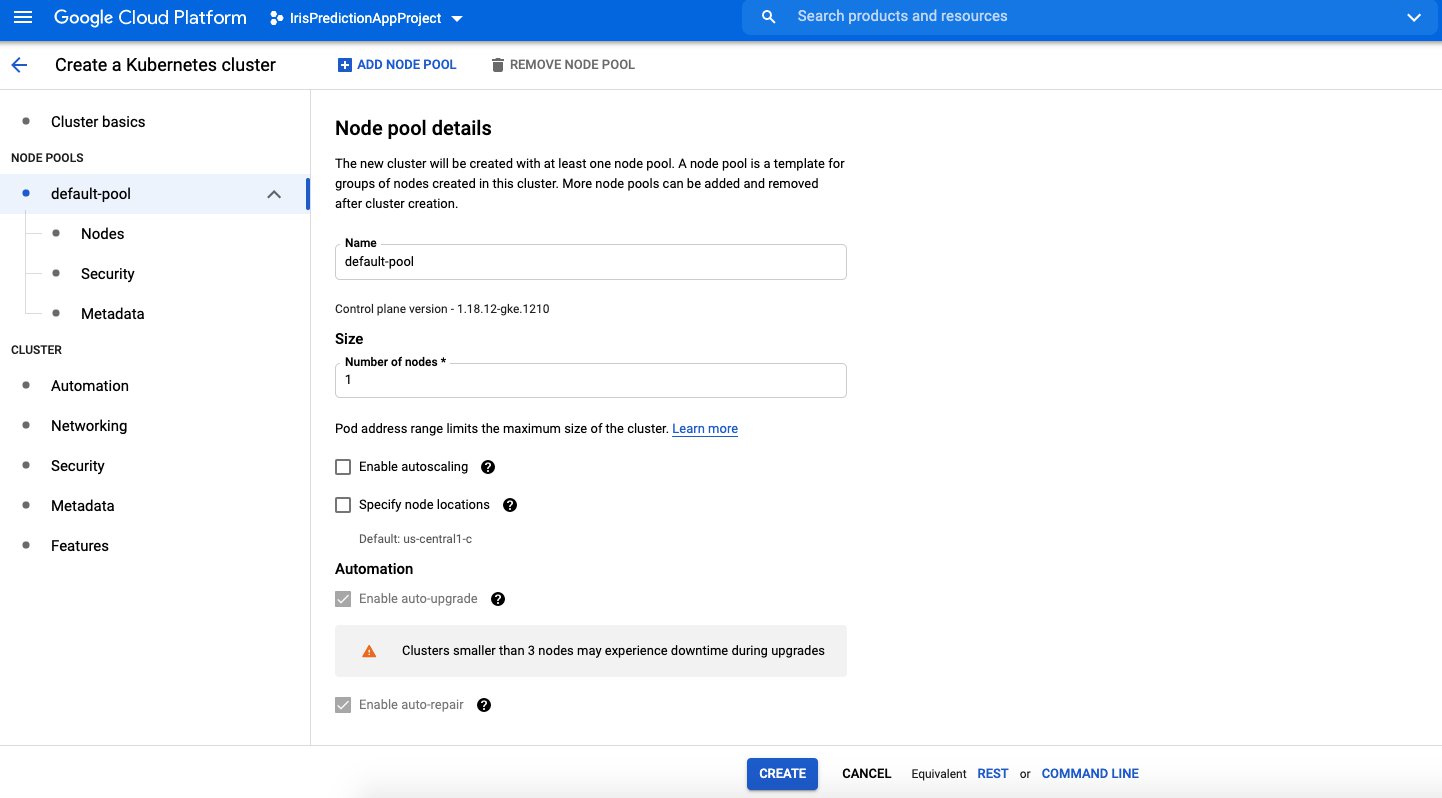
If you go to the Nodes option, you would see further options to customise your node machine.
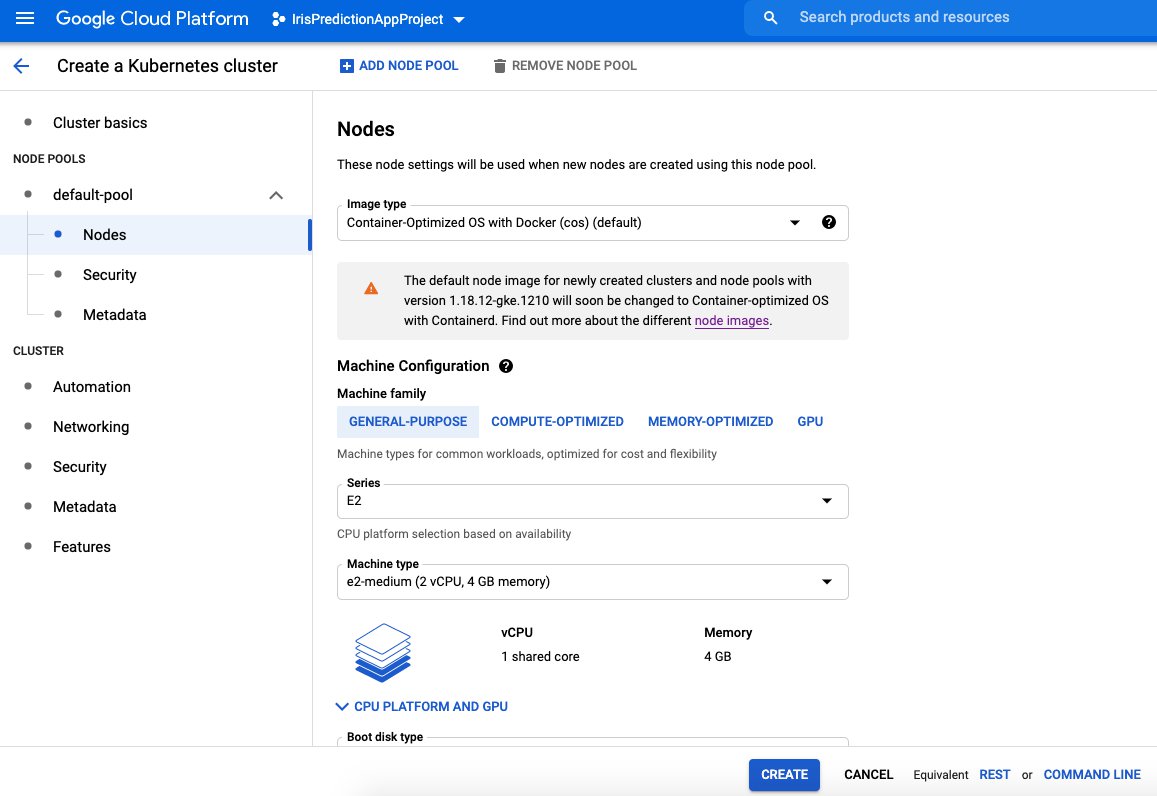
I am using the default options. Press create. This would take you to your cluster screen and you should see a spinner which means that your cluster is being created. This would take a few minutes.
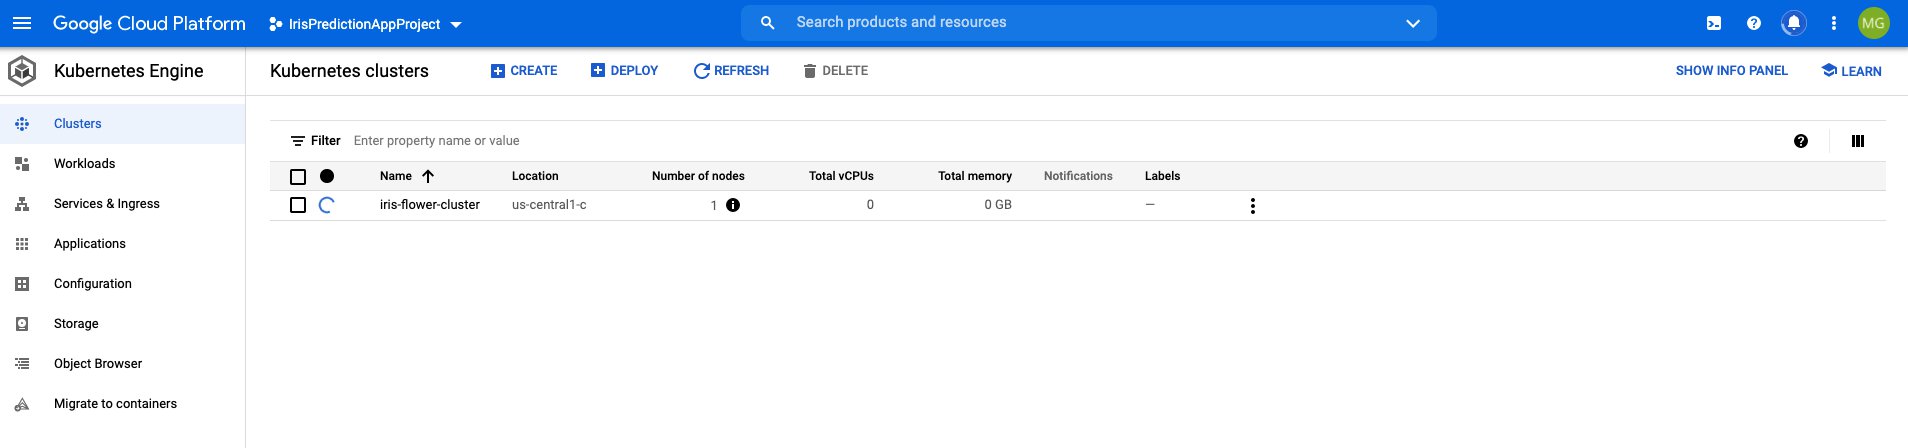
Once your cluster has been created, your spinner would stop.

2.3.4 Connect to GKE Cluster
Now you need to press the 3 dots on the right of your cluster information and press connect.
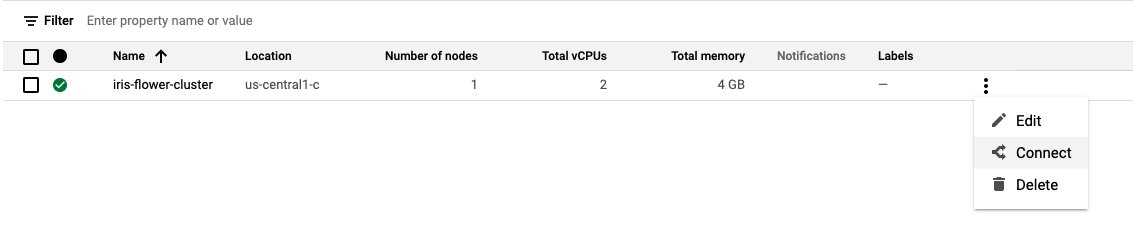
On the pop window that opens up, now you need to press the 'Run in Cloud Shell' option.
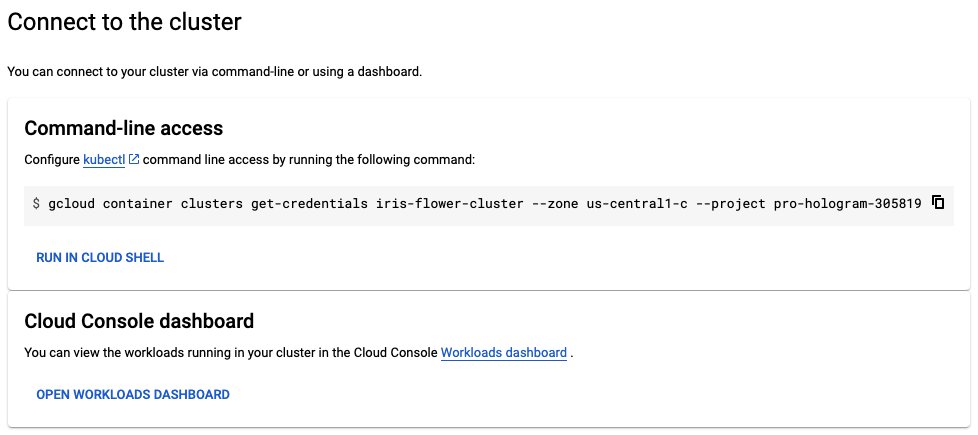
Hit enter when the cloud shell first opens.
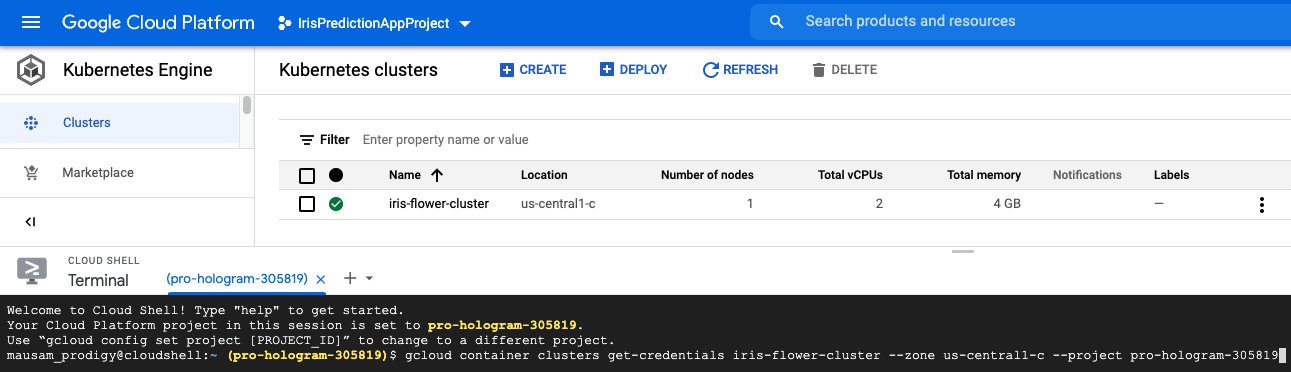
You would be greeted with a pop up asking for your permission to authorize the cloud shell to connect to your cluster.
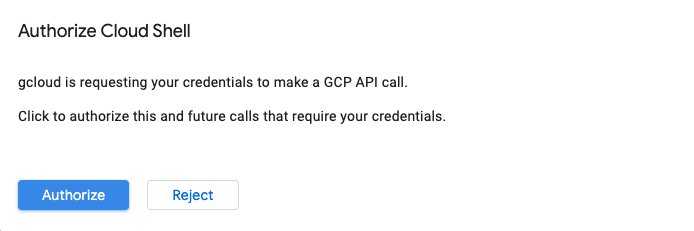
Press the Authorize button.
2.3.4 Check Kubectl
Once you have been authorized the first thing you need to check is whether you are able to run kubectl commands on your cluster. The way to check this is to perform the below command to see the version of kubectl on both your client and server.
kubectl version --short
You should see the version of both your client and the server as below.
Client Version: v1.20.2
Server Version: v1.18.12-gke.1210
If you see an error for the Server version such as 'Unable to connect to the server: dial tcp ... i/o timeout', this means you need to provision your cluster for kubectl again. You may need to perform the below.
gcloud container clusters get-credentials [cluster name] --zone [zone]
The other option is to delete your cluster and create it again and this should fix the issue.
2.3.5 Create Node Storage Locations
Before creating any of our components, first, let us create the folders required for Postgres and the Static assets on the single node in our cluster. Perform the below command to see the name-identifier of the node running on our cluster.
kubectl get nodes
You would see the information for our node similar to below.
NAME                                                 STATUS   ROLES    AGE   VERSION
gke-iris-flower-cluster-default-pool-08563020-64jk   Ready    <none>   29m   v1.18.12-gke.1210
Now we need to connect to our node as below.
gcloud compute ssh gke-iris-flower-cluster-default-pool-08563020-64jk --zone us-central1-c
Note that you would need to provide your own node name and cluster zone. Once we are connected, we can use our automated script to create the required folders with the right permissions. You can download this sh file from GitHub directly as below.
wget https://raw.githubusercontent.com/MausamGaurav/KubernetesDjangoReactProject/master/prod/create_node_storage_directories.sh
Now perform the below command.
sudo bash create_node_storage_directories.sh
Our directories must have been created after the above step. You can check whether the directories have been created as below.
ls -lh /var/lib/data/
You would see that our directories have been created with the right permissions.
total 8.0K
drwxrwxrwx 2 999 999 4.0K Feb 26 14:04 postgres_data
drwxrwxrwx 2 999 999 4.0K Feb 26 14:04 static_assets_data
2.3.6 Create Kubernetes Components
Exit out of our node terminal by pressing Ctrl+D. Your cloud shell has git installed by default. Therefore you can clone our git directory straight away. Clone the directory as below.
git clone https://github.com/MausamGaurav/KubernetesDjangoReactProject.git
Once the directory has been cloned, navigate to our project directory.
cd KubernetesDjangoReactProject/
Now we are ready to create our Kubernetes components.
2.3.6.1 Create secrets and config map
mausam_prodigy@cloudshell:~/KubernetesDjangoReactProject (pro-hologram-305819)$ kubectl apply -f prod/app_secrets.yaml
secret/app-secrets created
mausam_prodigy@cloudshell:~/KubernetesDjangoReactProject (pro-hologram-305819)$ kubectl apply -f prod/app_variables.yaml
configmap/app-variables created
Note that you should change the value of the variable DJANGO_ALLOWED_HOSTS in the 'app_variables.yaml' file to whatever domain you are planning to host your app on (such as "www.yourwebsite.com"). However, since for this demonstration, I do not plan to buy a domain name, I have not changed the app_variables file.
2.3.6.2 Create Postgres component
mausam_prodigy@cloudshell:~/KubernetesDjangoReactProject (pro-hologram-305819)$ kubectl apply -f prod/component_postgres.yaml
persistentvolume/postgres-pv-volume created
persistentvolumeclaim/postgres-persistent-volume-claim created
deployment.apps/postgres-deployment created
service/postgres-cluster-ip-service created
Wait for some time and you would see that the Postgres component is running without any issues.
mausam_prodigy@cloudshell:~/KubernetesDjangoReactProject (pro-hologram-305819)$ kubectl get pods
NAME                                   READY   STATUS    RESTARTS   AGE
postgres-deployment-5654fbfb7b-cj9cm   1/1     Running   0          29s
2.3.6.3 Perform the Django job
mausam_prodigy@cloudshell:~/KubernetesDjangoReactProject (pro-hologram-305819)$ kubectl apply -f prod/job_django.yaml
persistentvolume/static-assets-pv-volume created
persistentvolumeclaim/static-assets-volume-claim created
job.batch/django-job created
You'll see that the Django job was performed successfully without any errors.
mausam_prodigy@cloudshell:~/KubernetesDjangoReactProject (pro-hologram-305819)$ kubectl get pods
NAME                                   READY   STATUS      RESTARTS   AGE
django-job-mmhxw                       0/1     Completed   0          27s
postgres-deployment-5654fbfb7b-cj9cm   1/1     Running     0          3m30s
2.3.6.4 Create the static assets Nginx component
mausam_prodigy@cloudshell:~/KubernetesDjangoReactProject (pro-hologram-305819)$ kubectl apply -f prod/component_static_assets.yaml
deployment.apps/static-assets-nginx-deployment created
service/static-assets-cluster-ip-service created
You'll see that the static assets Nginx pods are running successfully.
mausam_prodigy@cloudshell:~/KubernetesDjangoReactProject (pro-hologram-305819)$ kubectl get pods
NAME                                              READY   STATUS      RESTARTS   AGE
django-job-mmhxw                                  0/1     Completed   0          6m8s
postgres-deployment-5654fbfb7b-cj9cm              1/1     Running     0          9m11s
static-assets-nginx-deployment-69ffb86c9f-2pc8b   1/1     Running     0          4m
static-assets-nginx-deployment-69ffb86c9f-gt2jn   1/1     Running     0          4m
static-assets-nginx-deployment-69ffb86c9f-rjct2   1/1     Running     0          4m
2.3.6.5 Create the Django component
mausam_prodigy@cloudshell:~/KubernetesDjangoReactProject (pro-hologram-305819)$ kubectl apply -f prod/component_django.yaml
deployment.apps/django-deployment created
service/django-cluster-ip-service created
You'll see that the Django pods are running successfully.
mausam_prodigy@cloudshell:~/KubernetesDjangoReactProject (pro-hologram-305819)$ kubectl get pods
NAME                                              READY   STATUS      RESTARTS   AGE
django-deployment-664fcc6c7f-5lcjw                1/1     Running     0          29s
django-deployment-664fcc6c7f-86lsk                1/1     Running     0          29s
django-deployment-664fcc6c7f-jsvhh                1/1     Running     0          29s
django-job-mmhxw                                  0/1     Completed   0          7m48s
postgres-deployment-5654fbfb7b-cj9cm              1/1     Running     0          10m
static-assets-nginx-deployment-69ffb86c9f-2pc8b   1/1     Running     0          5m40s
static-assets-nginx-deployment-69ffb86c9f-gt2jn   1/1     Running     0          5m40s
static-assets-nginx-deployment-69ffb86c9f-rjct2   1/1     Running     0          5m40s
2.3.6.6 Create the React component
mausam_prodigy@cloudshell:~/KubernetesDjangoReactProject (pro-hologram-305819)$ kubectl apply -f prod/component_react.yaml
deployment.apps/react-deployment created
service/react-cluster-ip-service created
You'll see that the React pods are running successfully.
mausam_prodigy@cloudshell:~/KubernetesDjangoReactProject (pro-hologram-305819)$ kubectl get pods
NAME                                              READY   STATUS      RESTARTS   AGE
django-deployment-664fcc6c7f-5lcjw                1/1     Running     0          2m30s
django-deployment-664fcc6c7f-86lsk                1/1     Running     0          2m30s
django-deployment-664fcc6c7f-jsvhh                1/1     Running     0          2m30s
django-job-mmhxw                                  0/1     Completed   0          9m49s
postgres-deployment-5654fbfb7b-cj9cm              1/1     Running     0          12m
react-deployment-84f98b8f8f-7d54w                 1/1     Running     0          77s
react-deployment-84f98b8f8f-dw824                 1/1     Running     0          77s
react-deployment-84f98b8f8f-j8bs8                 1/1     Running     0          77s
static-assets-nginx-deployment-69ffb86c9f-2pc8b   1/1     Running     0          7m41s
static-assets-nginx-deployment-69ffb86c9f-gt2jn   1/1     Running     0          7m41s
static-assets-nginx-deployment-69ffb86c9f-rjct2   1/1     Running     0          7m41s
2.3.6.7 Create Ingress
On Google Cloud Kubernetes you would need to run a few extra commands before starting the 'ingress-nginx' service. As per the official documentation at the time of writing this article, you first need to perform the below command from your Google Cloud shell terminal.
kubectl create clusterrolebinding cluster-admin-binding \
  --clusterrole cluster-admin \
  --user $(gcloud config get-value account)
The above command should run successfully and you would see messages similar to below appear.
Your active configuration is: [cloudshell-17316]
clusterrolebinding.rbac.authorization.k8s.io/cluster-admin-binding created
Next, you need to run this command.
kubectl apply -f https://raw.githubusercontent.com/kubernetes/ingress-nginx/controller-v0.44.0/deploy/static/provider/cloud/deploy.yaml
Upon execution, you would see messages like the below appear.
namespace/ingress-nginx created
serviceaccount/ingress-nginx created
configmap/ingress-nginx-controller created
clusterrole.rbac.authorization.k8s.io/ingress-nginx created
clusterrolebinding.rbac.authorization.k8s.io/ingress-nginx created
role.rbac.authorization.k8s.io/ingress-nginx created
rolebinding.rbac.authorization.k8s.io/ingress-nginx created
service/ingress-nginx-controller-admission created
service/ingress-nginx-controller created
deployment.apps/ingress-nginx-controller created
validatingwebhookconfiguration.admissionregistration.k8s.io/ingress-nginx-admission created
serviceaccount/ingress-nginx-admission created
clusterrole.rbac.authorization.k8s.io/ingress-nginx-admission created
clusterrolebinding.rbac.authorization.k8s.io/ingress-nginx-admission created
role.rbac.authorization.k8s.io/ingress-nginx-admission created
rolebinding.rbac.authorization.k8s.io/ingress-nginx-admission created
job.batch/ingress-nginx-admission-create created
job.batch/ingress-nginx-admission-patch created
This means we are ready to create the Ingress component. Like before execute the kubectl apply command on the 'ingress_service.yaml' file.
mausam_prodigy@cloudshell:~/KubernetesDjangoReactProject (pro-hologram-305819)$ kubectl apply -f prod/ingress_service.yaml
ingress.networking.k8s.io/ingress-service created
After the above step, our application should be up and running!
If you go to the Google Cloud Kubernetes dashboard, you would see that an object called 'ingress-nginx-controller' has been created with a status 'OK'.
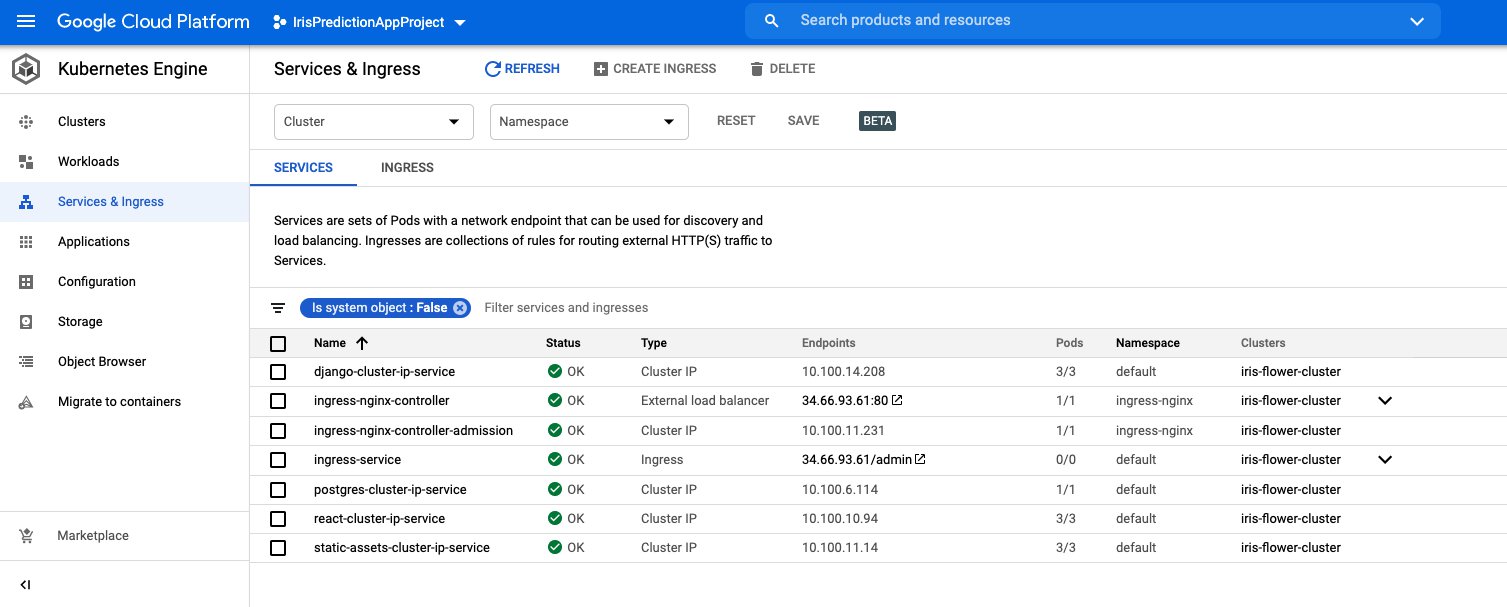
You need to open the IP address in the 'Endpoints' description of this controller object in your browser. And magic! – you'll see that our machine learning application is running on the cloud.
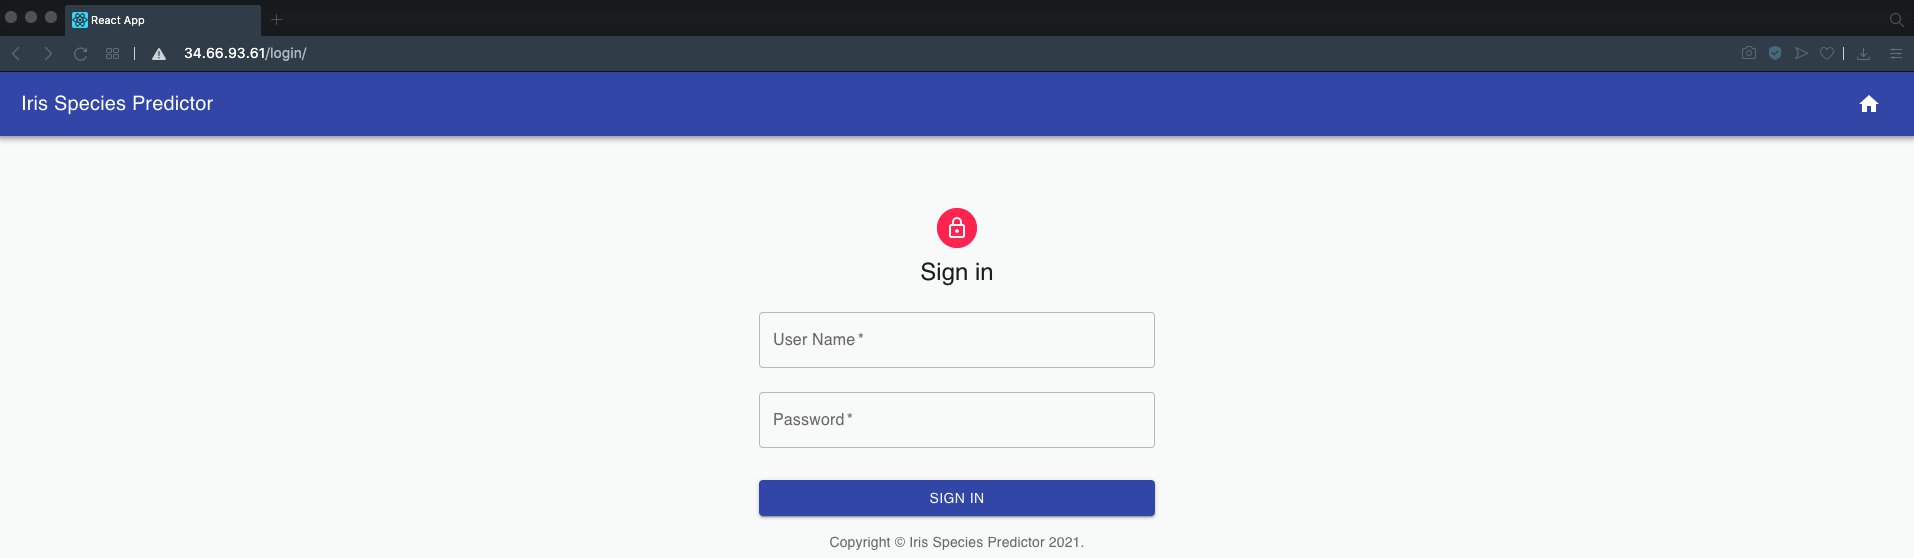
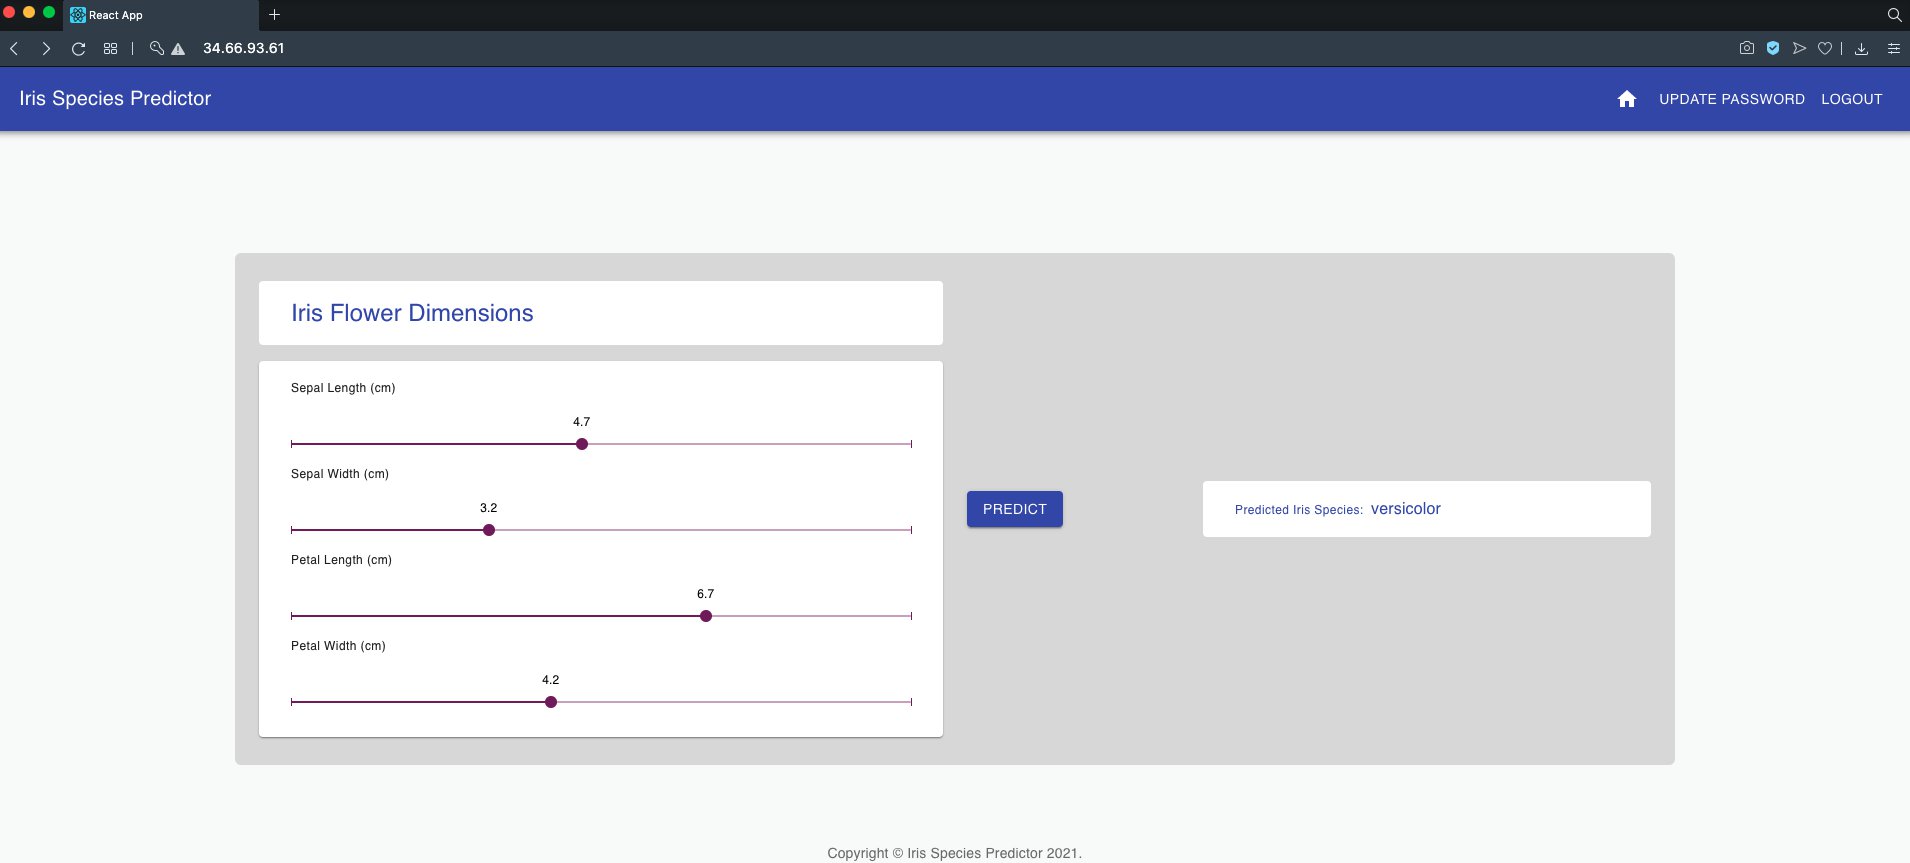
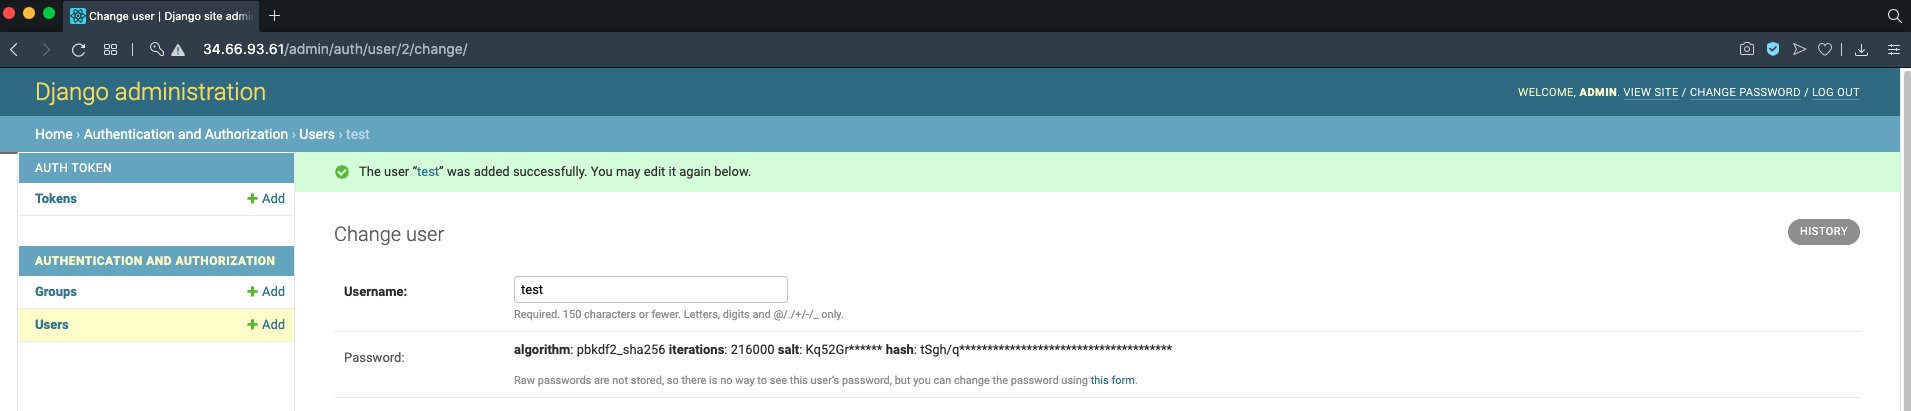

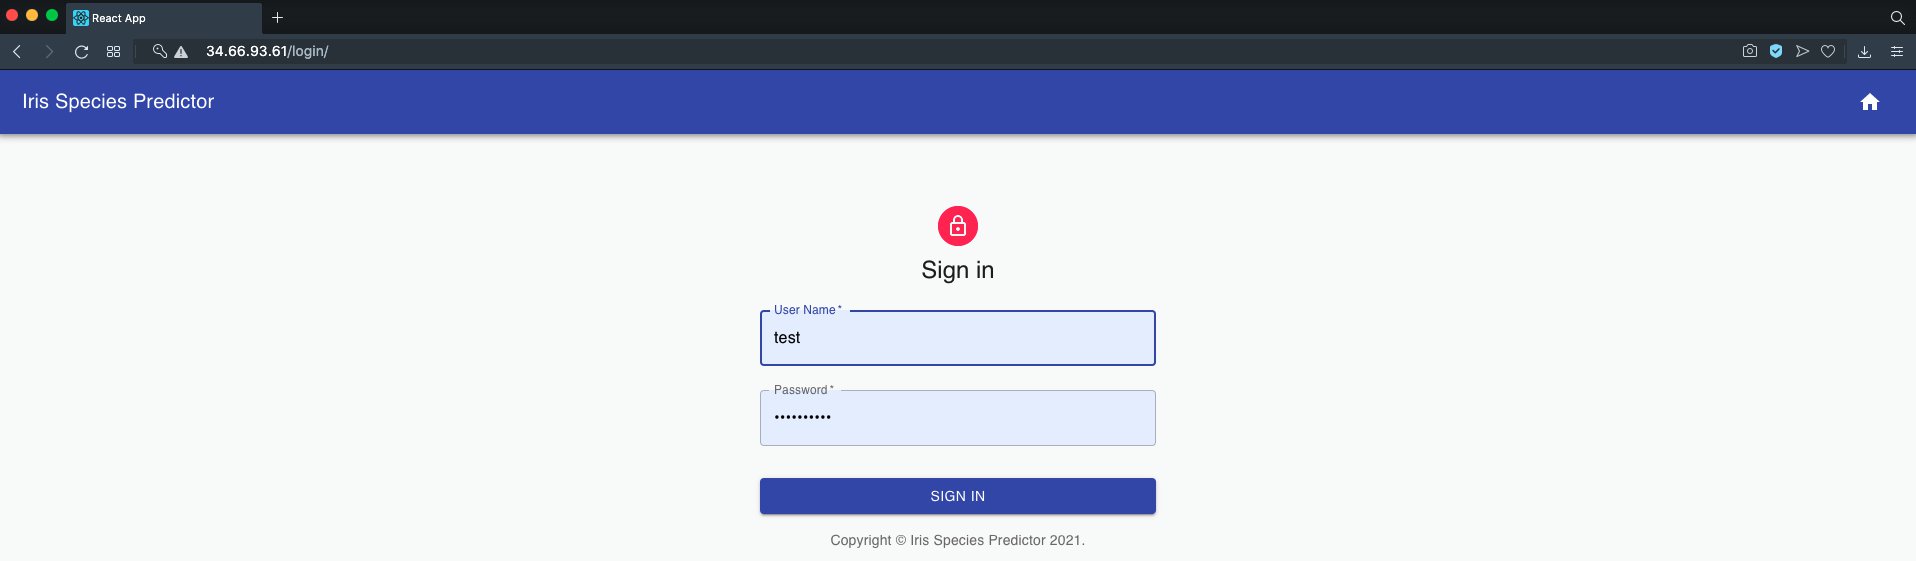
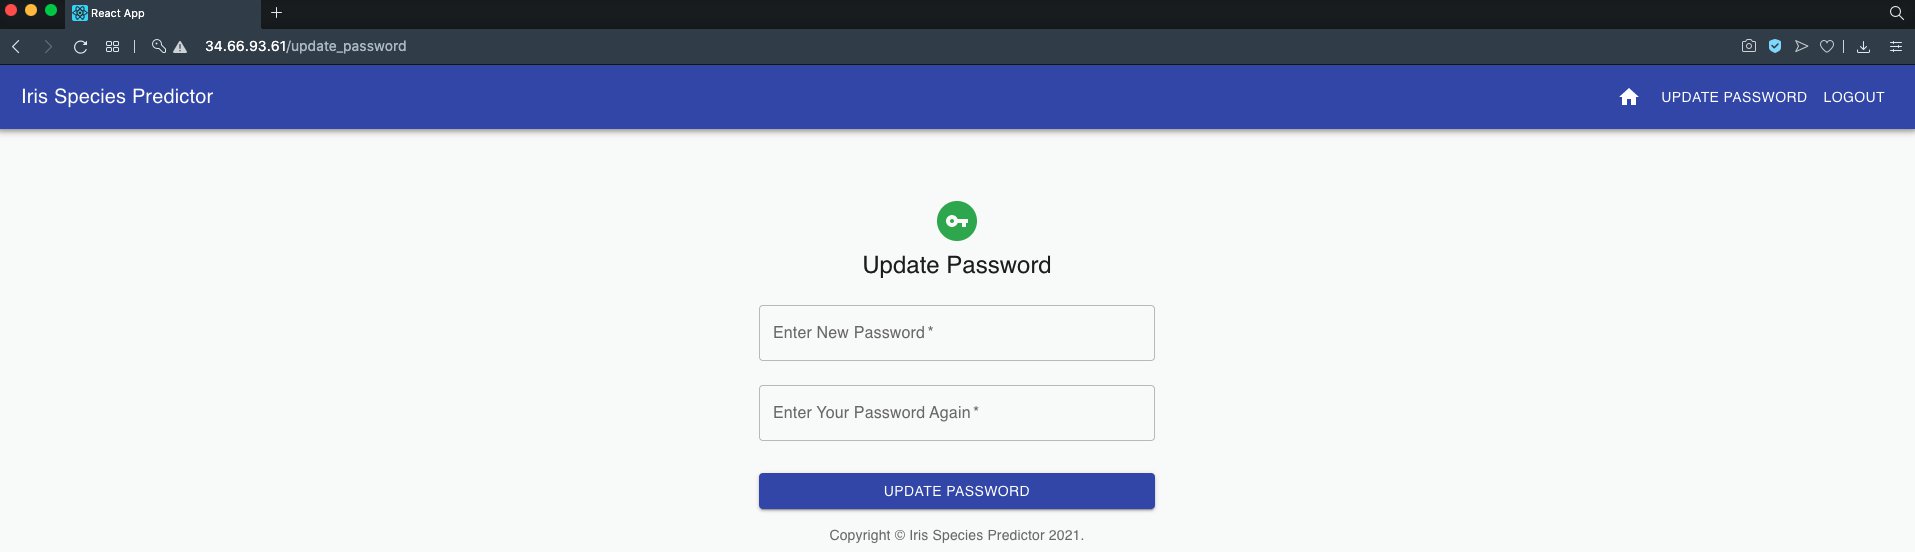
So there you have it! Our Iris Flower Prediction app is running successfully from Google Cloud Kubernetes Engine!!! ⛅ 🍺🍺
Note that we are running our app without HTTPS. As the HTTPS setup requires a certificate that only works for a particular domain (such as www.example.com) and not IP addresses, we have not covered this for our simple demonstration. However, if you require so, you may read about it from the 'ingress-nginx' documentation. The other option is to have another architecture where a separate Nginx Deployment would be serving all of the components we have built so far – it is far easier to setup HTTPS on plain Nginx (here is a good guide) – however in this case we would need to divert all traffic from the 'ingress-nginx' to this Nginx deployment. Please note that the purpose of 'ingress-nginx' is not only routing but also load balancing for components inside the node. Okay, so I would leave it till here. Hope you enjoyed the article.
If you were following this Article as a tutorial, don't forget to delete the cluster before logging out from Google Cloud – this would ensure that you are not charged for something you were not using.
I hope that with this simple application of Kubernetes, you have acquired a solid foundational knowledge of Kubernetes and deploying a fully functioning machine learning app on the cloud ⛅ with Kubernetes ☸ !
Post your comment