
Prerequisites
Familiarity with Python, creating Python environment, installing packages in Python. Familiarity with Streamlit, CSS styles and HTML. Some familiarity with Streamlit and AWS.
What are we going to build
Multi-page app
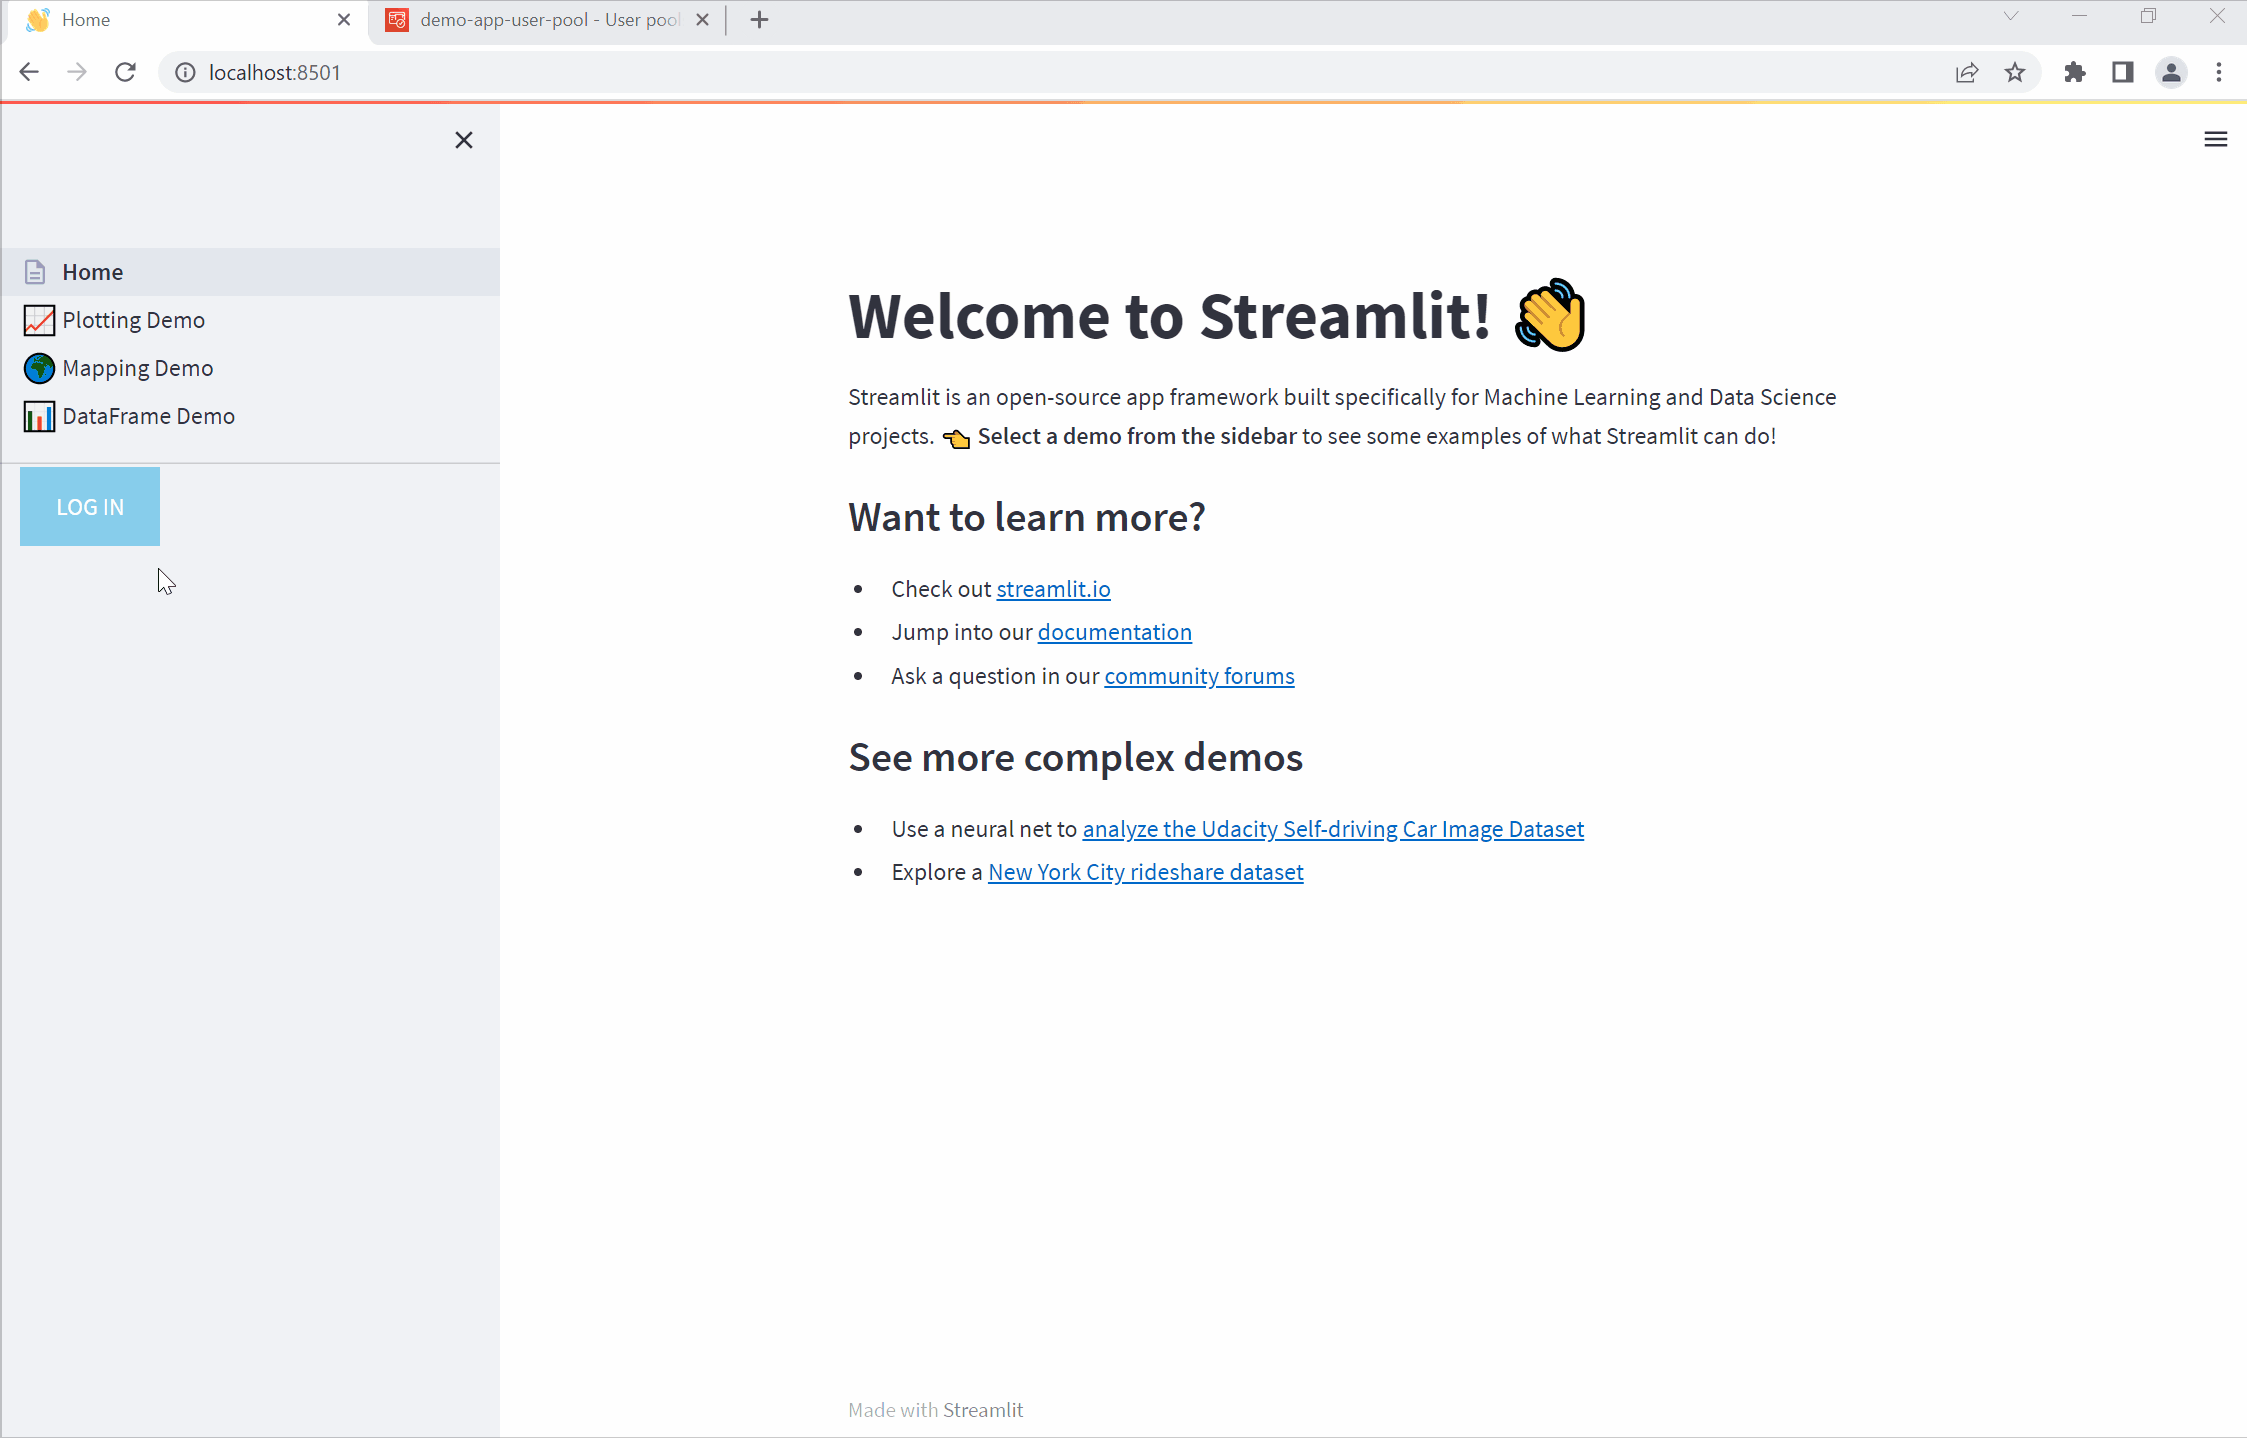
We are going to build a demo multi page app using Streamlit. The app would have a home page, and three other pages (Plotting Demo, Mapping Demo and DataFrame Demo). The app would allow users to securely login. These users would be added to certain user groups by the administrator. Once a user has logged in, depending on which user group a user belongs to, the user would only be able to access certain pages. User authentication would be provided using AWS Cognito.
All of our pages on the frontend, including the home page would contain a Log in/Log out button.
Sign up
This is how the 'Sign up' process would look like. The sign up functionality allows users to sign up using their emails. Please note that the sign up functionality is optional. Within an organization, the administrator can manually add users without letting them sign up themselves. The sign up feature can be disabled through the AWS Cognito console settings.
A demo of the sign up feature is shown above. To access the sign up feature, the user needs to click on the log in button. This opens up a log in UI webpage page hosted on AWS Cognito. Since sign up is allowed in AWS Cognito setttings, the login UI also has a sign up link. Clicking the link opens a form, where the users can signup using their emails. Upon initially signing up, the user is sent a verification code. Once a user is verified with this code, the administrator adds the user to a user group. In our demo example, the user signed up using 'mausamgaurav@ymail.com' and the user was subsequently added to the 'Underwriters' group by the administrator.
Login and page-wise access
A demo of the login and page-wise access is shown below. When a user first lands on the application without authenticating, the user cannot access the first two pages (Plotting Demo, Mapping Demo), because only authenticated users can access these pages. When the user logs in with the 'mausam.gaurav@gmail.com' email, he receives an authorization code as a query parameter (watch the URL in the browser). Once logged in, this user can access the second page but not the first page. This is because the user was added to a group called 'CreditAnalysts', and only members of the 'CreditAnalyts' group can access the second page. The first page can only be accessed by users of the group 'Underwriters', hence the current user cannot access the first page. The demo next shows that the user can sign out of by clicking the log out button. When a different user 'mausamgaurav@ymail.com', signs in to the application, he can access the first page. This is because the user 'mausamgaurav@ymail.com' belongs to the group 'Underwriters' and users of this group can access the the first page but not the second page. (Note that the third page, DataFrame Demo, in the application is open to anyone, and does not require authentication. We have skipped showing the third page in the demo animation below).

Creating the basic multi-page app
Create a Python environment, activate the environment and install Streamlit in it. For this article, Streamlit version 1.12.2 was used. All other python packages used for this article would be provided in the requirements.txt file in the repo for this article. Streamlit is constantly evolving. At the time of writing, to create a multi-page app using this version of Streamlit we need to create an entry point file. So basically this is the main file which is run from Streamlit command to spin up the front end.
streamlit run [entrypoint file]
All separate pages need to be added to a pages directory. So the structure of the multi-page app would look like below:
Home.py # This is the file you run with "streamlit run"
└─── pages/
  └─── 1_📈_Plotting_Demo.py # This is a page
  └─── 2_🌍_Mapping_Demo.py # This is another page
  └─── 3_📊_DataFrame_Demo.py # So is this
Create the entrypoint file
The Home.py file would look like below:
import streamlit as st

st.set_page_config(
    page_title="Home",
    page_icon="👋",
)

st.write("# Welcome to Streamlit! 👋")

st.markdown(
    """
    Streamlit is an open-source app framework built specifically for
    Machine Learning and Data Science projects.
    **👈 Select a demo from the sidebar** to see some examples
    of what Streamlit can do!
    ### Want to learn more?
    - Check out [streamlit.io](https://streamlit.io)
    - Jump into our [documentation](https://docs.streamlit.io)
    - Ask a question in our [community
        forums](https://discuss.streamlit.io)
    ### See more complex demos
    - Use a neural net to [analyze the Udacity Self-driving Car Image
        Dataset](https://github.com/streamlit/demo-self-driving)
    - Explore a [New York City rideshare dataset](https://github.com/streamlit/demo-uber-nyc-pickups)
"""
)
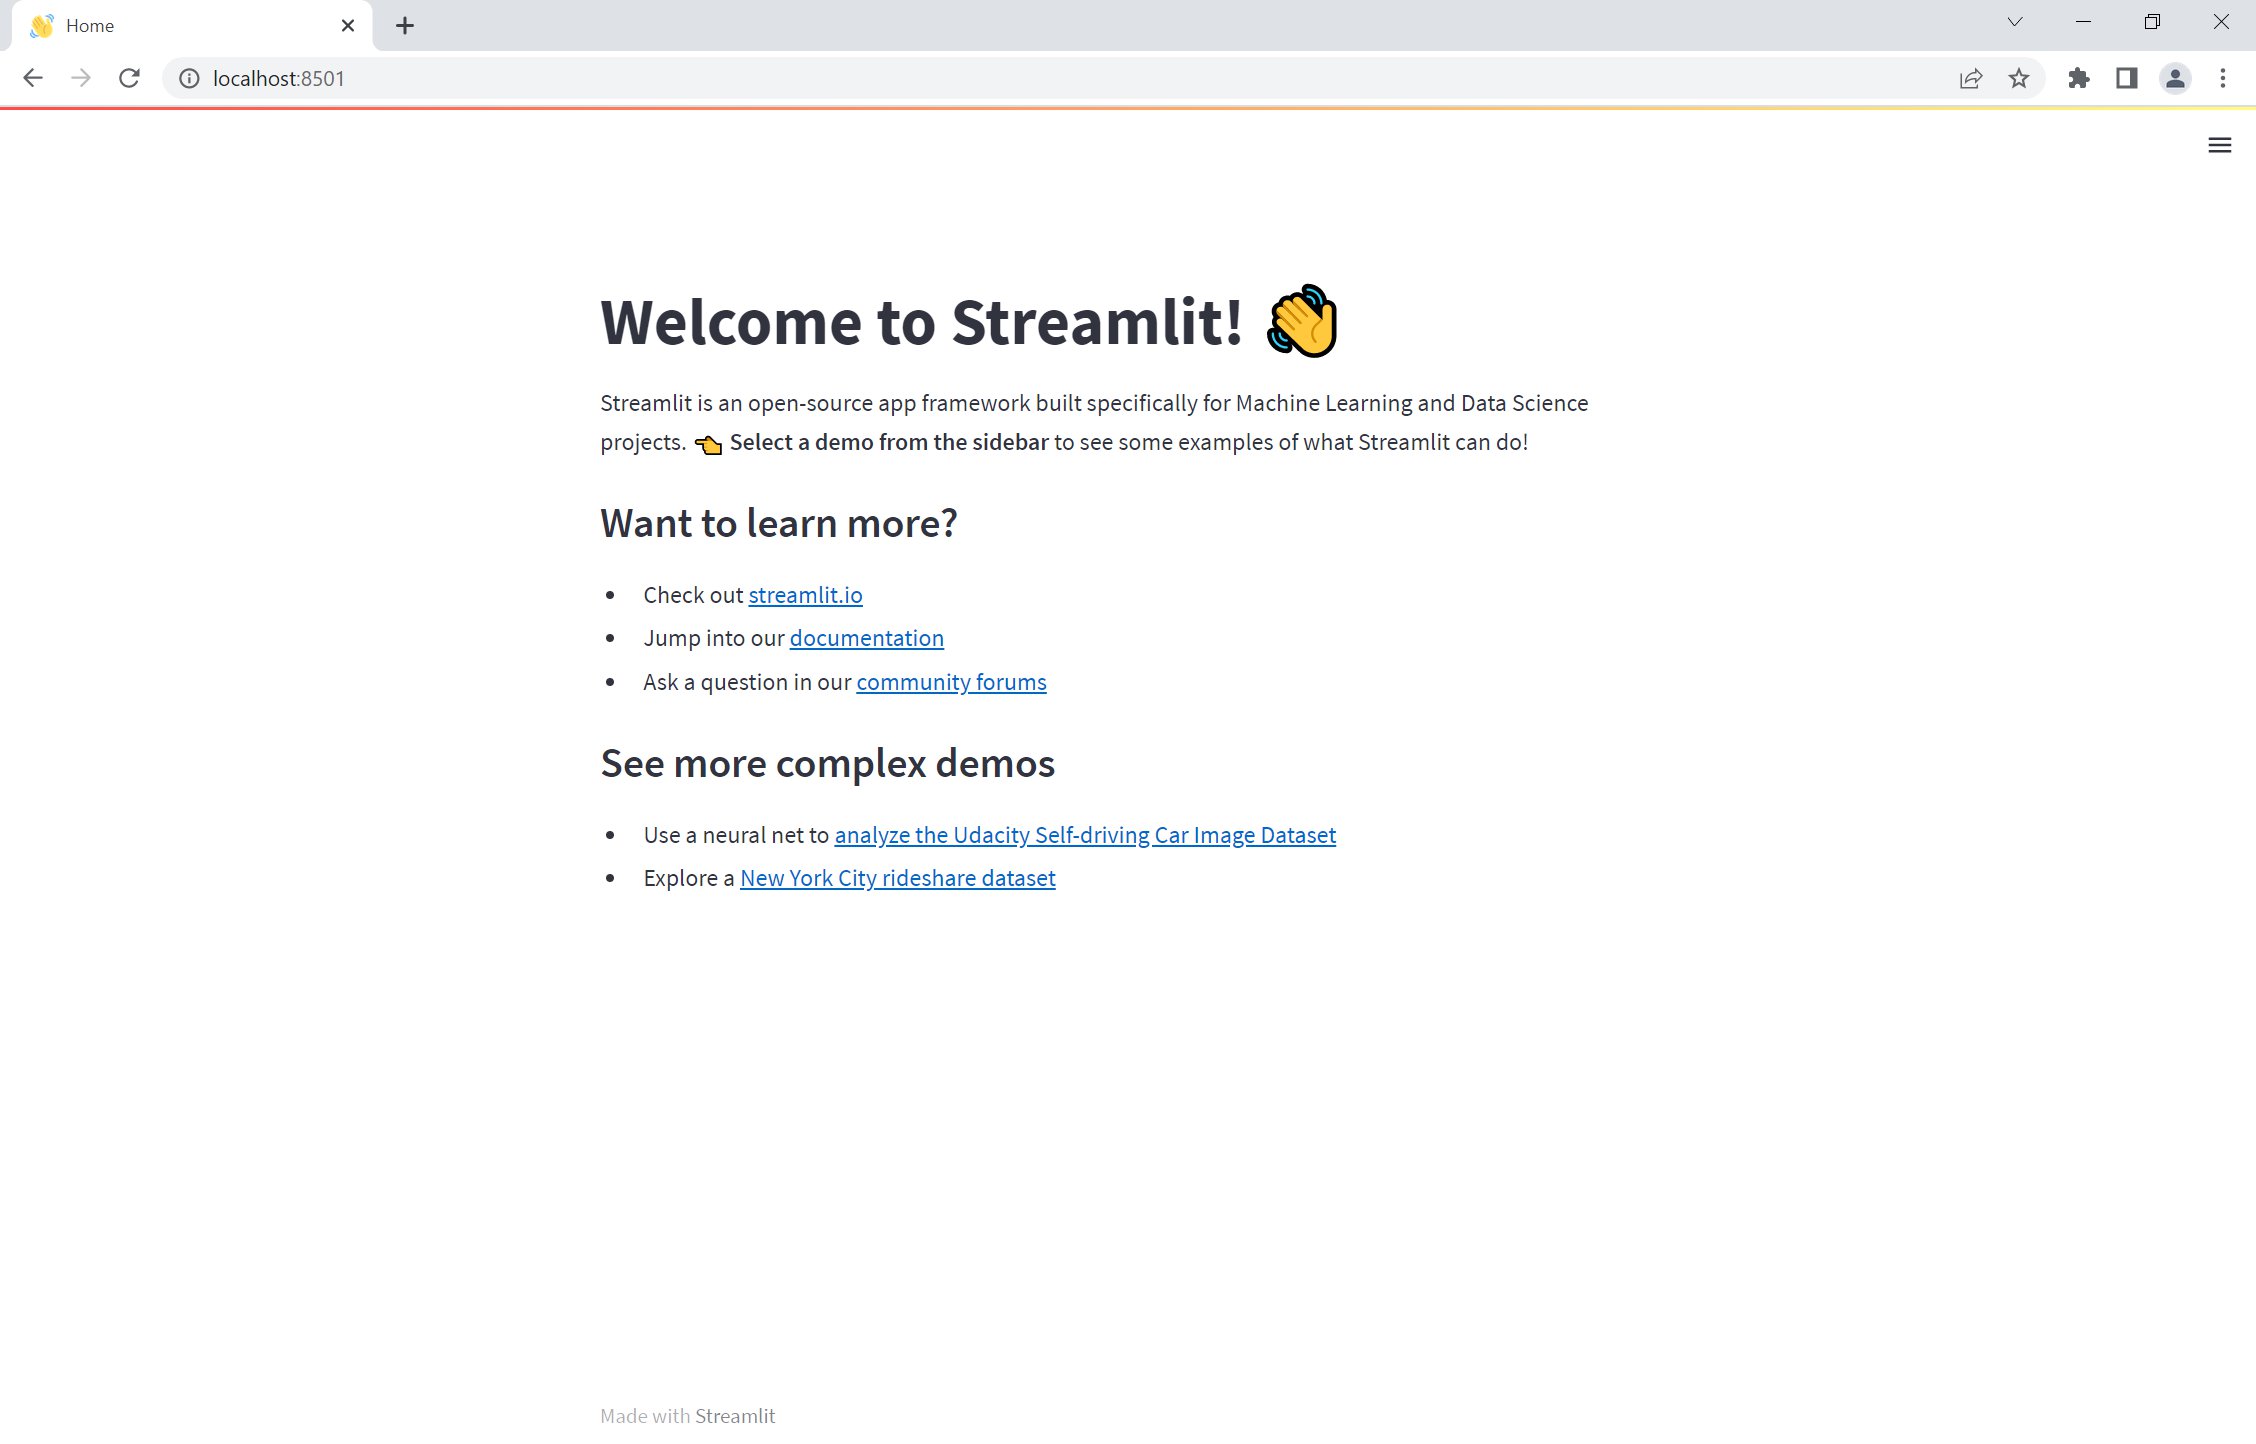
In the above we have customised the page title and the page icon. If we run the app now, without adding the rest of the pages, the app would look like below:
Create multiple pages
Now we create pages as below:
pages/1_📈_Plotting_Demo.py
import streamlit as st
import time
import numpy as np

st.set_page_config(page_title="Plotting Demo", page_icon="📈")

st.markdown("# Plotting Demo")
st.sidebar.header("Plotting Demo")
st.write(
    """This demo illustrates a combination of plotting and animation with
Streamlit. We're generating a bunch of random numbers in a loop for around
5 seconds. Enjoy!"""
)

progress_bar = st.sidebar.progress(0)
status_text = st.sidebar.empty()
last_rows = np.random.randn(1, 1)
chart = st.line_chart(last_rows)

for i in range(1, 101):
    new_rows = last_rows[-1, :] + np.random.randn(5, 1).cumsum(axis=0)
    status_text.text("%i%% Complete" % i)
    chart.add_rows(new_rows)
    progress_bar.progress(i)
    last_rows = new_rows
    time.sleep(0.05)

progress_bar.empty()

# Streamlit widgets automatically run the script from top to bottom. Since
# this button is not connected to any other logic, it just causes a plain
# rerun.
st.button("Re-run")
The app would look like below, with the first page added:

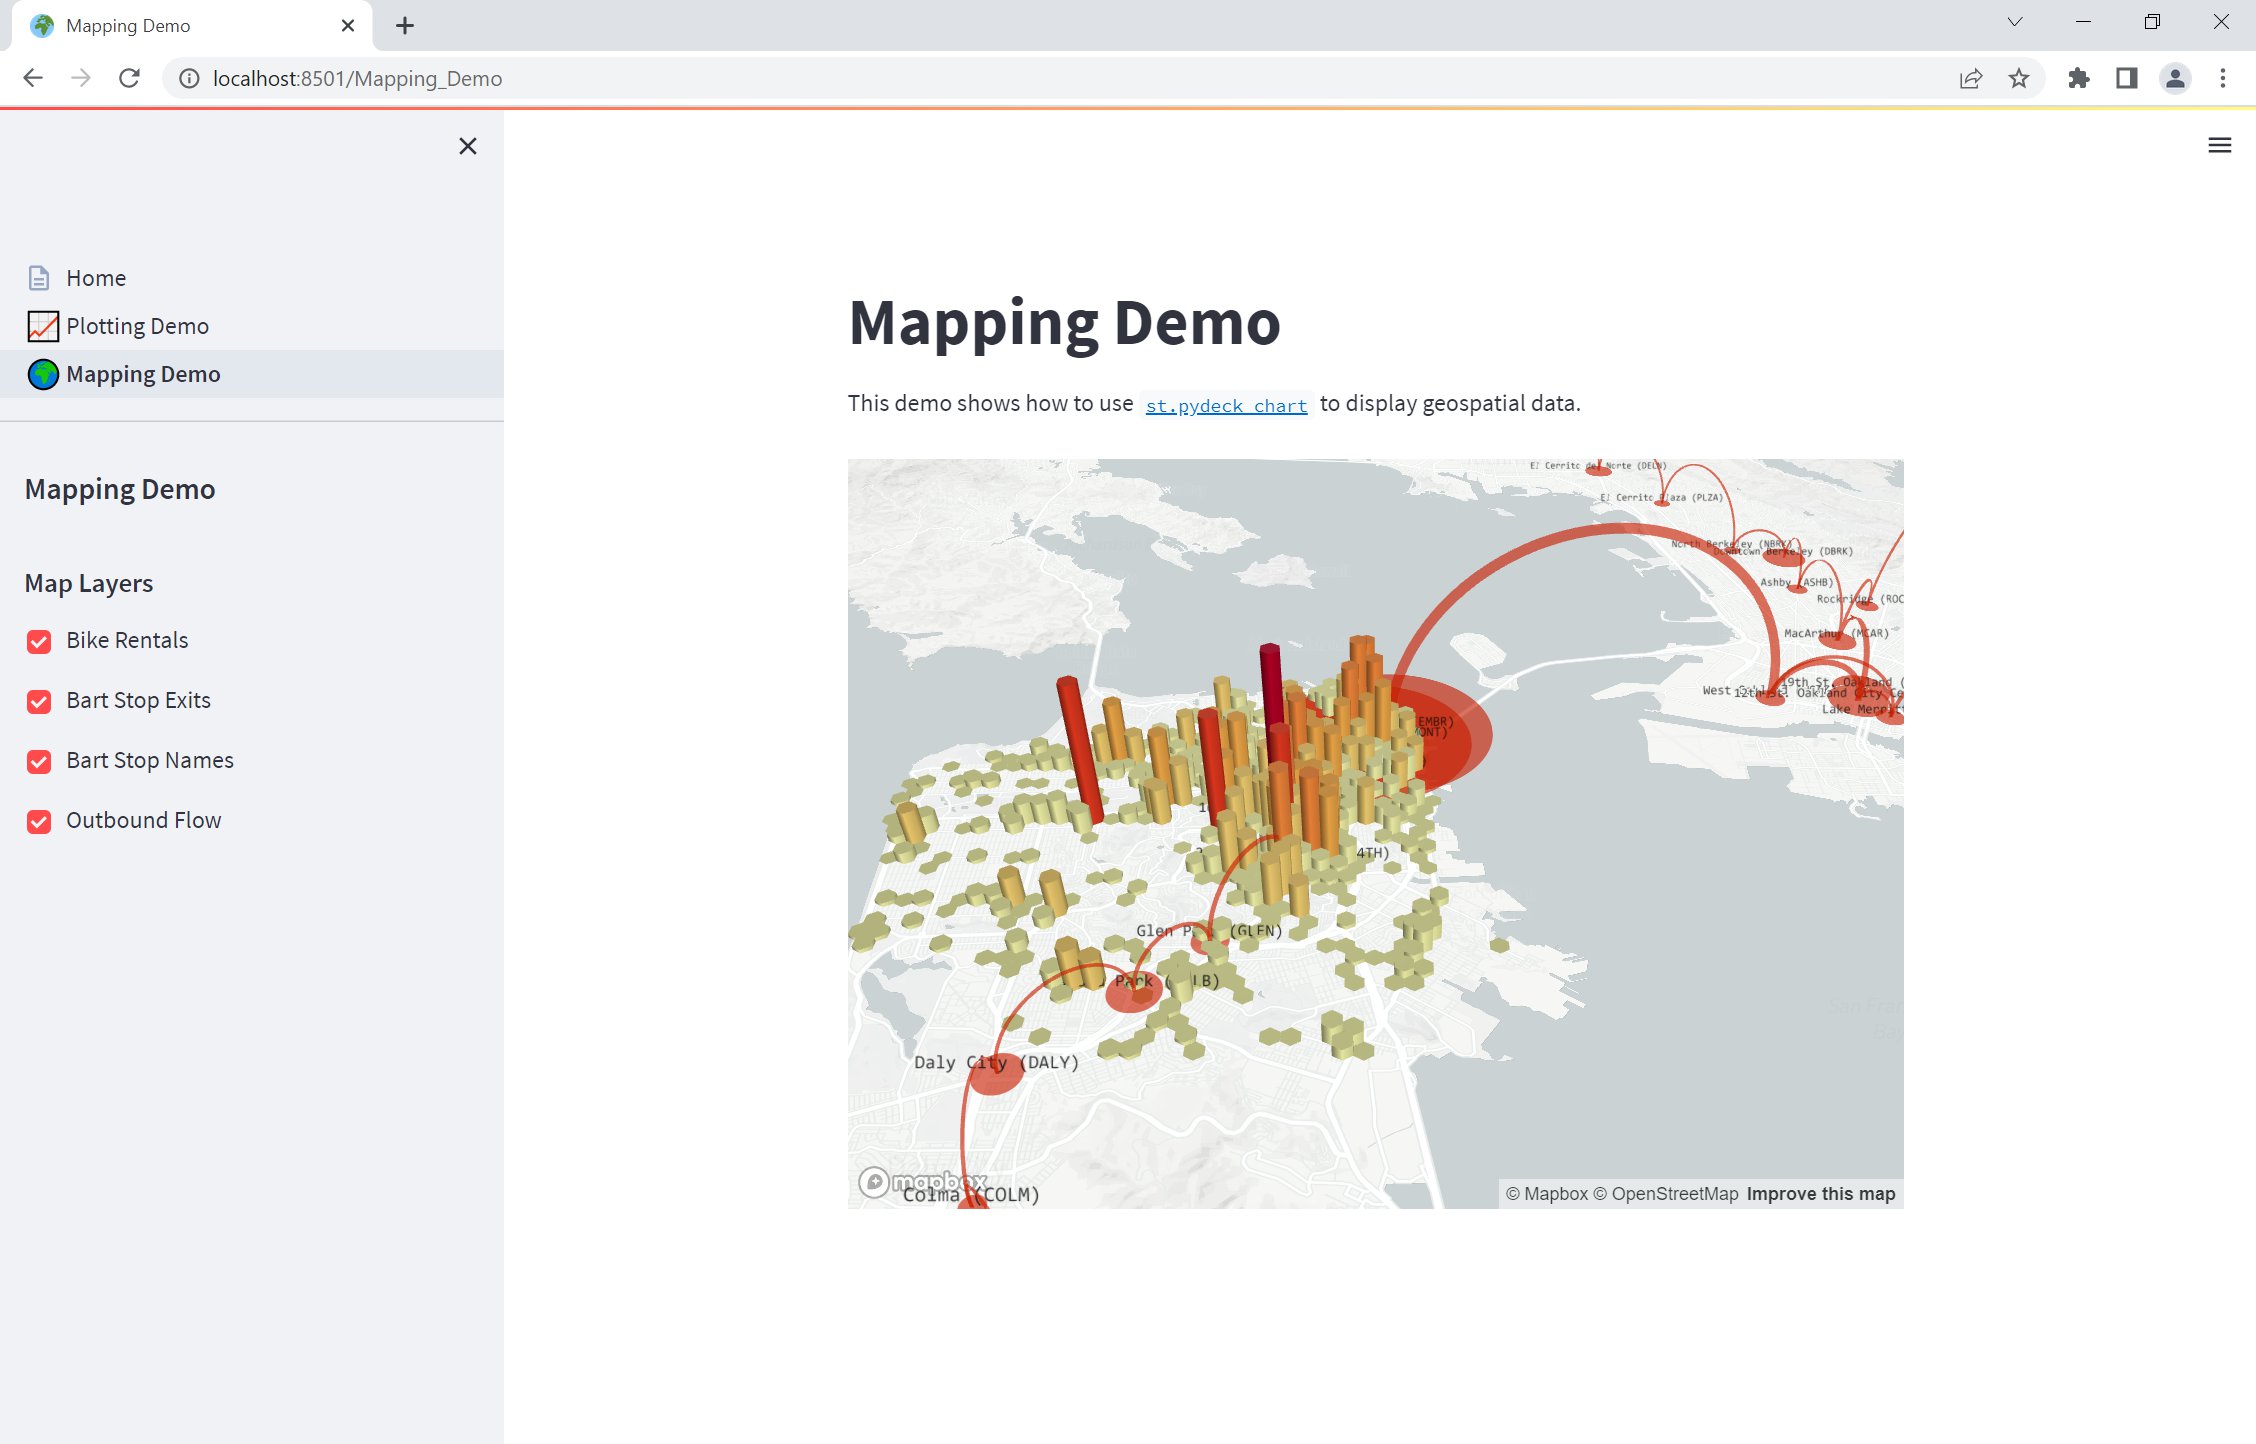
pages/2_🌍_Mapping_Demo.py
import streamlit as st
import pandas as pd
import pydeck as pdk
from urllib.error import URLError

st.set_page_config(page_title="Mapping Demo", page_icon="🌍")

st.markdown("# Mapping Demo")
st.sidebar.header("Mapping Demo")
st.write(
    """This demo shows how to use
[`st.pydeck_chart`](https://docs.streamlit.io/library/api-reference/charts/st.pydeck_chart)
to display geospatial data."""
)


@st.experimental_memo
def from_data_file(filename):
    url = (
        "http://raw.githubusercontent.com/streamlit/"
        "example-data/master/hello/v1/%s" % filename
    )
    return pd.read_json(url)


try:
    ALL_LAYERS = {
        "Bike Rentals": pdk.Layer(
            "HexagonLayer",
            data=from_data_file("bike_rental_stats.json"),
            get_position=["lon", "lat"],
            radius=200,
            elevation_scale=4,
            elevation_range=[0, 1000],
            extruded=True,
        ),
        "Bart Stop Exits": pdk.Layer(
            "ScatterplotLayer",
            data=from_data_file("bart_stop_stats.json"),
            get_position=["lon", "lat"],
            get_color=[200, 30, 0, 160],
            get_radius="[exits]",
            radius_scale=0.05,
        ),
        "Bart Stop Names": pdk.Layer(
            "TextLayer",
            data=from_data_file("bart_stop_stats.json"),
            get_position=["lon", "lat"],
            get_text="name",
            get_color=[0, 0, 0, 200],
            get_size=15,
            get_alignment_baseline="'bottom'",
        ),
        "Outbound Flow": pdk.Layer(
            "ArcLayer",
            data=from_data_file("bart_path_stats.json"),
            get_source_position=["lon", "lat"],
            get_target_position=["lon2", "lat2"],
            get_source_color=[200, 30, 0, 160],
            get_target_color=[200, 30, 0, 160],
            auto_highlight=True,
            width_scale=0.0001,
            get_width="outbound",
            width_min_pixels=3,
            width_max_pixels=30,
        ),
    }
    st.sidebar.markdown("### Map Layers")
    selected_layers = [
        layer
        for layer_name, layer in ALL_LAYERS.items()
        if st.sidebar.checkbox(layer_name, True)
    ]
    if selected_layers:
        st.pydeck_chart(
            pdk.Deck(
                map_style="mapbox://styles/mapbox/light-v9",
                initial_view_state={
                    "latitude": 37.76,
                    "longitude": -122.4,
                    "zoom": 11,
                    "pitch": 50,
                },
                layers=selected_layers,
            )
        )
    else:
        st.error("Please choose at least one layer above.")
except URLError as e:
    st.error(
        """
        **This demo requires internet access.**
        Connection error: %s
    """
        % e.reason
    )
The app would look like below, with the second page added:
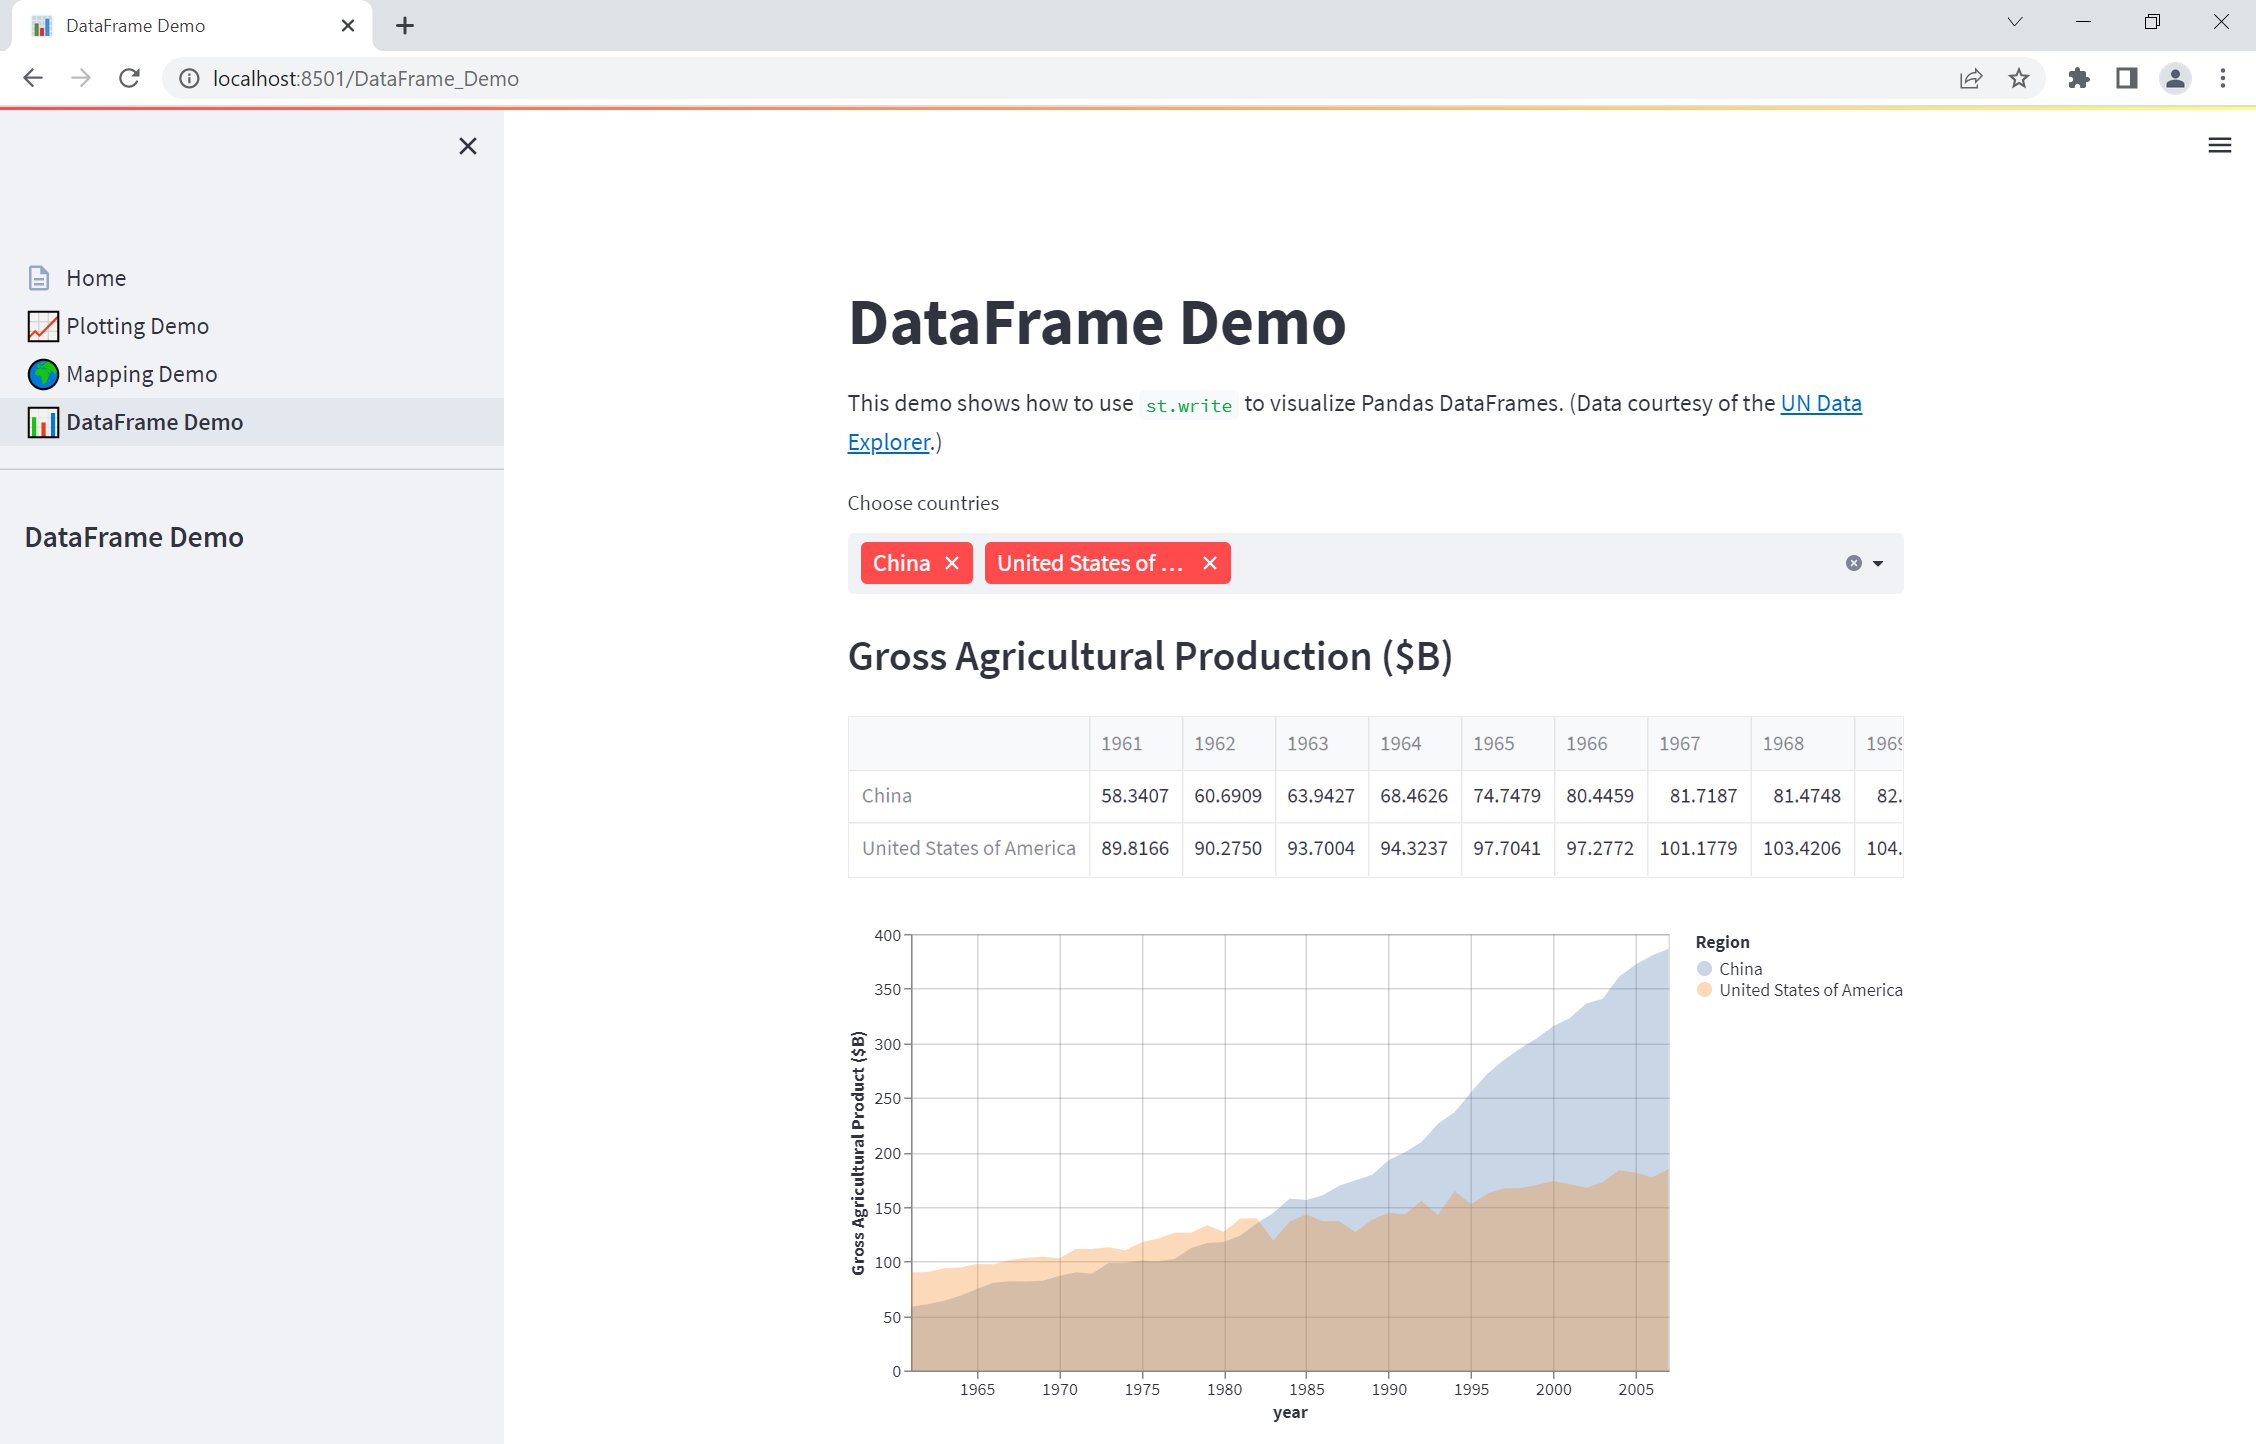
pages/3_📊_DataFrame_Demo.py
import streamlit as st
import pandas as pd
import altair as alt
from urllib.error import URLError

st.set_page_config(page_title="DataFrame Demo", page_icon="📊")

st.markdown("# DataFrame Demo")
st.sidebar.header("DataFrame Demo")
st.write(
    """This demo shows how to use `st.write` to visualize Pandas DataFrames.
(Data courtesy of the [UN Data Explorer](http://data.un.org/Explorer.aspx).)"""
)


@st.cache
def get_UN_data():
    AWS_BUCKET_URL = "http://streamlit-demo-data.s3-us-west-2.amazonaws.com"
    df = pd.read_csv(AWS_BUCKET_URL + "/agri.csv.gz")
    return df.set_index("Region")


try:
    df = get_UN_data()
    countries = st.multiselect(
        "Choose countries", list(df.index), ["China", "United States of America"]
    )
    if not countries:
        st.error("Please select at least one country.")
    else:
        data = df.loc[countries]
        data /= 1000000.0
        st.write("### Gross Agricultural Production ($B)", data.sort_index())

        data = data.T.reset_index()
        data = pd.melt(data, id_vars=["index"]).rename(
            columns={"index": "year", "value": "Gross Agricultural Product ($B)"}
        )
        chart = (
            alt.Chart(data)
            .mark_area(opacity=0.3)
            .encode(
                x="year:T",
                y=alt.Y("Gross Agricultural Product ($B):Q", stack=None),
                color="Region:N",
            )
        )
        st.altair_chart(chart, use_container_width=True)
except URLError as e:
    st.error(
        """
        **This demo requires internet access.**
        Connection error: %s
    """
        % e.reason
    )
The app would look like below, with the third page added:
Create AWS Cognito user pool
For the purpose of this demo, I created a free AWS account and used the free tier version of AWS Cognito which allows authentication functionality for free up to a certain number of users.
Click on the create user pool button.

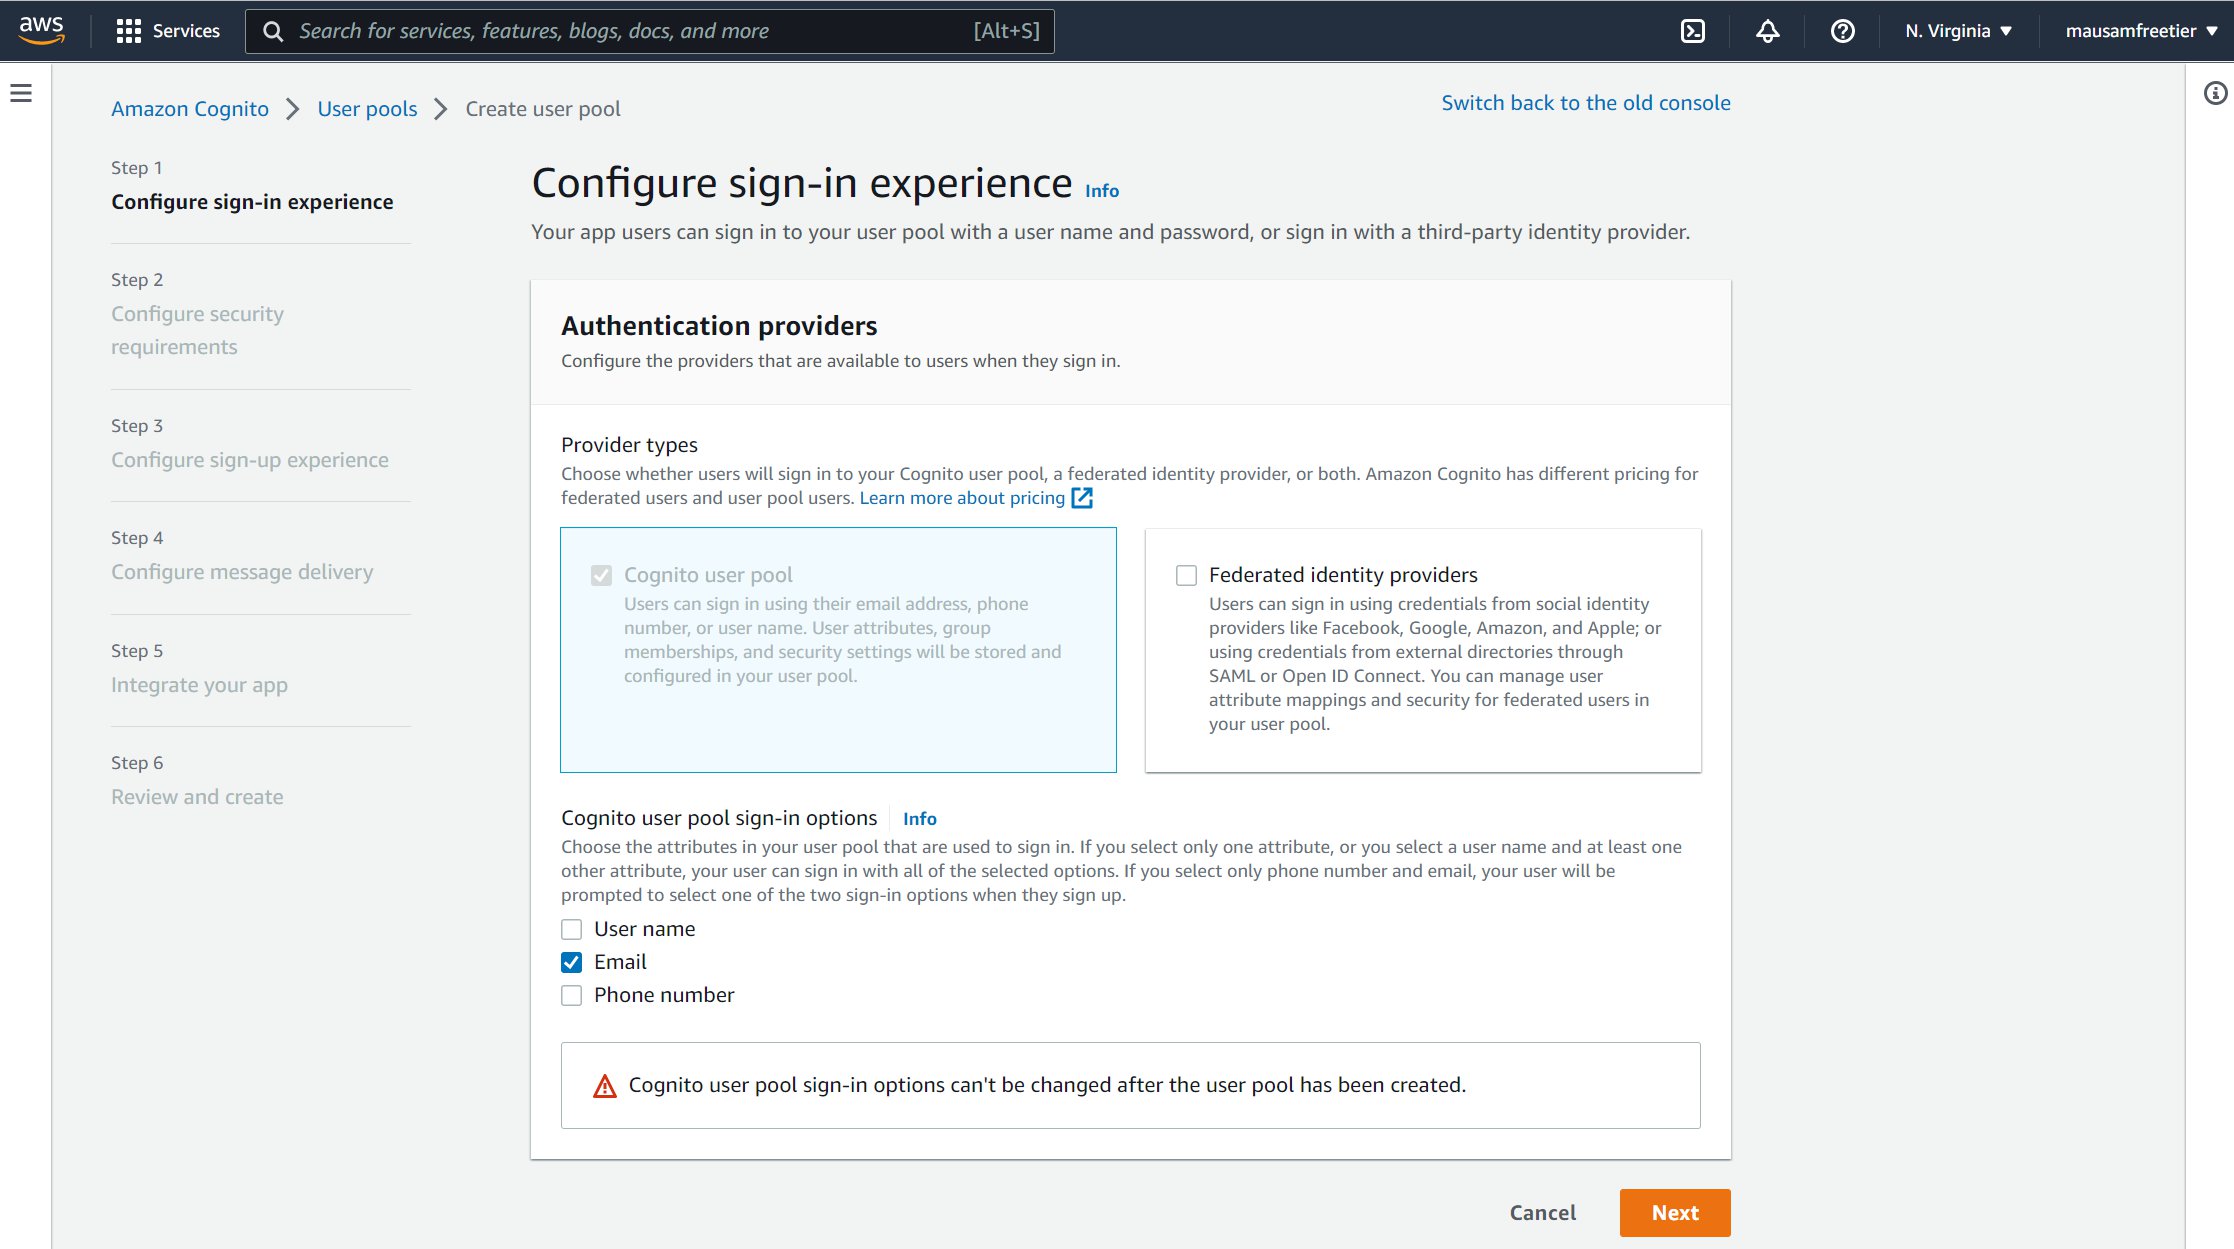
Then on the next option, Step 1, choose 'email' as the option for the 'Cognito user pool sign-in options'.
Then in Step 2, choose default password options and no multi-factor authentication.


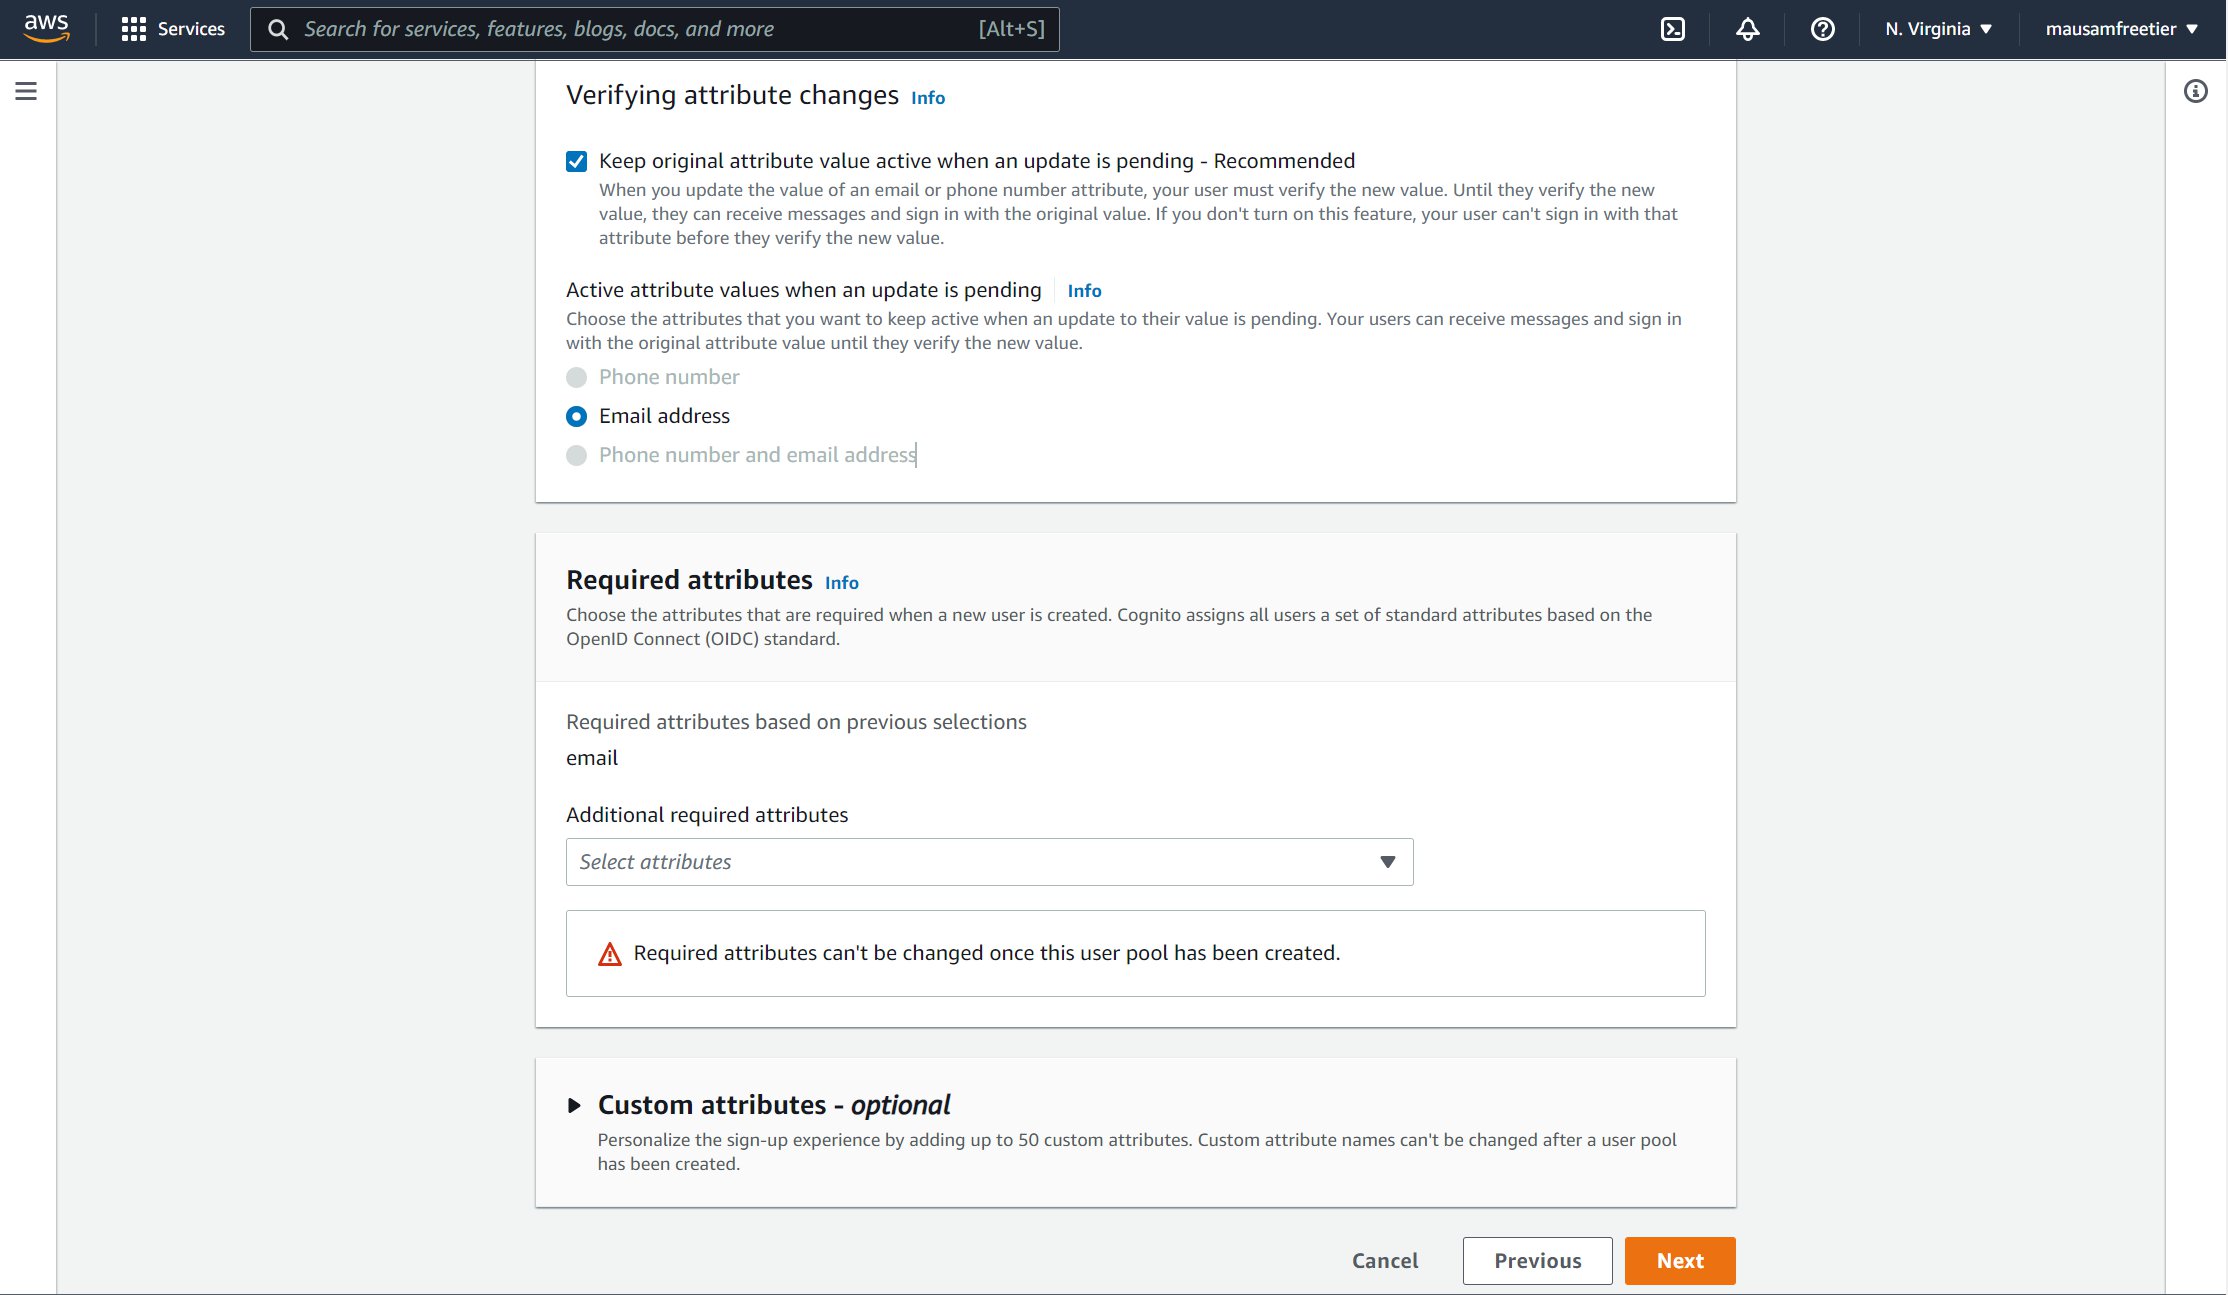
In Step 3, we allow users for self-signup and for the remaining options choose the default.
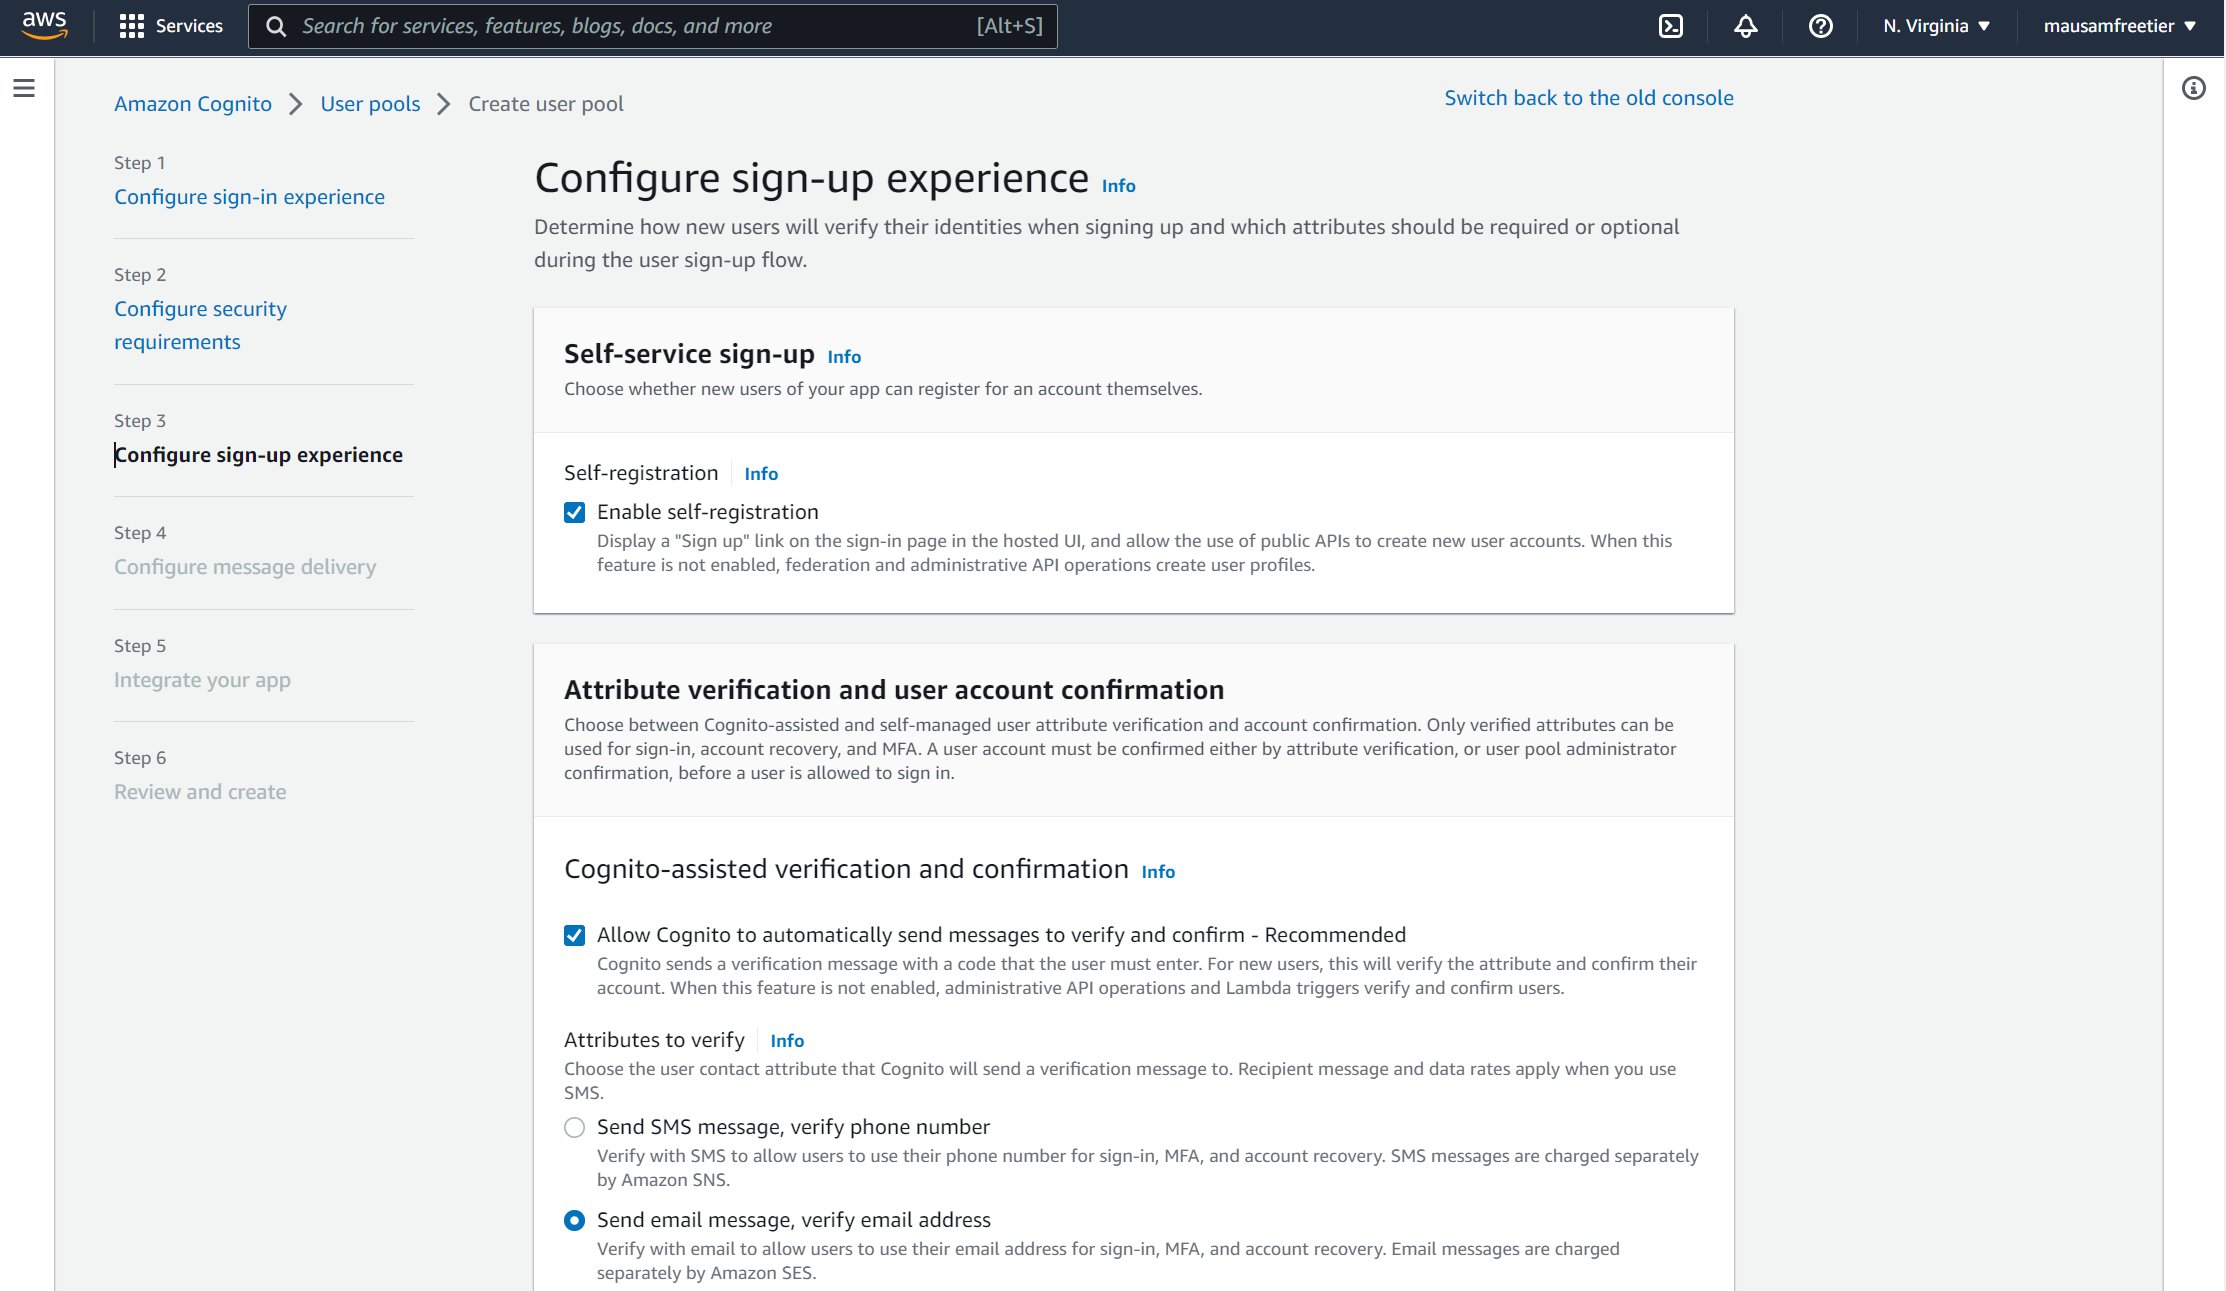
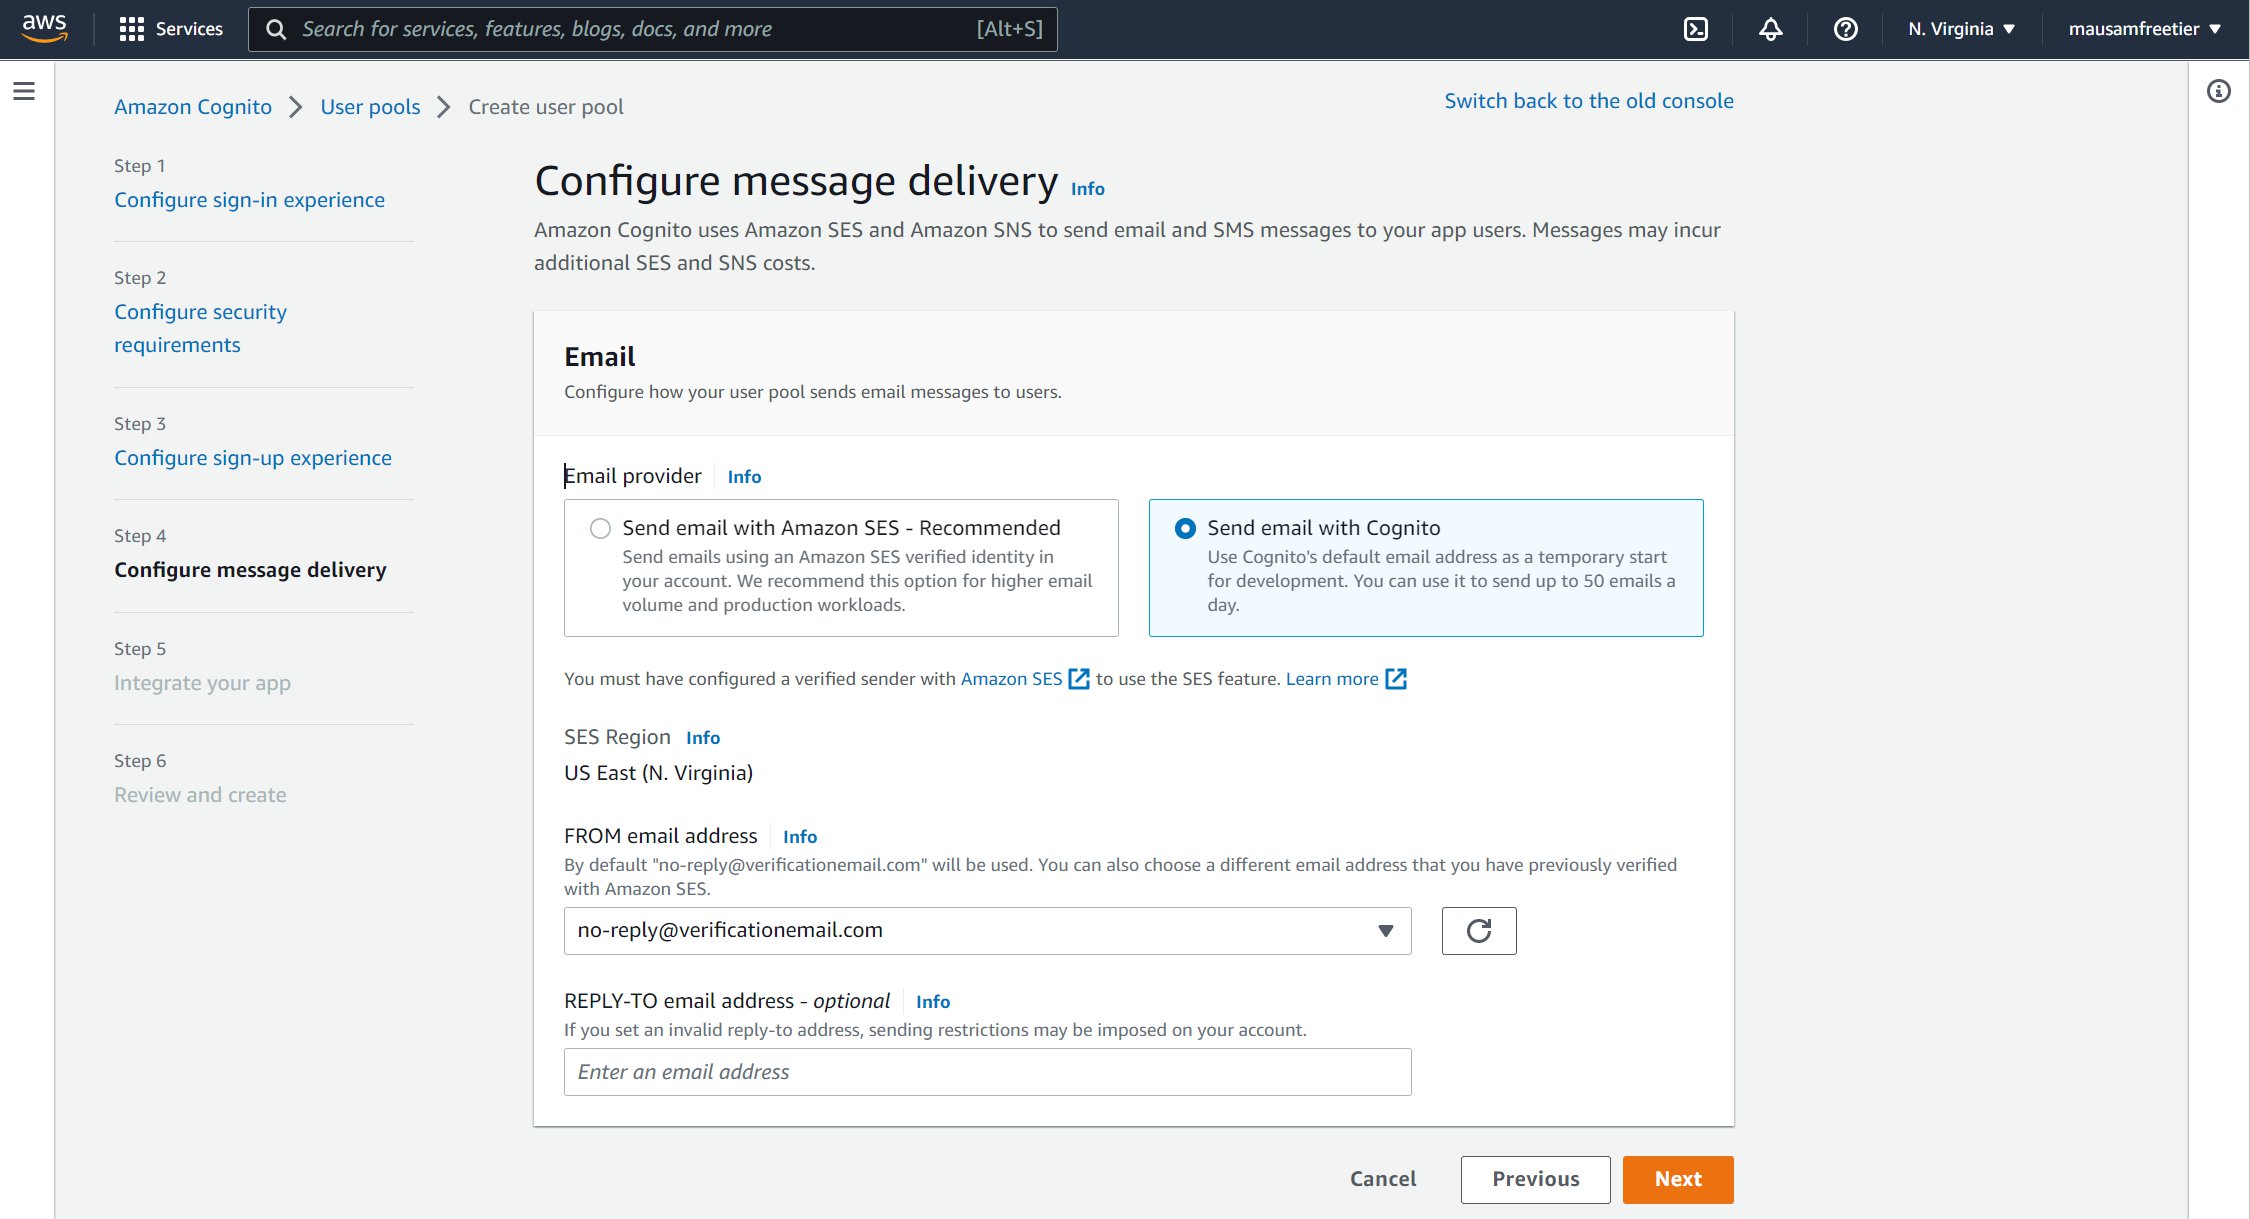
In Step 4, we want to send emails with the Cognito service, so we select that option.
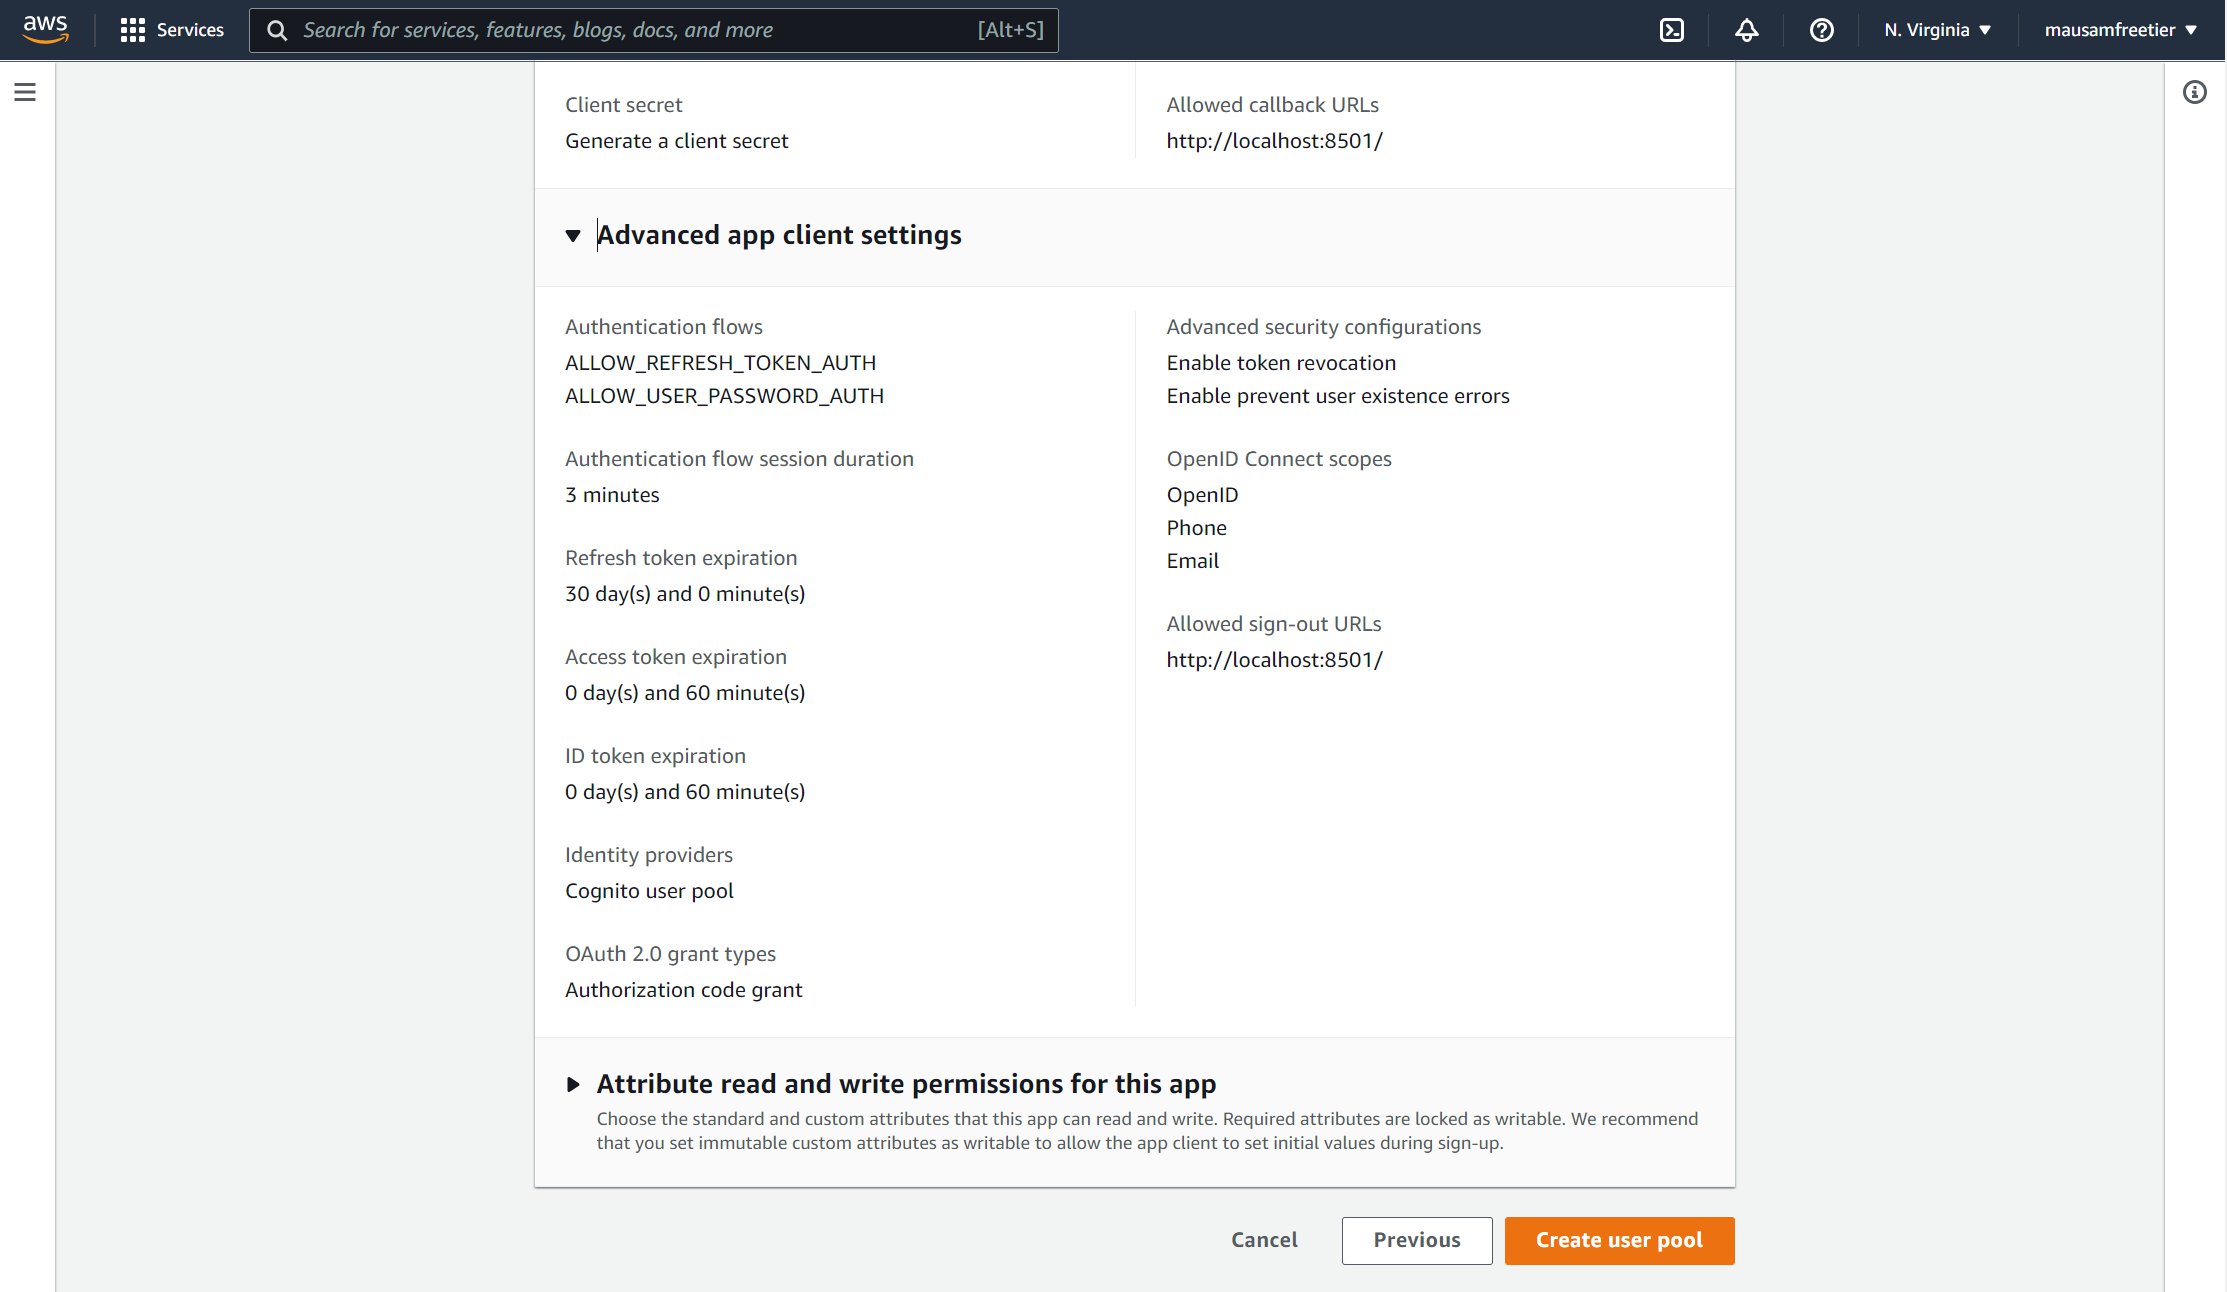
Step 5, is the most important step where we define our app client and its settings.
First choose a user pool name. We have used 'demo-app-user-pool' as the name. We have also allowed the hosted authentication pages. This is so that we use the default login/sign-up etc. pages provided in AWS Cognito.

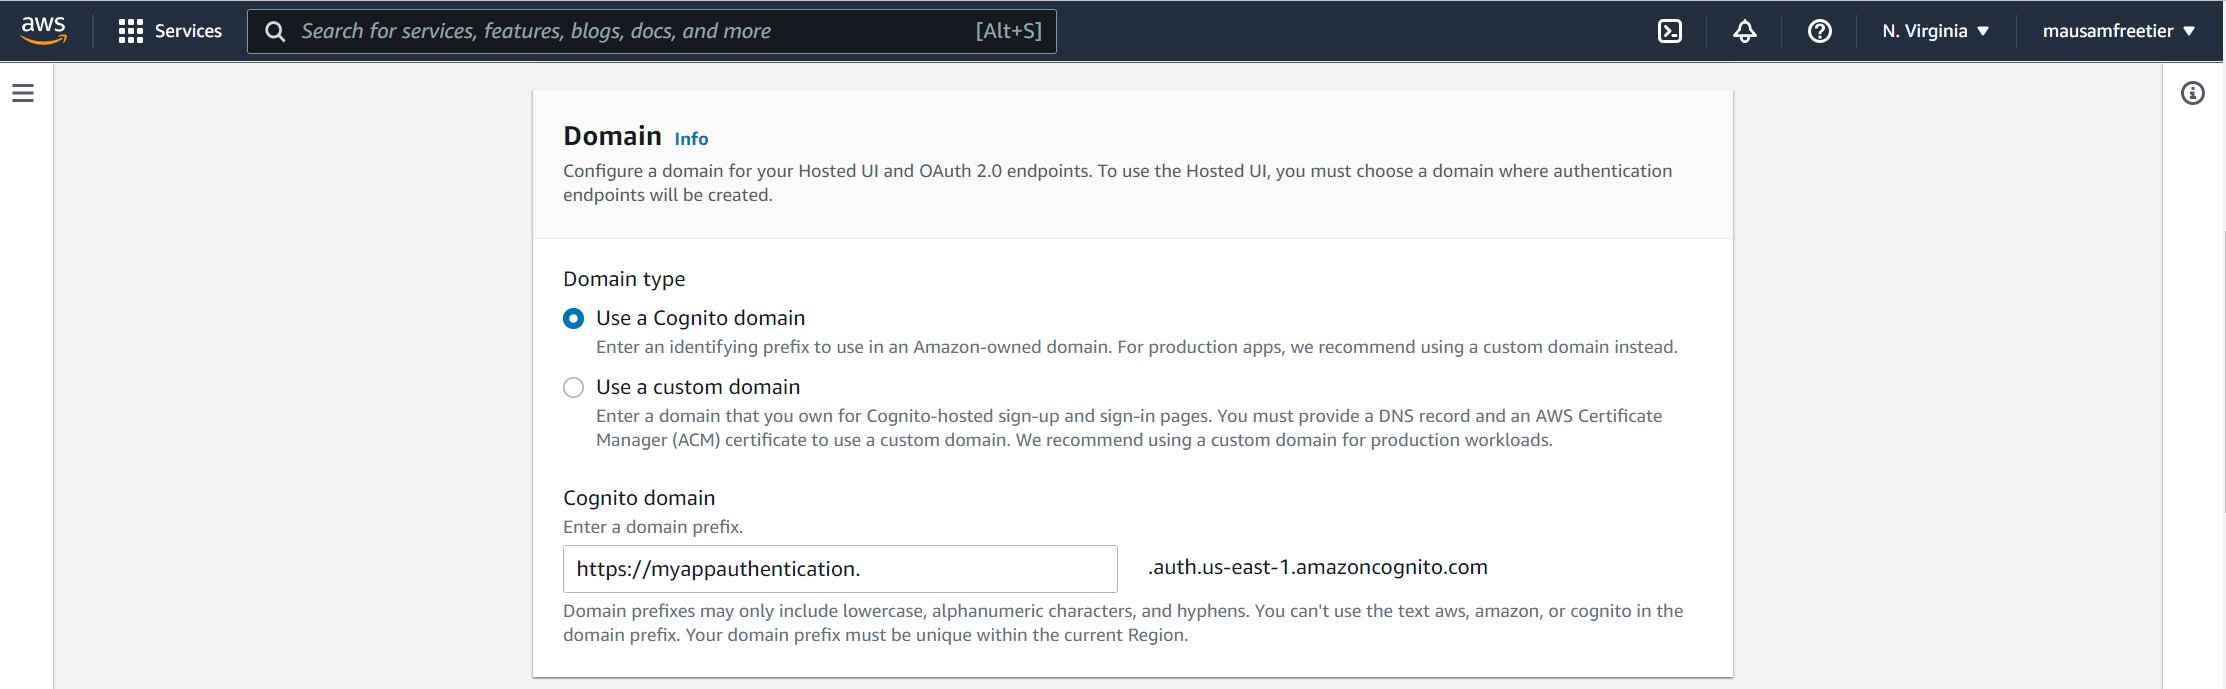
In the Cognito domain, we provide a custom domain. This is the domain where the Cognito hosted UI page above is hosted.
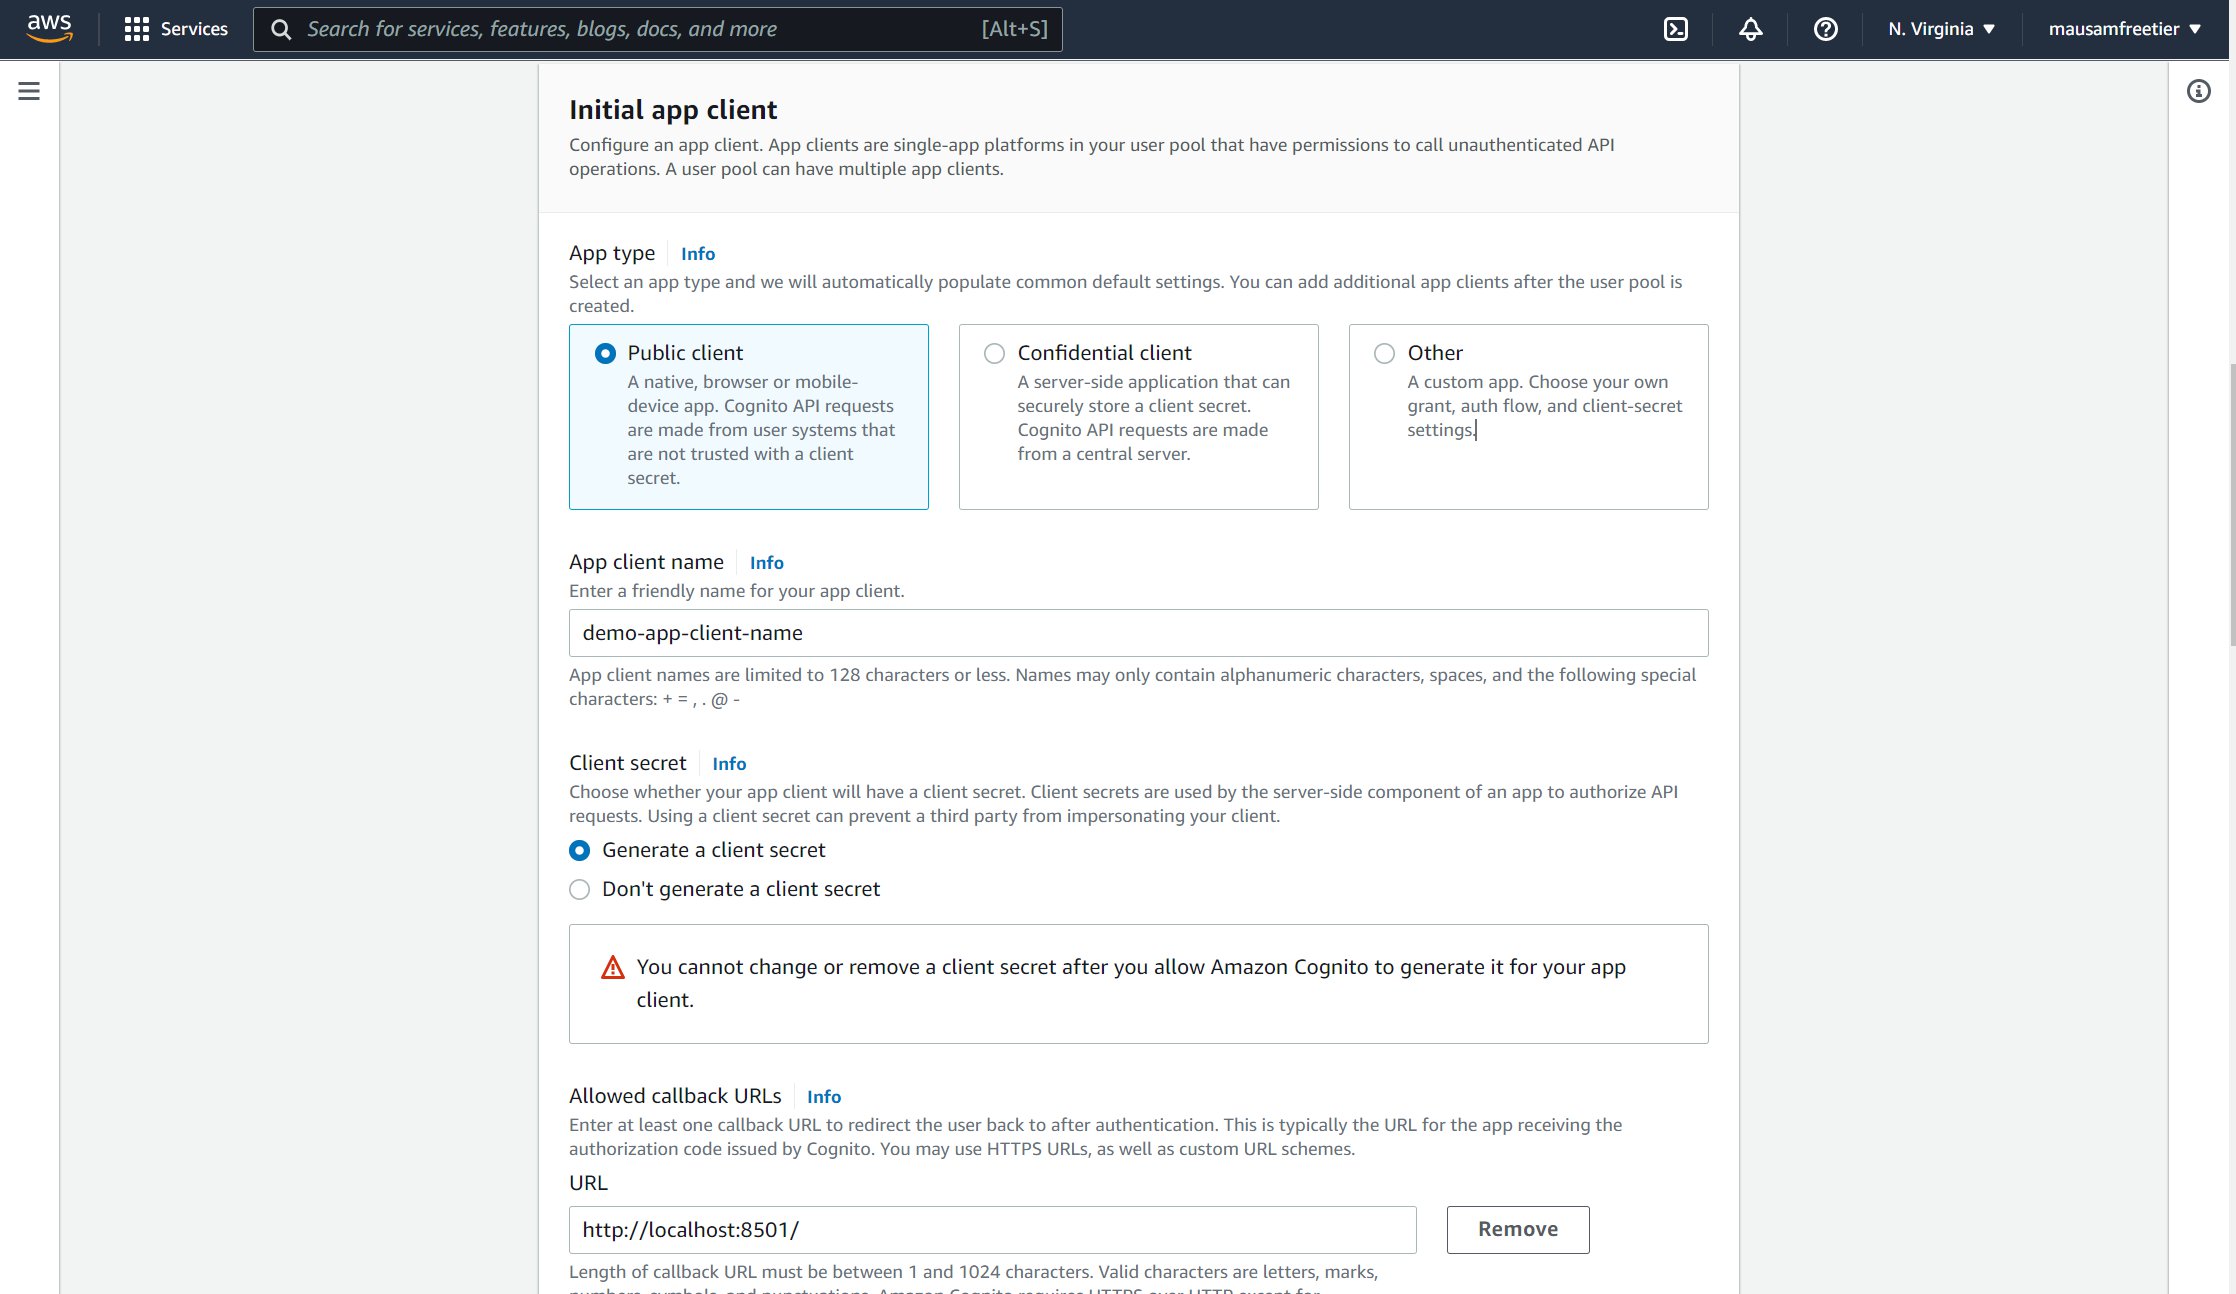
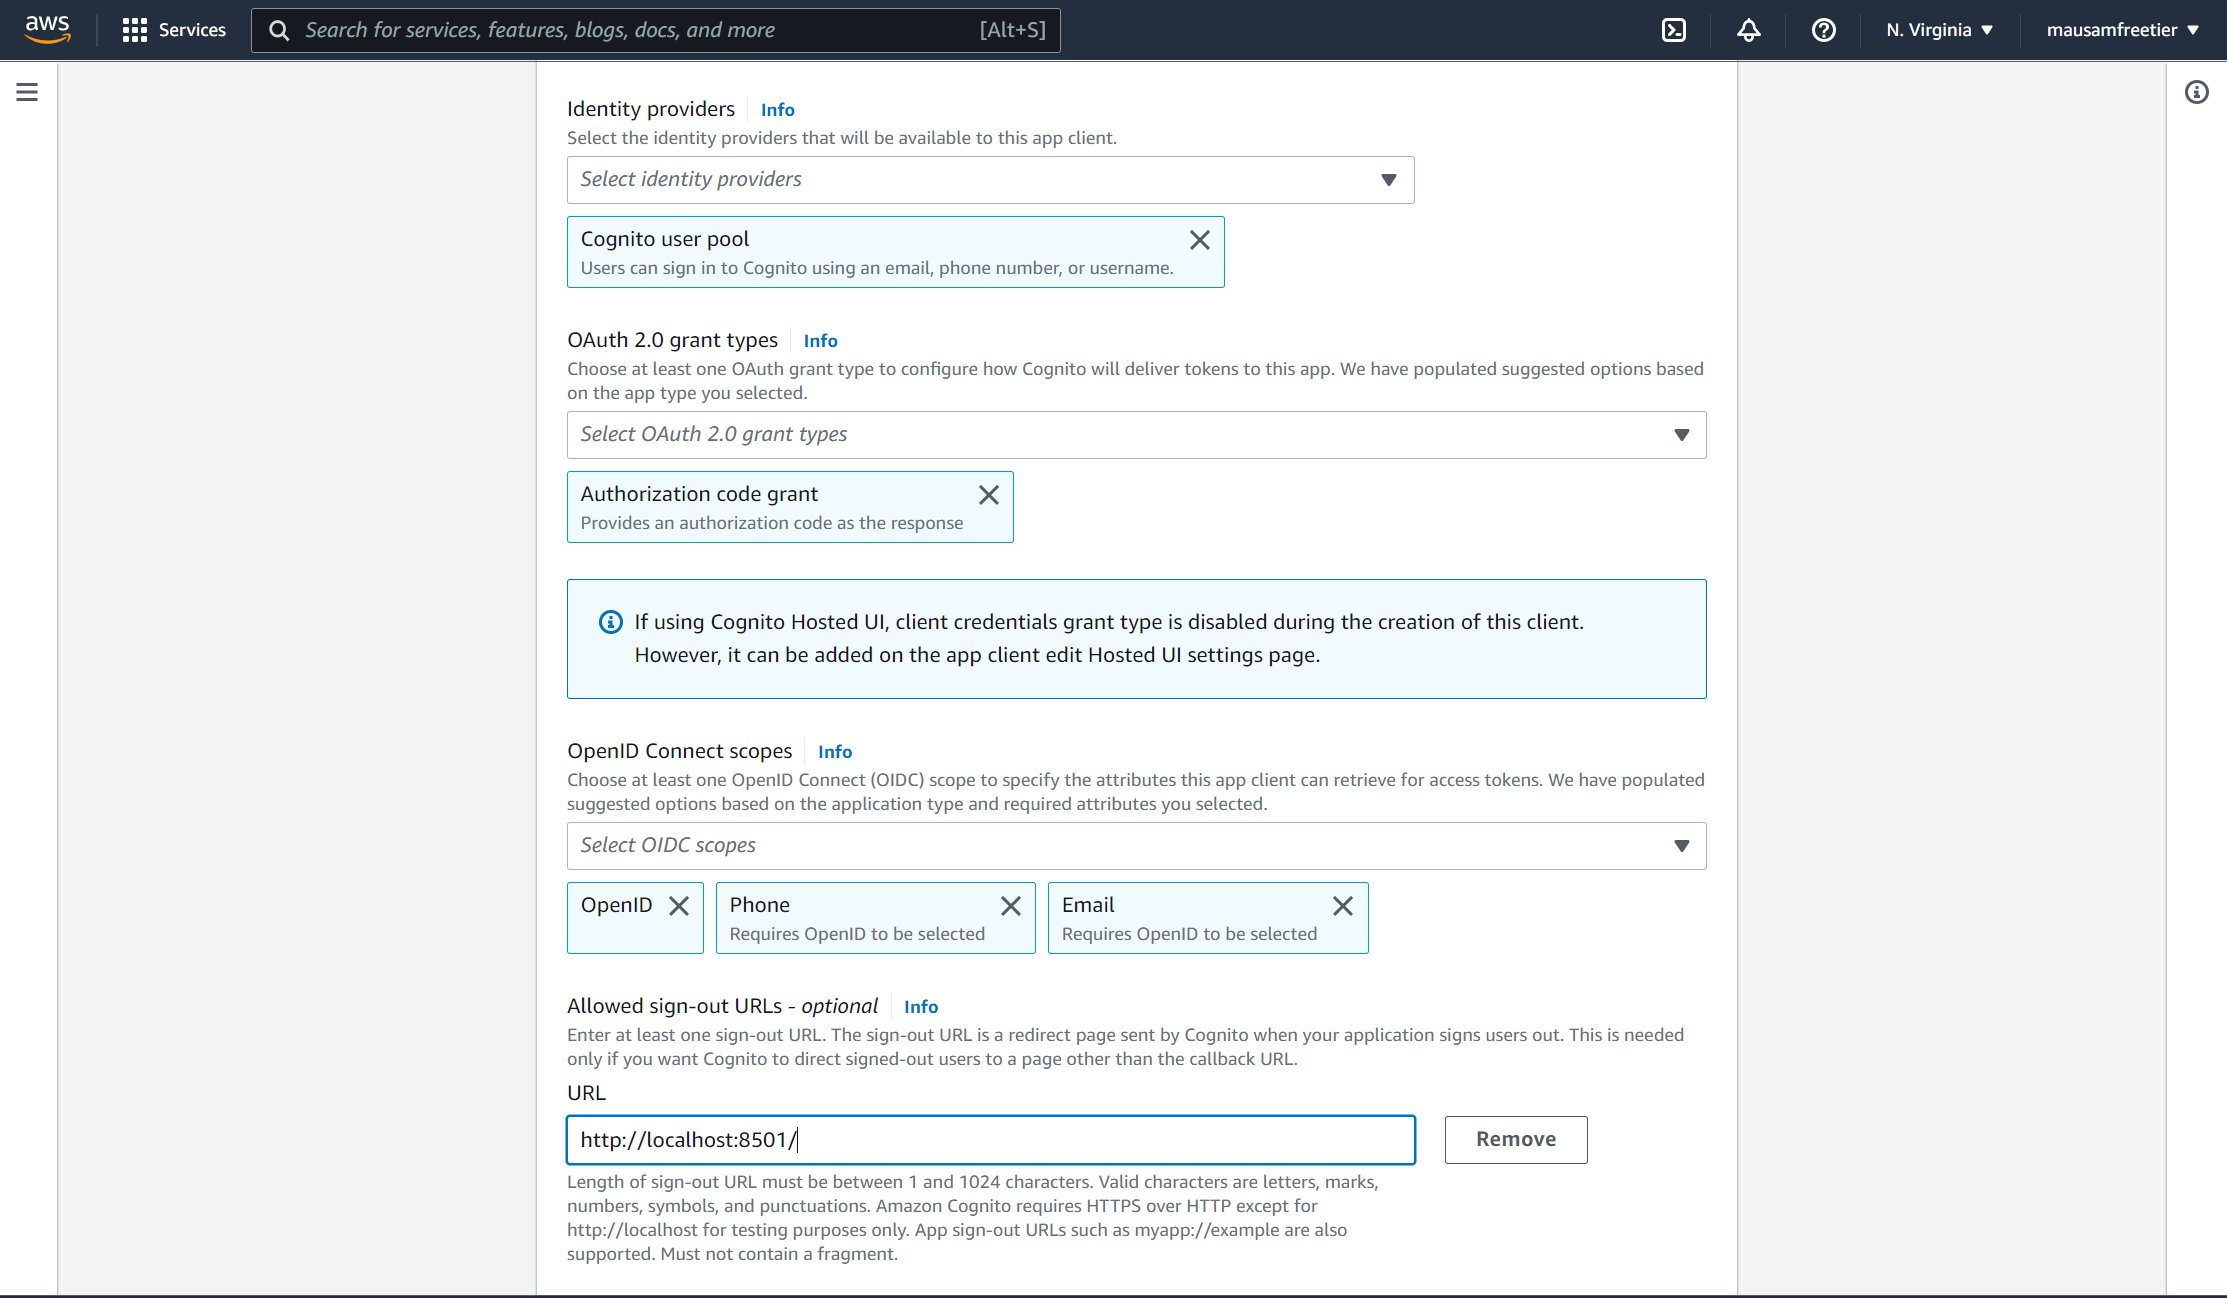
In the 'Initial app client', we choose a 'Public client'. We provide an app client name such as 'demo-app-client-name' and also generate a Client secret. For the Allowed call back URLs, we provide the url of the home page of our Streamlit app, i.e., 'http://localhost:8501/'. What the call back url does is that after successful authentication (log in), the user is routed back to this url. Since we have provided the url for the home page of our application, after successful authentication, the user is redirected to the home page. Please note that in production, we would need to provide the domain where the application is hosted, such as https://mystreamlitapp.com/.
In the Advanced app client settings, in the authentication flows, we use the 'ALLOW_USER_PASSWORD_AUTH' option. We leave the rest of the options as their default values.
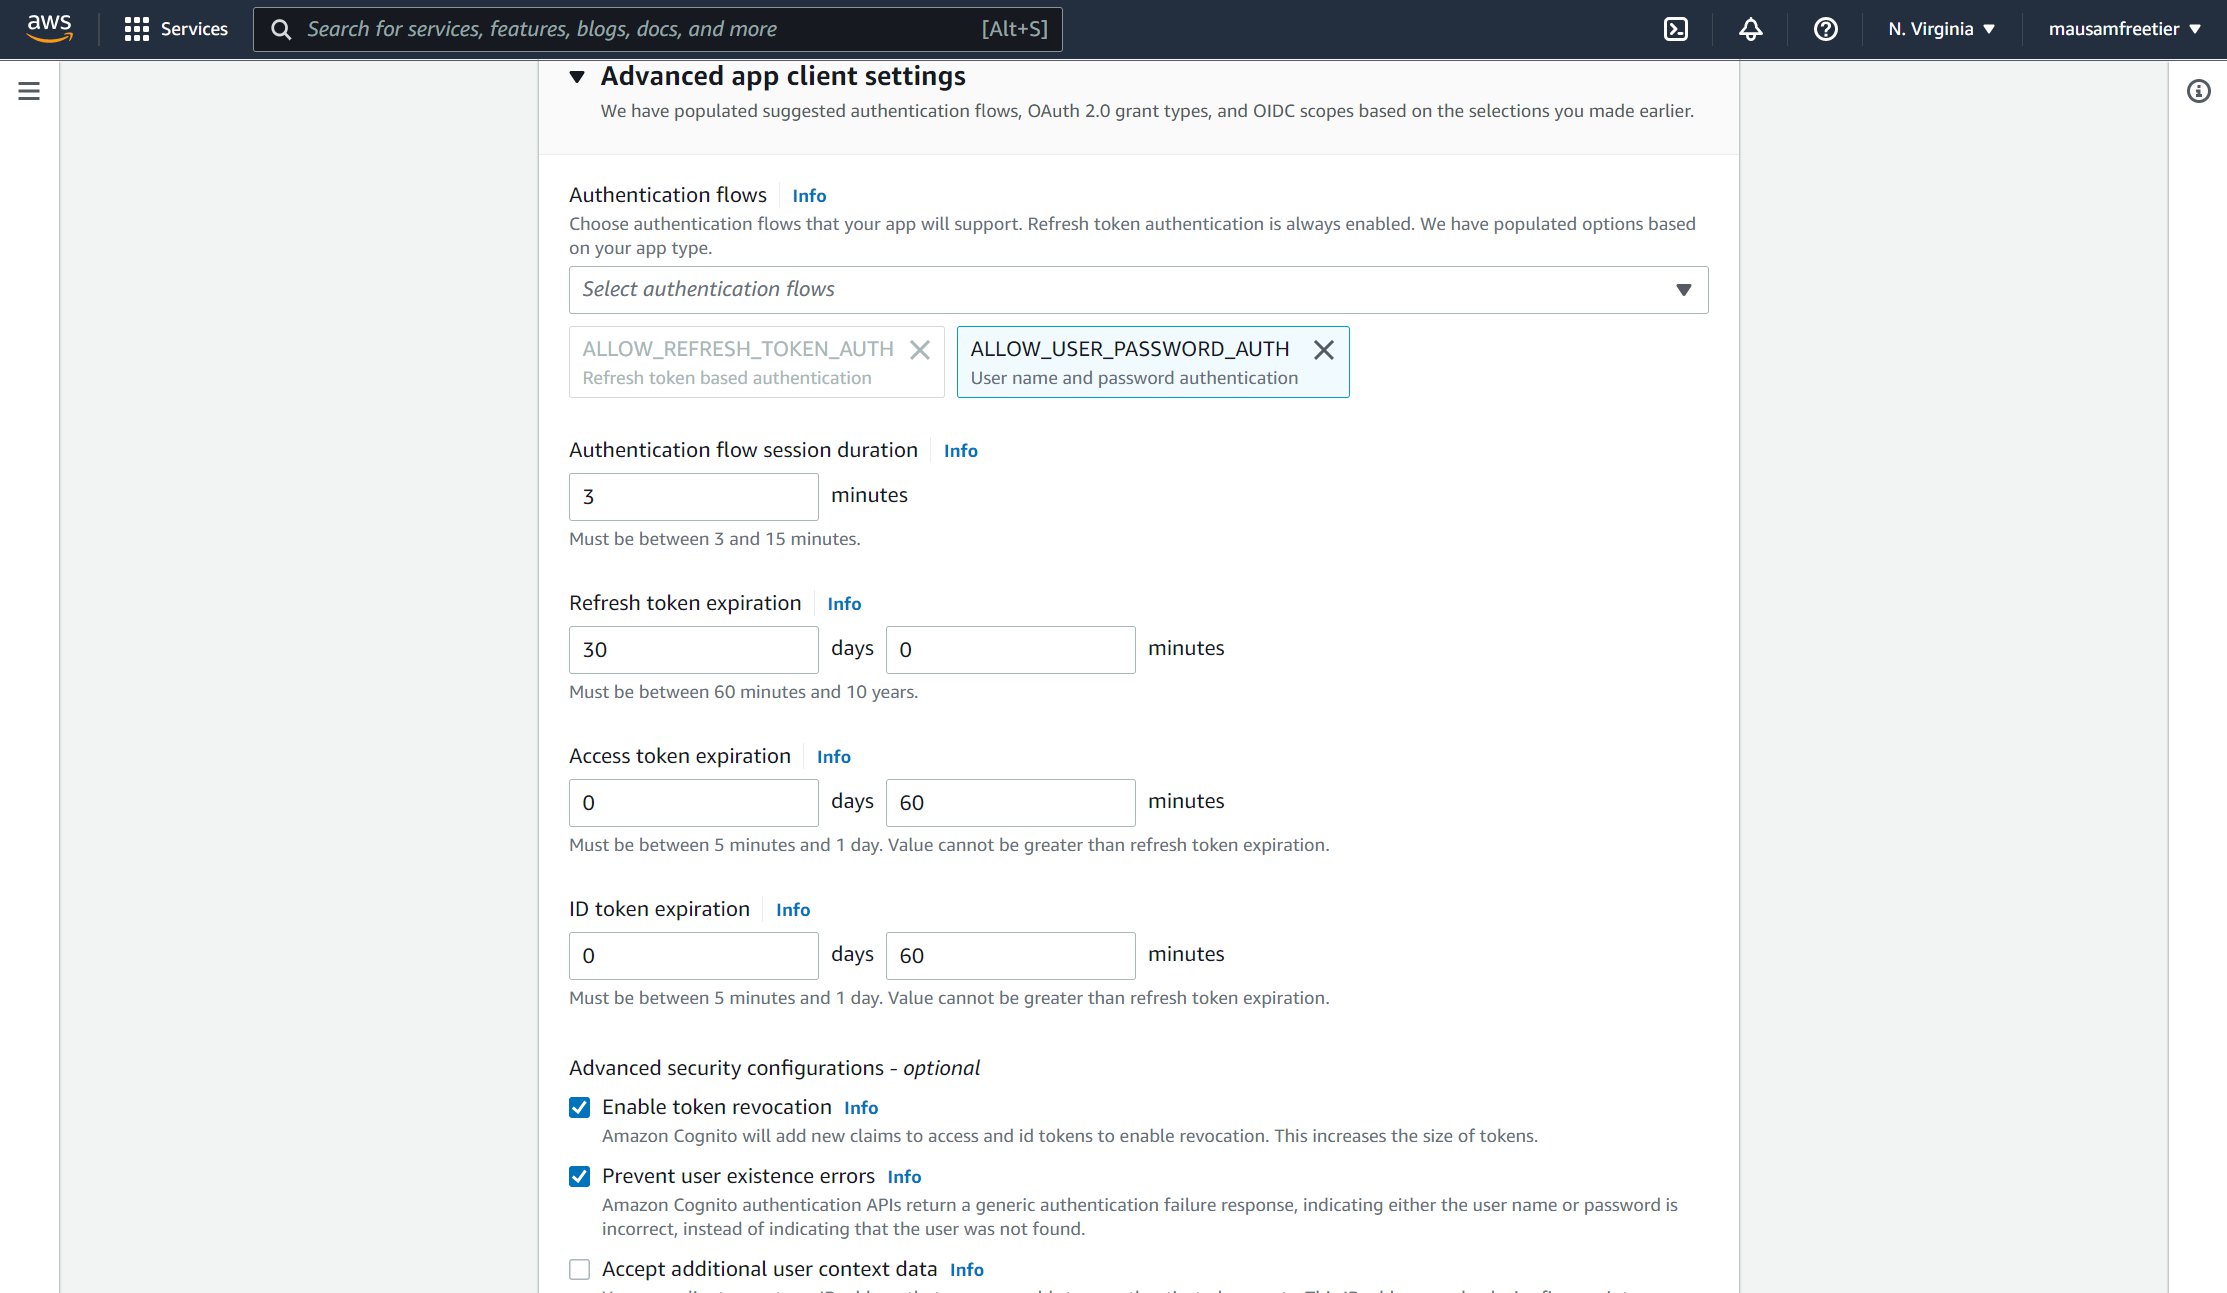
In the Allowed sign-out urls we again provide the home page of our application, i.e., 'http://localhost:8501/'. This means that after sign out, the user would be redirected back to the home page of our application.
Finally in Step 6, confirm and create the user pool.
Streamlit app with AWS Cognito
For using AWS Cognito from within our app, we have created a separate 'authenticate' module in Python which would be explained in the following sections. Before taking a look at that module, it would be useful to see how our authentication would work in principle. If we look at the demo animation shown in the 'Login and page-wise access' section, we see that once a user clicks on the 'log in' button, the user is taken to the AWS Cognito hosted sign in page. After successful sign in, the user would be redirected back to the home page. However, when the user is redirected to the home page, the redirected home page url also contains a query parameter. So the redirected url might look something like, http://localhost:8501/?code=3f3de7a2-76c2-476a-8032-950c79a519e8 . The query parameter here is 'code' and its value is the value returned from AWS Cognito after successful authentication. This value can be captured within Streamlit using the function below:
st.experimental_get_query_params()
Once we have this authentication code, we can make a post request to an oauth 2.0 token endpoint as described in the AWS API documentation here to retrieve an access_token, id_token and refresh_token. The access_token can be used to make other AWS Cognito API user requests. For example, using the access_token, the user information can be retrieved using the UserInfo API endpoint. Either the access_token or the id_token can then be base64 decoded to obtain the user_cognito_groups information. For example, after successfully logging in, the authorization code received was '3f3de7a2-76c2-476a-8032-950c79a519e8'. Using this authorization code, we made a POST request to the token API end point and the 'authorization token' received was the below:
eyJraWQiOiJidWJcL2hHa3N6eXozWmJsMlZMcWdlTTRkN0VYNWtyM2JVelJxSFNNMkVBRT0iLCJhbGciOiJSUzI1NiJ9.eyJzdWIiOiIyZTJhMTkwNy04NmNjLTRmN2EtOWEyOS0xMTczMmM5YzNlMmIiLCJjb2duaXRvOmdyb3VwcyI6WyJDcmVkaXRBbmFseXN0cyJdLCJpc3MiOiJodHRwczpcL1wvY29nbml0by1pZHAudXMtZWFzdC0xLmFtYXpvbmF3cy5jb21cL3VzLWVhc3QtMV9ldUxSaWZNQm4iLCJ2ZXJzaW9uIjoyLCJjbGllbnRfaWQiOiI2M2EzY3IzOGk1aW9mbm10dTh0MGRoOWJoNCIsIm9yaWdpbl9qdGkiOiJkMzZmMjhkOS1hNGIyLTQzMDItYjlmYS1hODA4MWNiZGYxNmEiLCJ0b2tlbl91c2UiOiJhY2Nlc3MiLCJzY29wZSI6Im9wZW5pZCBlbWFpbCIsImF1dGhfdGltZSI6MTY2NDEyNTk5OSwiZXhwIjoxNjY0MTI5NTk5LCJpYXQiOjE2NjQxMjU5OTksImp0aSI6IjU4ZjkwN2Y0LWJkOWMtNGJhMC04NjkxLWUzNzZjNDQ4NTdjMCIsInVzZXJuYW1lIjoiMmUyYTE5MDctODZjYy00ZjdhLTlhMjktMTE3MzJjOWMzZTJiIn0.R2i_YGCTX6cSZRyc19pTslPsEYRoDDGZygTjbIKDuVkqDuW1h9dyiOfS8e1LyzEDcSXGXTIcqMAhCJWIPUwdpzAutpWQdFkvUVd1DnY0Wuga5XiVM5Hc7o0_9JTY8qaO7Oo1T9tRPiNpS90q6HncqGzClHObxYF1E5q9duxpFqSllvxg5DNf7Q5kAMDYzf-b-zYHKkzxw1GXAnFyAI8rT_PZlsm4UolXeSQtR42JtFnrfk3EM5HWH10ro5QKRUqOY1NxN7SH_PGWU3_gEznF53kdwrxK7nUEXstZQau_Va0KUoXrIqzLb3cZkliWE-af3RDYro8ggMmQZbGD2m-hhg
If we base64 decode the above token with a JWT decoder such as https://jwt.io/, the decoded payload would contain the group information as shown below.
{
  "sub": "2e2a1907-86cc-4f7a-9a29-11732c9c3e2b",
  "cognito:groups": [
    "CreditAnalysts"
  ],
  "iss": "https://cognito-idp.us-east-1.amazonaws.com/us-east-1_euLRifMBn",
  "version": 2,
  "client_id": "63a3cr38i5iofnmtu8t0dh9bh4",
  "origin_jti": "d36f28d9-a4b2-4302-b9fa-a8081cbdf16a",
  "token_use": "access",
  "scope": "openid email",
  "auth_time": 1664125999,
  "exp": 1664129599,
  "iat": 1664125999,
  "jti": "58f907f4-bd9c-4ba0-8691-e376c44857c0",
  "username": "2e2a1907-86cc-4f7a-9a29-11732c9c3e2b"
}
If we successfully receive the access token which is not an empty string from the token endpoint, we know that the user was successfully authenticated. We can then store such information into Streamlit session variables, so that the variables are shared across pages. For example, the authentication status and the user cognito group information can be saved into session variables like below.
st.session_state["authenticated"] = True
st.session_state["user_cognito_groups"] = user_cognito_groups
The session variables can be used on particular pages to know whether a user is authenticated and which group the user belongs to. If the user group information matches the one required on a page to access that page, that page would then be accessible to that particular user.
Integrating AWS Cognito into our Streamlit app
To integrate our AWS Cognito User Pool into our app we create a separate 'authenticate.py' module. We have kept this 'authenticate.py' file in a directory called 'components' side-by-side the 'pages' directory. In the 'components' directory, we also create a .env file which would keep some of our AWS Cognito client settings. Note that we have also added an __init__.py file in the components directory so that the components directory can be imported as a module.
Home.py
└─── components/
  └─── __init__.py
  └─── .env
  └─── authenticate.py
└─── pages/
  └─── 1_📈_Plotting_Demo.py
  └─── 2_🌍_Mapping_Demo.py
  └─── 3_📊_DataFrame_Demo.py
The contents of the .env file would look something like below:
COGNITO_DOMAIN = "https://myappauthentication.auth.us-east-1.amazoncognito.com"
CLIENT_ID = "xyz"
CLIENT_SECRET = "secret-secret"
APP_URI = "http://localhost:8501/"
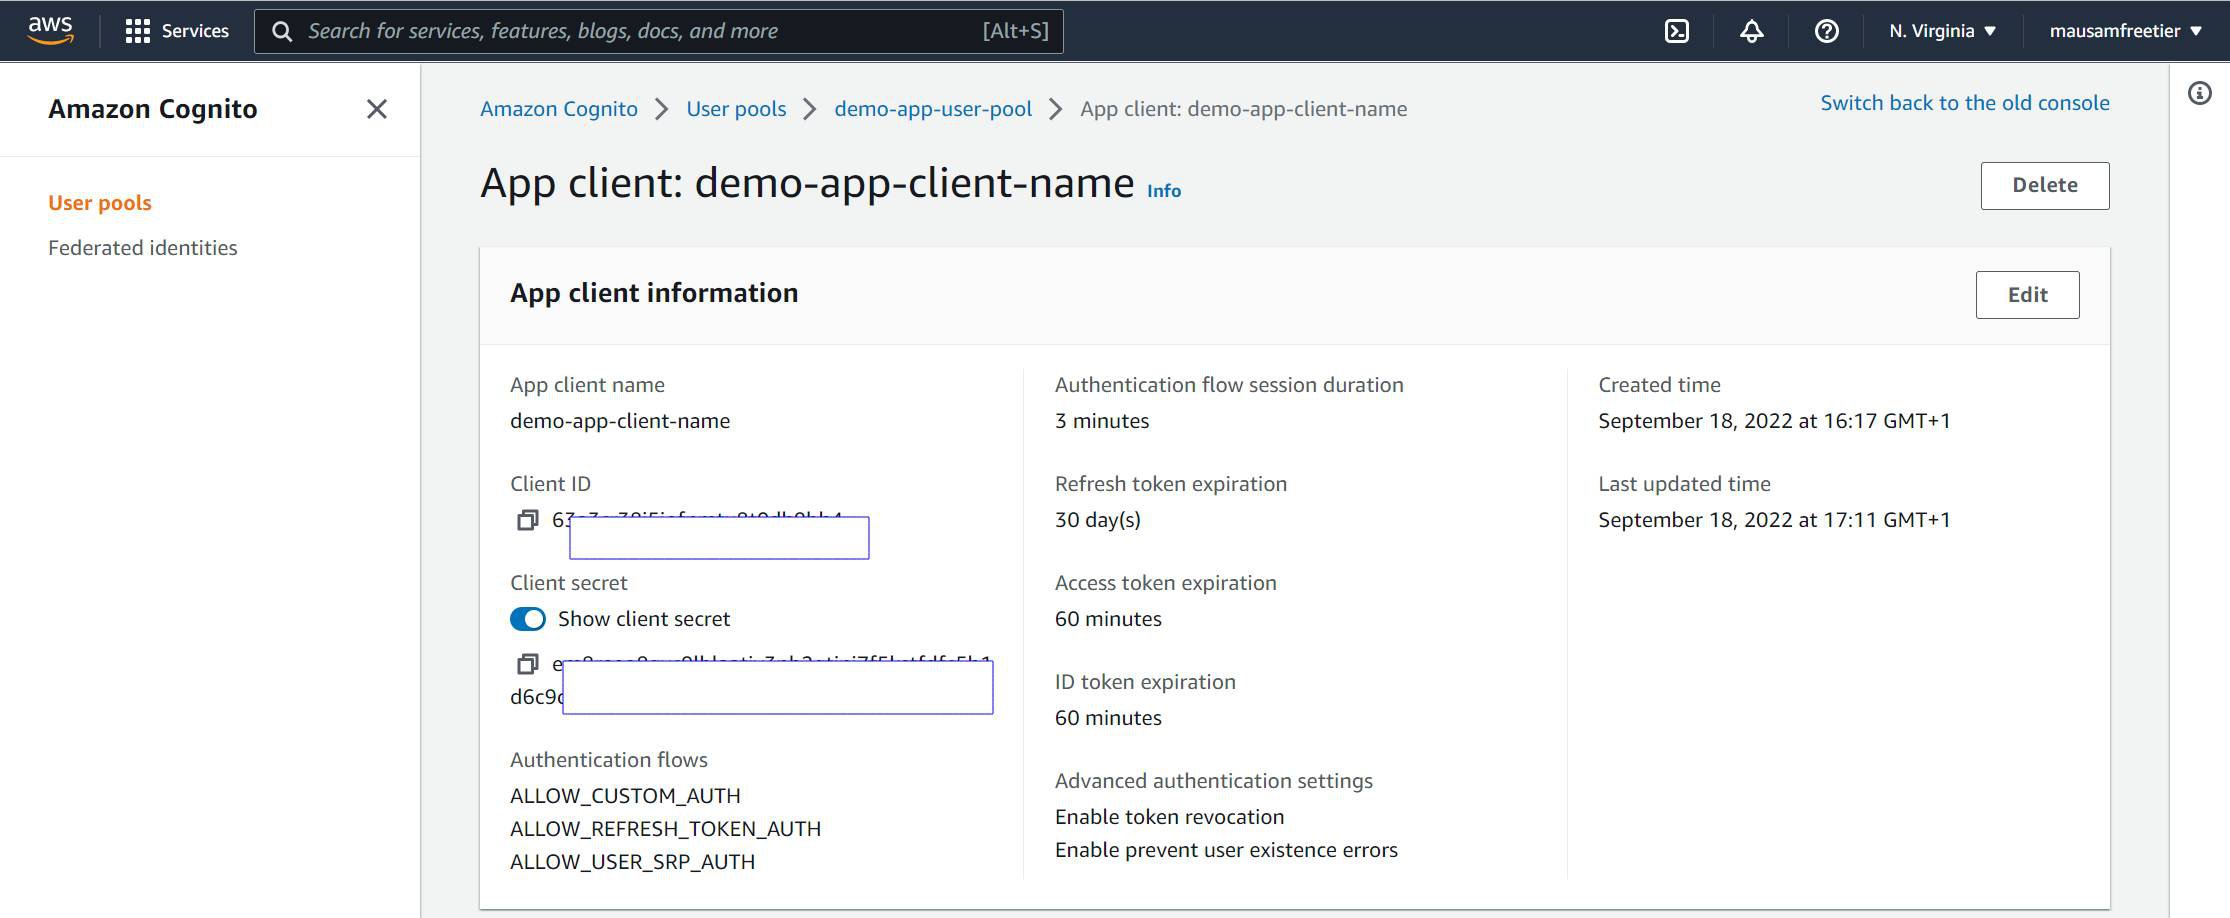
The actual values of these environment variables should be the ones present in your AWS Cognito User Pool. For example the 'CLIENT_ID' and 'CLIENT_SECRET' values would come from the below area on the managed AWS Cognito console.
The 'authenticate.py' module looks like below.
import os
import streamlit as st
from dotenv import load_dotenv
import requests
import base64
import json

# ------------------------------------
# Read constants from environment file
# ------------------------------------
load_dotenv()
COGNITO_DOMAIN = os.environ.get("COGNITO_DOMAIN")
CLIENT_ID = os.environ.get("CLIENT_ID")
CLIENT_SECRET = os.environ.get("CLIENT_SECRET")
APP_URI = os.environ.get("APP_URI")


# ------------------------------------
# Initialise Streamlit state variables
# ------------------------------------
def initialise_st_state_vars():
    """
    Initialise Streamlit state variables.

    Returns:
        Nothing.
    """
    if "auth_code" not in st.session_state:
        st.session_state["auth_code"] = ""
    if "authenticated" not in st.session_state:
        st.session_state["authenticated"] = False
    if "user_cognito_groups" not in st.session_state:
        st.session_state["user_cognito_groups"] = []


# ----------------------------------
# Get authorization code after login
# ----------------------------------
def get_auth_code():
    """
    Gets auth_code state variable.

    Returns:
        Nothing.
    """
    auth_query_params = st.experimental_get_query_params()
    try:
        auth_code = dict(auth_query_params)["code"][0]
    except (KeyError, TypeError):
        auth_code = ""

    return auth_code


# ----------------------------------
# Set authorization code after login
# ----------------------------------
def set_auth_code():
    """
    Sets auth_code state variable.

    Returns:
        Nothing.
    """
    initialise_st_state_vars()
    auth_code = get_auth_code()
    st.session_state["auth_code"] = auth_code


# -------------------------------------------------------
# Use authorization code to get user access and id tokens
# -------------------------------------------------------
def get_user_tokens(auth_code):
    """
    Gets user tokens by making a post request call.

    Args:
        auth_code: Authorization code from cognito server.

    Returns:
        {
        'access_token': access token from cognito server if user is successfully authenticated.
        'id_token': access token from cognito server if user is successfully authenticated.
        }

    """

    # Variables to make a post request
    token_url = f"{COGNITO_DOMAIN}/oauth2/token"
    client_secret_string = f"{CLIENT_ID}:{CLIENT_SECRET}"
    client_secret_encoded = str(
        base64.b64encode(client_secret_string.encode("utf-8")), "utf-8"
    )
    headers = {
        "Content-Type": "application/x-www-form-urlencoded",
        "Authorization": f"Basic {client_secret_encoded}",
    }
    body = {
        "grant_type": "authorization_code",
        "client_id": CLIENT_ID,
        "code": auth_code,
        "redirect_uri": APP_URI,
    }

    token_response = requests.post(token_url, headers=headers, data=body)
    try:
        access_token = token_response.json()["access_token"]
        id_token = token_response.json()["id_token"]
    except (KeyError, TypeError):
        access_token = ""
        id_token = ""

    return access_token, id_token


# ---------------------------------------------
# Use access token to retrieve user information
# ---------------------------------------------
def get_user_info(access_token):
    """
    Gets user info from aws cognito server.

    Args:
        access_token: string access token from the aws cognito user pool
        retrieved using the access code.

    Returns:
        userinfo_response: json object.
    """
    userinfo_url = f"{COGNITO_DOMAIN}/oauth2/userInfo"
    headers = {
        "Content-Type": "application/json;charset=UTF-8",
        "Authorization": f"Bearer {access_token}",
    }

    userinfo_response = requests.get(userinfo_url, headers=headers)

    return userinfo_response.json()


# -------------------------------------------------------
# Decode access token to JWT to get user's cognito groups
# -------------------------------------------------------
# Ref - https://gist.github.com/GuillaumeDerval/b300af6d4f906f38a051351afab3b95c
def pad_base64(data):
    """
    Makes sure base64 data is padded.

    Args:
        data: base64 token string.

    Returns:
        data: padded token string.
    """
    missing_padding = len(data) % 4
    if missing_padding != 0:
        data += "=" * (4 - missing_padding)
    return data


def get_user_cognito_groups(id_token):
    """
    Decode id token to get user cognito groups.

    Args:
        id_token: id token of a successfully authenticated user.

    Returns:
        user_cognito_groups: a list of all the cognito groups the user belongs to.
    """
    if id_token != "":
        header, payload, signature = id_token.split(".")
        printable_payload = base64.urlsafe_b64decode(pad_base64(payload))
        payload_dict = json.loads(printable_payload)
        user_cognito_groups = list(dict(payload_dict)["cognito:groups"])
    else:
        user_cognito_groups = []
    return user_cognito_groups


# -----------------------------
# Set Streamlit state variables
# -----------------------------
def set_st_state_vars():
    """
    Sets the streamlit state variables after user authentication.
    Returns:
        Nothing.
    """
    initialise_st_state_vars()
    auth_code = get_auth_code()
    access_token, id_token = get_user_tokens(auth_code)
    user_cognito_groups = get_user_cognito_groups(id_token)

    if access_token != "":
        st.session_state["auth_code"] = auth_code
        st.session_state["authenticated"] = True
        st.session_state["user_cognito_groups"] = user_cognito_groups


# -----------------------------
# Login/ Logout HTML components
# -----------------------------
login_link = f"{COGNITO_DOMAIN}/login?client_id={CLIENT_ID}&response_type=code&scope=email+openid&redirect_uri={APP_URI}"
logout_link = f"{COGNITO_DOMAIN}/logout?client_id={CLIENT_ID}&logout_uri={APP_URI}"

html_css_login = """
<style>
.button-login {
  background-color: skyblue;
  color: white !important;
  padding: 1em 1.5em;
  text-decoration: none;
  text-transform: uppercase;
}

.button-login:hover {
  background-color: #555;
  text-decoration: none;
}

.button-login:active {
  background-color: black;
}

</style>
"""

html_button_login = (
    html_css_login
    + f"<a href='{login_link}' class='button-login' target='_self'>Log In</a>"
)
html_button_logout = (
    html_css_login
    + f"<a href='{logout_link}' class='button-login' target='_self'>Log Out</a>"
)


def button_login():
    """

    Returns:
        Html of the login button.
    """
    return st.sidebar.markdown(f"{html_button_login}", unsafe_allow_html=True)


def button_logout():
    """

    Returns:
        Html of the logout button.
    """
    return st.sidebar.markdown(f"{html_button_logout}", unsafe_allow_html=True)
If we read the 'authenticate.py' module, the functions are self explanatory. The order in which these functions would be executed on a page are in the master function called 'set_st_state_variables()'. So what this does is that whenever a user lands on a page, first it tries to create the session state variables if they don't exist and then assign default values. Then it gets the authorization code using the get_auth_code() function. Using the 'get_user_tokens(auth_code)' function, the access and id token are retrieved. Then using the 'get_user_cognito_groups(id_token)' function, the user_cognito_groups information is received. These are then stored in the Streamlit session variables. The authenticate module also creates two customized html link buttons called button_login() and button_logout() which are used on every page to display the sign in and sign out buttons.
Now we just modify every Streamlit page, to import the authenticate module. The 'set_st_state_variables()' function is used on every page to authenticate the user, and display the login and logout buttons.
import components.authenticate as authenticate

# Check authentication when user lands on the page.
authenticate.set_st_state_vars()

# Add login/logout buttons
if st.session_state["authenticated"]:
    authenticate.button_logout()
else:
    authenticate.button_login()
We can hide/show page content using the state variables. This is how we ensure that content on a page is only accessible to a user if they are authenticated and/or belong to particular aws cognito groups. For example:
if st.session_state["authenticated"] and "Underwriters" in st.session_state["user_cognito_groups"]:
    # Show the below Streamlit code
    st.write(
        """This demo illustrates a combination of plotting and animation with
    Streamlit. We're generating a bunch of random numbers in a loop for around
    5 seconds. Enjoy!"""
    )

    # ...
else:
    if st.session_state["authenticated"]:
        st.write("You do not have access. Please contact the administrator.")
    else:
        st.write("Please login!")
The code for the individual pages now look like below. Note that we have skipped the third page for authentication and user access, so there are no changes to it.
Home.py
import streamlit as st
import components.authenticate as authenticate

st.set_page_config(
    page_title="Home",
    page_icon="👋",
)

st.write("# Welcome to Streamlit! 👋")

st.markdown(
    """
    Streamlit is an open-source app framework built specifically for
    Machine Learning and Data Science projects.
    **👈 Select a demo from the sidebar** to see some examples
    of what Streamlit can do!
    ### Want to learn more?
    - Check out [streamlit.io](https://streamlit.io)
    - Jump into our [documentation](https://docs.streamlit.io)
    - Ask a question in our [community
        forums](https://discuss.streamlit.io)
    ### See more complex demos
    - Use a neural net to [analyze the Udacity Self-driving Car Image
        Dataset](https://github.com/streamlit/demo-self-driving)
    - Explore a [New York City rideshare dataset](https://github.com/streamlit/demo-uber-nyc-pickups)
"""
)

# Check authentication when user lands on the home page.
authenticate.set_st_state_vars()

# Add login/logout buttons
if st.session_state["authenticated"]:
    authenticate.button_logout()
else:
    authenticate.button_login()
pages/1_📈_Plotting_Demo.py
import streamlit as st
import time
import numpy as np
import components.authenticate as authenticate

# Page configuration
st.set_page_config(page_title="Plotting Demo", page_icon="📈")

# Check authentication
authenticate.set_st_state_vars()

# Add login/logout buttons
if st.session_state["authenticated"]:
    authenticate.button_logout()
else:
    authenticate.button_login()

# Rest of the page
st.markdown("# Plotting Demo")
st.sidebar.header("Plotting Demo")

if (
    st.session_state["authenticated"]
    and "Underwriters" in st.session_state["user_cognito_groups"]
):
    st.write(
        """This demo illustrates a combination of plotting and animation with
    Streamlit. We're generating a bunch of random numbers in a loop for around
    5 seconds. Enjoy!"""
    )

    progress_bar = st.sidebar.progress(0)
    status_text = st.sidebar.empty()
    last_rows = np.random.randn(1, 1)
    chart = st.line_chart(last_rows)

    for i in range(1, 101):
        new_rows = last_rows[-1, :] + np.random.randn(5, 1).cumsum(axis=0)
        status_text.text("%i%% Complete" % i)
        chart.add_rows(new_rows)
        progress_bar.progress(i)
        last_rows = new_rows
        time.sleep(0.05)

    progress_bar.empty()

    # Streamlit widgets automatically run the script from top to bottom. Since
    # this button is not connected to any other logic, it just causes a plain
    # rerun.
    st.button("Re-run")
else:
    if st.session_state["authenticated"]:
        st.write("You do not have access. Please contact the administrator.")
    else:
        st.write("Please login!")
pages/2_🌍_Mapping_Demo.py
import streamlit as st
import pandas as pd
import pydeck as pdk
from urllib.error import URLError
import components.authenticate as authenticate


# Page configuration
st.set_page_config(page_title="Mapping Demo", page_icon="🌍")

# Check authentication
authenticate.set_st_state_vars()

# Add login/logout buttons
if st.session_state["authenticated"]:
    authenticate.button_logout()
else:
    authenticate.button_login()

# Rest of the page
st.markdown("# Mapping Demo")
st.sidebar.header("Mapping Demo")

if (
    st.session_state["authenticated"]
    and "CreditAnalysts" in st.session_state["user_cognito_groups"]
):
    st.write(
        """This demo shows how to use
    [`st.pydeck_chart`](https://docs.streamlit.io/library/api-reference/charts/st.pydeck_chart)
    to display geospatial data."""
    )

    @st.experimental_memo
    def from_data_file(filename):
        url = (
            "http://raw.githubusercontent.com/streamlit/"
            "example-data/master/hello/v1/%s" % filename
        )
        return pd.read_json(url)

    try:
        ALL_LAYERS = {
            "Bike Rentals": pdk.Layer(
                "HexagonLayer",
                data=from_data_file("bike_rental_stats.json"),
                get_position=["lon", "lat"],
                radius=200,
                elevation_scale=4,
                elevation_range=[0, 1000],
                extruded=True,
            ),
            "Bart Stop Exits": pdk.Layer(
                "ScatterplotLayer",
                data=from_data_file("bart_stop_stats.json"),
                get_position=["lon", "lat"],
                get_color=[200, 30, 0, 160],
                get_radius="[exits]",
                radius_scale=0.05,
            ),
            "Bart Stop Names": pdk.Layer(
                "TextLayer",
                data=from_data_file("bart_stop_stats.json"),
                get_position=["lon", "lat"],
                get_text="name",
                get_color=[0, 0, 0, 200],
                get_size=15,
                get_alignment_baseline="'bottom'",
            ),
            "Outbound Flow": pdk.Layer(
                "ArcLayer",
                data=from_data_file("bart_path_stats.json"),
                get_source_position=["lon", "lat"],
                get_target_position=["lon2", "lat2"],
                get_source_color=[200, 30, 0, 160],
                get_target_color=[200, 30, 0, 160],
                auto_highlight=True,
                width_scale=0.0001,
                get_width="outbound",
                width_min_pixels=3,
                width_max_pixels=30,
            ),
        }
        st.sidebar.markdown("### Map Layers")
        selected_layers = [
            layer
            for layer_name, layer in ALL_LAYERS.items()
            if st.sidebar.checkbox(layer_name, True)
        ]
        if selected_layers:
            st.pydeck_chart(
                pdk.Deck(
                    map_style="mapbox://styles/mapbox/light-v9",
                    initial_view_state={
                        "latitude": 37.76,
                        "longitude": -122.4,
                        "zoom": 11,
                        "pitch": 50,
                    },
                    layers=selected_layers,
                )
            )
        else:
            st.error("Please choose at least one layer above.")
    except URLError as e:
        st.error(
            """
            **This demo requires internet access.**
            Connection error: %s
        """
            % e.reason
        )
else:
    if st.session_state["authenticated"]:
        st.write("You do not have access. Please contact the administrator.")
    else:
        st.write("Please login!")
With the pages setup, we should now see user authentication and section access in our app as shown at the beginning of the article.
The github page for the article is here.
Hope you enjoyed the article. Happy Streamlitting 🚣 !!
Post your comment